
Replacing the main gear pinion flange seal
Caution: Use only recommended rear axle gearbox oils.
1. Disconnect the cardan shaft from the main transmission drive pinion flange. If necessary, remove the propeller shaft.
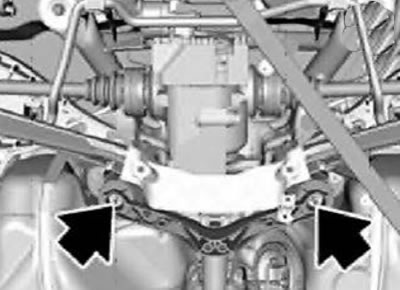
2. Support the rear axle beam with a jack, placing it under the center of the beam from the front.
3. Loosen the nuts and remove the reaction rod.
Note: Self-locking nuts must be replaced during installation.
Tightening torque: 77 Nm.
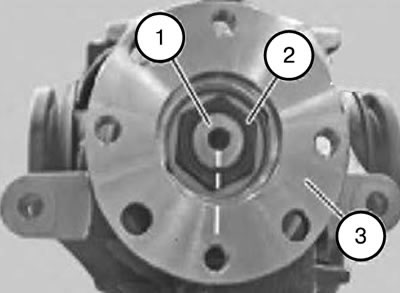
Attention: Before unscrewing the flange nut, mark the position of the flange (3) and nut (2) relative to the axle shaft (3) with a punch or felt-tip pen.

4. Unscrew the nut, holding the flange from turning with stopper 230020.

5. Remove the pinion flange using puller 312101, 312102, 312103/312104.
Note: Only for modification with 210 gearbox with locking, 215 K.
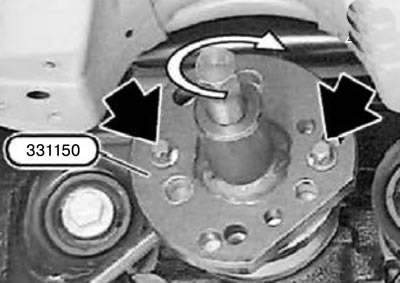
6. Remove the pinion flange using puller 331150.
Note: Only for modification with 168 K/L or 188 K/L gearbox.
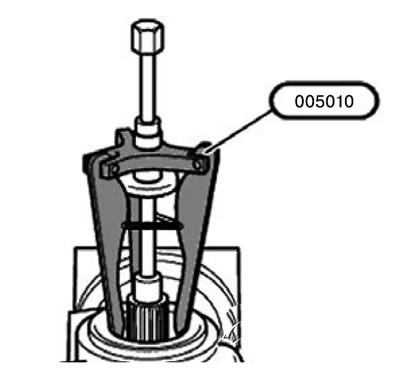
7. Remove the oil seal using tool 005010.
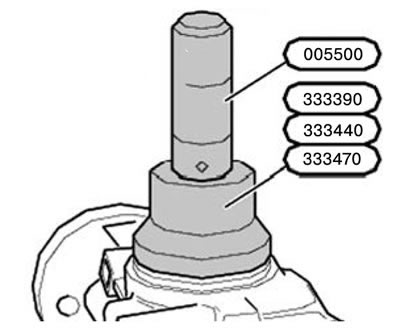
8. Press the new oil seal in until it stops using the tools.
Note: The choice of accessories depends on the rear axle gearbox:
- 68 K/L: Use tools 005500 and 333390;
- 188 K/L: Use tools 005500 and 333470;
- 210 with lock, 215 K: use tools 005500 and 333440.
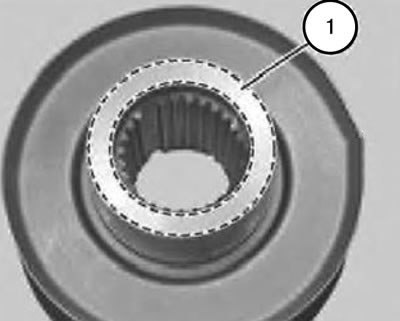
Caution: Clean the end surface (1) of the flange and apply a thin layer of grease to it.
Note: Failure to comply with this requirement will result in noise in the rear axle gearbox.
9. Lubricate the working lips of the oil seal and the sealing surface of the flange with rear axle gearbox oil.
10. Put on the flange, following the marks.
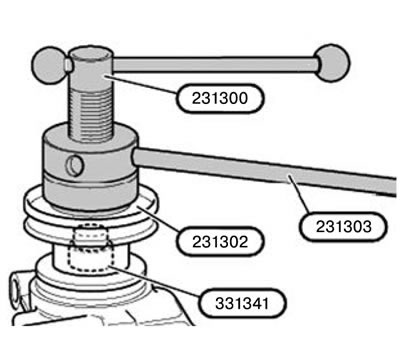
11. Press on the flange using tools 231300, 331341, 231303 and, if necessary, 231302.
Note: Stop pressing when the flange nut can be screwed on.
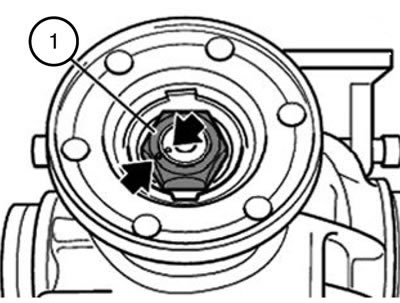
Caution: Never tighten the nut beyond the alignment marks, otherwise the spacer sleeve will need to be replaced.
Note: The nut (1) should only be tightened until the timing marks align.
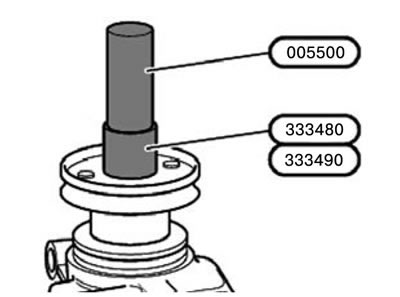
12. Press in the new locking plate using the tools.
Note: The choice of accessories depends on the rear axle gearbox:
- 168 K/L or 188 K/L: use tools 005500 and 333480;
- 210 with lock, 215 K: use tools 005500 and 333490.
13. Installation should be carried out in the reverse order of removal, taking into account the above notes.
14. Change/replenish the oil in the rear axle gearbox to the required level.