
Table of contents: Removal ↓ Installation ↓
- Home
- BMW 3 Series
- E46
- Transmission
- Cardan and drive shafts
- Main gear unit — removal and installation
Main gear unit — removal and installation (BMW 3 Series E46)
Note: When installing, you will need new propeller shaft rear flange mounting nuts and drive shaft mounting bolts.
Removal
1. Place chocks under the front wheels. Raise the rear of the vehicle and support it on jack stands (see Fig. "Lifting and installing the car on supports"). Remove both rear wheels. If necessary, drain the oil from the final drive (see paragraph 10).
2. Mark the position of the cardan shaft relative to the main gear flange with a felt-tip pen. Unscrew the nuts securing the cardan shaft to the main gear and discard them. You will need new nuts for installation.
3. Loosen and remove the bolts securing the right drive shaft to the final drive. Secure the end of the drive shaft with wire.
Note: Do not allow the drive shaft to hang under its own weight as this will damage the CV joint. Discard the bolts as you will need new ones for installation.
4. Disconnect the left drive shaft from the main gear in the same way.
5. Loosen the nuts/bolts and remove the heat shield secured to the left strut, under the final drive input shaft.
6. Disconnect the speedometer wiring connector at the rear of the final drive assembly (if it exists).
7. Unscrew the anti-roll bar fasteners (see chapter 10).
8. Place a hydraulic trolley with a wooden block under the main transmission, lift it and support the main transmission unit
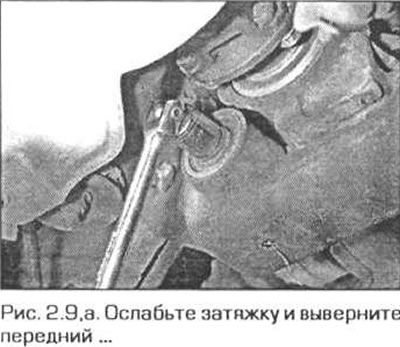
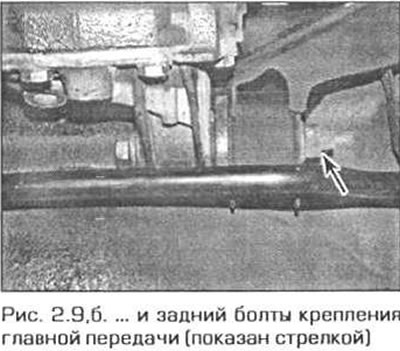
9. Make sure that the final drive is securely supported, then remove the two front support bolts and one rear support bolt of the unit (fig. 2.9, a, b).
10. Carefully lower the final drive unit and roll it out from under the vehicle. Inspect the rubber mounts on the unit to ensure that they are not worn or damaged. Replace the mounts if necessary.
Installation
11. Installation is carried out in the reverse order of removal. Please note the following points.
- a) Raise the main gear and align the marks on the input and propeller shaft flanges made before removal.
- b) Tighten the final drive mounting bolts to the specified torque.
- c) Screw on the new propeller shaft mounting nuts and tighten them to the specified torque.
- d) Insert new drive shaft mounting bolts and tighten them to the specified torque.
- d) After installation is complete, fill the final drive with oil (see chapter 8).
Examine the original source using the link on the website BMWman.ru
This article is available at russian, bulgarian, belarusian, ukrainian, serbian, croatian, romanian, polish, slovak, hungarian
Article verified: Ilyinsky Matvey
Share information:
Previous articles
БМВ E46: Cardan and drive shafts
Next articles
Similar articles on other types of BMW cars:
Removal and installation the propeller shaft / rear axle main gear BMW 5 Series E39 (1995-2003)
Removal and installation of the power unit BMW 5 Series E12 (1972-1981)
DME control unit — removal and installation BMW 7 Series E32 (1986-1994)
Removal and installation gear shift drive components BMW 7 Series E38 (1994-2001)
Removal and installation the power steering gear BMW X3 E83 (2003-2010)
Removal and installation the engine BMW X5 E53 (1999-2006)
Link in different formats to this page
Visitor comments
No comments yet
- General information
- Manual
- Maintenance
- Power unit
- Engine repair
- Cooling system
- Power system (gasoline)
- Injection system (gasoline)
- Fuel system (diesel)
- Exhaust system
- Ignition system
- Charge and launch systems
- Transmission
- Car gearbox
- Clutch and drive shafts
- Chassis
- Brake system
- Suspension front and rear
- Steering
- Body
- Body care and repair
- Exterior
- Interior
- Electrical equipment
- Troubleshooting
- Lighting and signaling
- Equipment and devices
- Heater and air conditioner
- Electrical circuits
- General information
- Manual
- Repair on the road
- Weekly checks
- Maintenance
- Troubleshooting
- Power unit
- 4 cylinder engines
- 6 cylinder engines
- Engine overhaul
- Cooling and heating
- Fuel and exhaust system
- Starting and charging system
- Ignition system
- Transmission
- Clutch
- Mechanical gearbox
- Automatic gearbox
- Cardan and drive shafts
- Chassis
- Brake system
- Wheel suspension
- Steering
- Body
- Exterior
- Interior
- Electrical equipment
- Equipment and devices
- Electrical circuits
- General information
- Maintenance
- Power unit
- Engine repair
- Cooling system
- Ignition system
- Supply system
- Fuel injection system
- Exhaust system
- Transmission
- Clutch
- Car gearbox
- Front and rear axle
- Chassis
- Steering
- Brake system
- Body
- Exterior
- Interior
- Electrical equipment
- Heating system
- Equipment and devices
- Power devices
- Electrical circuits
- Power unit
- M10/M20 engine
- M40 engine
- Ignition system
- Lubrication system
- Cooling system
- Supply system
- Fuel injection
- Exhaust system
- Transmission
- Clutch
- Manual gearbox
- Front axle
- Rear axle
- Chassis
- Steering
- Brake system
- Body
- Exterior
- Interior
- Electrical equipment
- Heating system
- Equipment and devices
- Electrical circuits
- General information
- Specifications
- Operation and maintenance
- 4-cylinder engine
- Engine repair
- Cooling and lubrication system
- Supply system
- Ignition system
- 6-cylinder engine
- Engine repair
- Cooling and lubrication system
- Supply system
- Fuel injection system
- Ignition system
- Transmission
- Clutch
- 4-speed manual gearbox
- 5-speed manual gearbox
- Automatic gearbox
- Cardan and rear axle
- Chassis
- Steering
- Front suspension
- Rear suspension
- Brake system
- Electrical equipment
- Equipment and devices
- Electrical circuits