
- loss of engine power
- low coolant level, white exhaust smoke when the engine is hot
- coolant in engine oil. The oil level does not decrease, but rather increases. Gray oil in the engine, foam on the oil dipstick. Oil liquefaction.
- engine oil in the coolant, decreasing oil.
Attention: In this case, after the repair, it is necessary to remove the radiator and flush it with "Solvethane", to remove any remaining oil from the radiator.
- strong seepage of the coolant.
- lack of compression in two adjacent cylinders.
Withdrawal, Models 316i, 318i before August
Attention: Some works are described in more detail in the section "Removal and installation of the engine", therefore, it is recommended that you also read this section.
Disconnect the ground wire from the battery.
Attention: When the battery is disconnected, the information in the electronic memory devices, such as the engine trouble memory or the radio security code memory, is erased. When disconnecting the battery, follow the instructions in section "Removing and installing the battery".
Remove toothed belt.
Remove the camshaft sprocket.
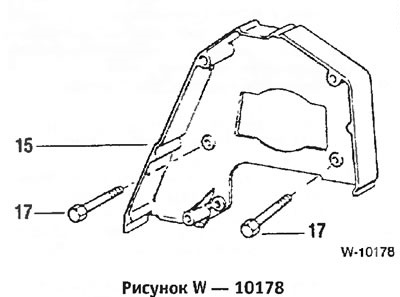
Remove 2 bolts -17- for inner toothed belt guard -15-. Remove cover.
Remove the throttle lever cover. To do this, unscrew the bolts, tilt the cover up and unscrew the 2 front bolts.
Detach throttle cable -1- by pulling out clip in direction of arrow. Automatic transmission: Disconnect cable -2-.
Remove bolts -3- and lay cables with bracket to one side.
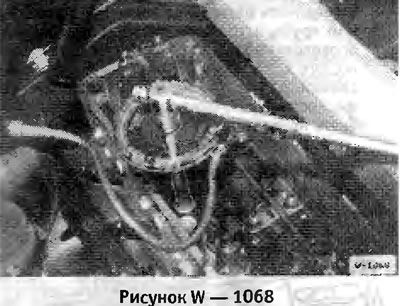
Disconnect connector -A- for idle speed controller and vacuum hoses -5- and -6-.
Loosen the clamps and disconnect the air intake hose.
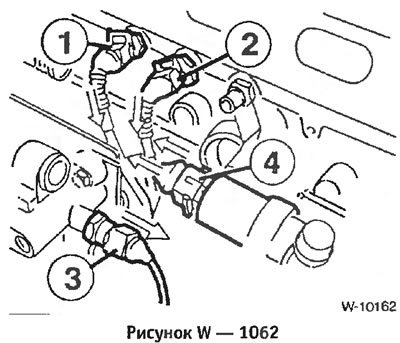
Turn to the left and connect the connector -1- of the air mass meter.
Unplug connector -2- for tank vent valve.
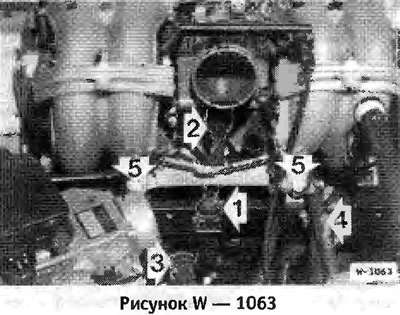
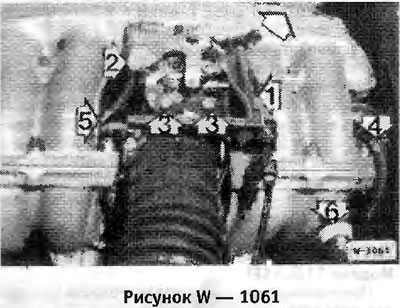
Disconnect connector -1- for injectors and connector -2- for throttle valve switch.
Detach heating hose -3-.
Disconnect fuel hoses -4- and close with plugs.
Unbolt the fuel hose bracket.
Remove bolts -5- for intake manifold support.
Remove water hose.
Raise the car.
Remove the front muffler pipe from the exhaust manifold.
Drain the coolant by removing the drain plug on the side of the engine block under the exhaust manifold. After draining, immediately screw on and tighten the drain plug.
Disconnect the ventilation hose.
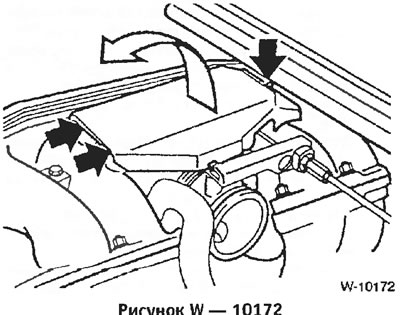
Remove cylinder head cover.
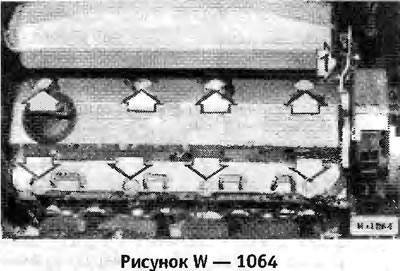
Remove camshaft cover -1-.
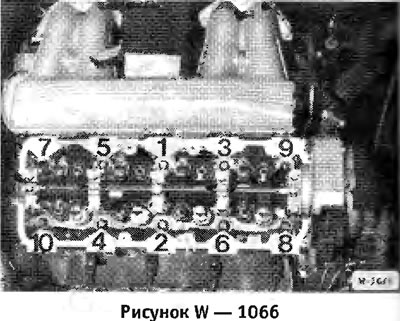
Loosen the cylinder head bolts in reverse order from 10 to 1 by ½ turn, then remove. To loosen the bolts, an E12 Torx wrench is required.
Remove cylinder head.
Attention: After removal, do not place the cylinder head on the contact surface, otherwise fully open valves may be damaged. Therefore, the cylinder head should be placed on 2 wooden blocks.
Installation
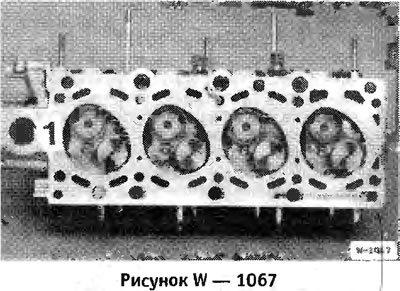
Before installing, clean the cylinder head and cylinder block from the remnants of the old seal. Do not allow seal residues to enter cylinder bores. Close the holes with rags.
Measure the flatness of the cylinder head and engine block with a steel ruler in the longitudinal and transverse directions and, if necessary, mill (service station work). The maximum allowable non-flatness is 0.03 mm.

Attention: With a milled cylinder head, it is possible, depending on the height of the cylinder head after machining, to install the cylinder head gasket either in the original thickness or 0.3 mm thicker. Installing a thicker gasket prevents the combustion chamber from shrinking. Also note that the O-ring -1- of the cooling duct must be correspondingly thicker, see illustration.
Check the cylinder head for cracks and the surface of the cylinder head for scratches.
Thoroughly clean the holes in the cylinder head from oil and other objects.
Attention: Oil must not remain in the blind holes, otherwise the bolts will not fully tighten the cylinder head, although they will be tightened to the correct torque. In addition, the motor block may crack.
Be sure to replace the cylinder head gasket.
Apply a new gasket without sealing compound so that the holes do not overlap. Inscription "TOP" should be located on top, and the inscription "FRONT" must be on the toothed belt side.
Replace O-ring -1- for hole in engine block.
Before installing the cylinder head, check that the camshaft is at top dead center.
Install the cylinder head.
Lubricate new cylinder head bolts with engine oil and screw in by hand. Be sure to install only new bolts.
Caution: Be very careful when tightening the cylinder head bolts. Before tightening the bolts, check the accuracy of the torque wrench. In addition, a protractor, such as HAZET 6690, is required to tighten the cylinder head bolts. If a protractor is not available, place the key on the bolt head, attach a square to the key handle and mark the desired angle with chalk. Subsequently, turn the key handle in one pass to the line marked with chalk.
Tighten the cylinder head bolts in three passes each time in sequence 1 to 10:
- 1st pass: tighten the bolts with a torque wrench to a tightening torque of 30 Nm.
- 2nd pass: Tighten the bolts with a rigid wrench by 90°.
- 3rd pass: Tighten the bolts with a rigid wrench by 90°.
Insert and screw on inner toothed belt guard.
Install toothed belt.
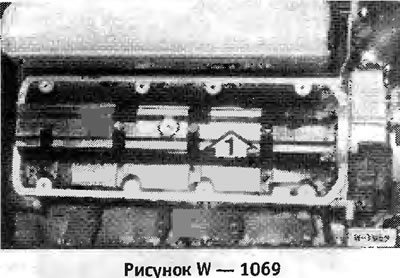
Insert the camshaft cover.
Check the integrity of the cylinder head cover gasket and replace if necessary.
Fit the cylinder head cover, tighten the bolts in sequence from the inside outwards to a torque of 9 Nm.
Connect ventilation hose.
Screw on the front muffler pipe with a new gasket using new self-locking nuts. Pre-coat bolts with copper (high temperature) paste. First tighten all bolts to a tightening torque of 30 Nm, then tighten them to a torque of 50 Nm.
Install the intake manifold mounting bolts.
Connect all hoses and secure with clamps.
Connect electrical wires.
Screw on fuel hose bracket.
Screw the cable bracket, fix the cables in the clamps.
Install the throttle lever cover.
Connect ground wire to battery.
Pour coolant into the engine.
Check engine oil level, top up if necessary. If the cylinder head was removed to replace a blown cylinder head gasket, it is recommended to change the oil with an oil filter change, as coolant may have entered the oil.
Caution: Do not tighten the cylinder head bolts after 1000 km.