
Withdrawal
Attention: Some works are described in more detail in the section "Removal and installation of the engine", therefore, it is recommended that you also read this section. Remove the cylinder head only when the engine is cold.
Disconnect the ground wire from the battery.
Attention: When the battery is disconnected, the information in the electronic memory devices, such as the engine trouble memory or the radio security code memory, is erased. When disconnecting the battery, follow the instructions in sections "Radio" And "Removing and installing the battery".
Raise the car.
Remove the front muffler pipe from the exhaust manifold.
Unscrew exhaust manifold. The intake manifold is not removed.
Drain the coolant from the engine.
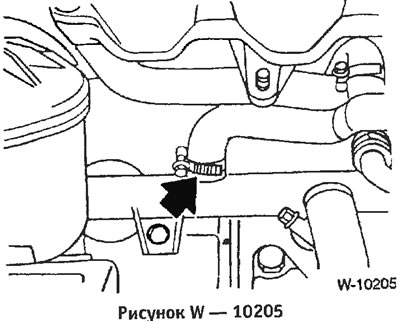
Drain the coolant from the engine by unscrewing the drain plug on the side of the engine block under the exhaust manifold. After draining, immediately screw on the plug and tighten it.
Disconnect the water hoses from the thermostat, after releasing their clamps.
Disconnect the throttle cable from the throttle lever.
Disconnect the following hoses and connectors from the throttle support. It is recommended to pre-mark the hoses and connectors and their connection points so as not to confuse them during subsequent connection. Loosen the hose clamps: fuel tank ventilation hose -3-, underwater fuel hose -2-, fuel return hose -1-.
Caution: Flammable, no smoking. Wipe up leaking fuel with a cloth.
Loosen the intake manifold mounting bolts.
Disconnect the connectors from the elements on the intake pipe and cylinder head by pressing the wire clamps of the connectors: idle air control, throttle potentiometer, coolant temperature sensor, oil pressure switch.
Remove the trim from the cylinder head and disconnect the spark plug tips.
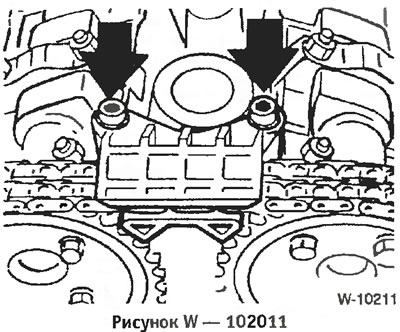
Remove 2 nuts -arrows- and remove ignition wires as a set.
Disconnect the crankcase ventilation hose from the cylinder head.
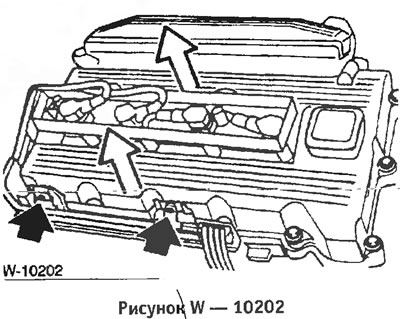
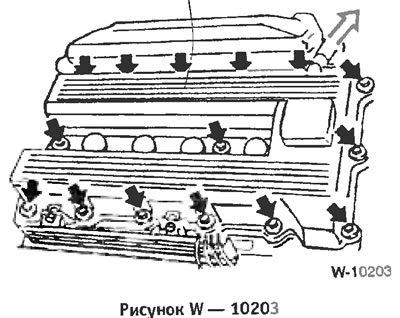
Unscrew cylinder head cover, see illustration.
Attention: Pay attention to the location of the rubber pads under the bolts for subsequent installation.
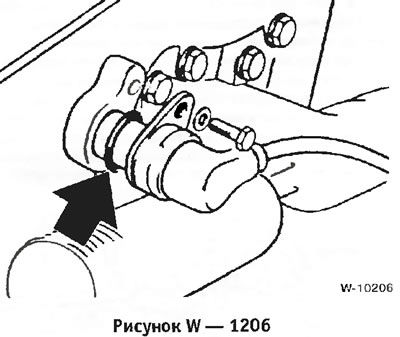
Loosen the clamp and disconnect the water hose from the water tube.
Unscrew the camshaft position sensor and pull it out with the gasket.
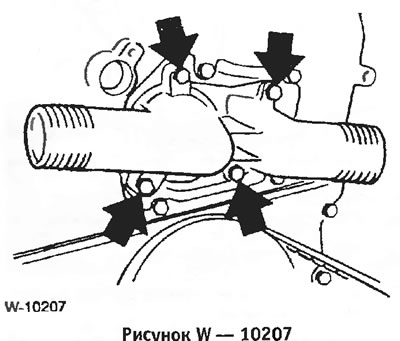
Unscrew the thermostat housing and pull it out together with the thermostat.
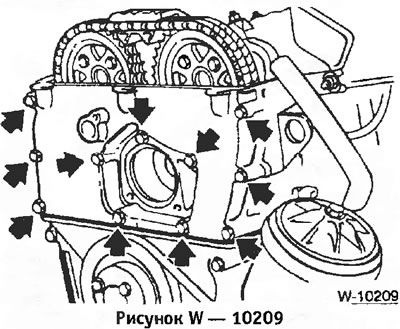
Unscrew and remove the top cover of the gear box.
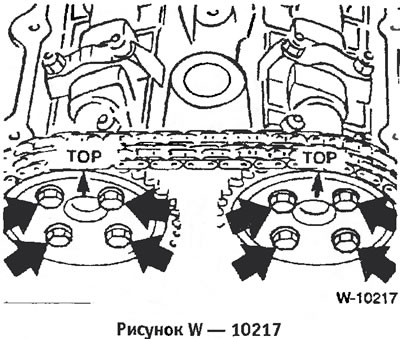
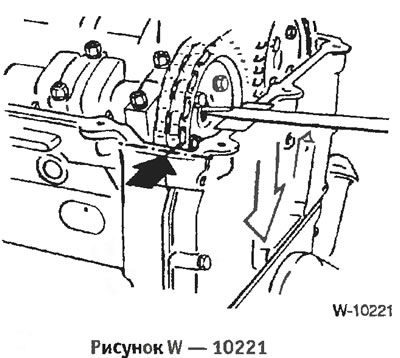
Set the engine to top dead center. To do this, engage 5th gear and move the vehicle on level ground, or crank the engine behind the crankshaft pulley in the direction of engine rotation until the tips of the intake and exhaust cams of cylinder 1 are facing each other. The arrows on both camshaft sprockets must point upwards.
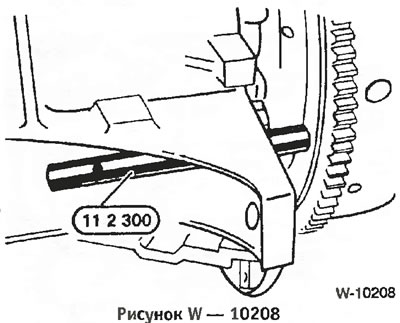
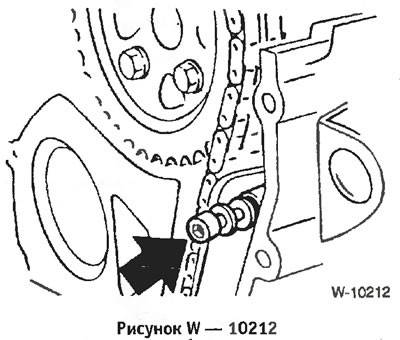
Lock the crankshaft at top dead center with BMW 11 2 300 or another suitable rod. To do this, insert the rod through the hole in the engine block into the hole in the flywheel.
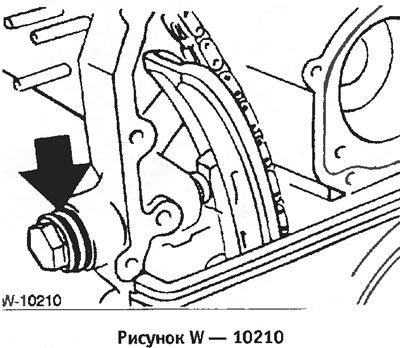
Unscrew the chain tensioner from the cylinder head.
Unscrew the top chain guide.
Loosen the top bolt of the right chain guide.
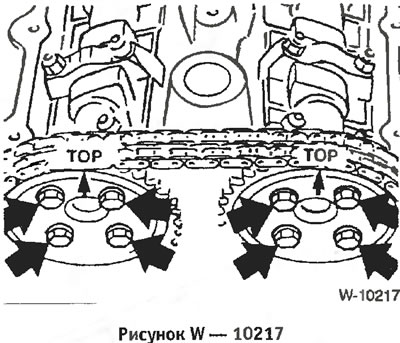
Loosen and remove sprockets. The arrows on the stars should point up.
Attention: Hook the chain on the wire hook so that it does not slip down.
Loosen cylinder head bolts in several passes from inside to outside. To loosen the cylinder head bolts, a Torx head bolt wrench is required.
Attention: After removal, do not place the cylinder head on the contact surface, otherwise fully open valves may be damaged. Therefore, the cylinder head should be placed on 2 wooden blocks.
Installation
Before installing, clean the cylinder head and engine block from seal residues. Residues of seals must not fall into the holes, cover the holes with rags.
Check position and integrity of centering sleeves -arrows-. Threaded holes must be free of oil.
Attention: Be sure to install new cylinder head bolts. Washers are not supplied in standard cylinder heads as they are pressed in. When installing a new cylinder head, install the spacer washers without pressing them in.
Check for cracks on the cylinder head and scratches on its surface.
Measure the flatness of the cylinder head and engine block with a steel ruler in the longitudinal and transverse directions and, if necessary, mill (service station work). The maximum allowable flatness is 0.03 mm.

Attention: With a milled cylinder head, it is possible, depending on the height of the cylinder head after machining, to install the cylinder head gasket either in the original thickness or 0.3 mm thicker. Installing a thicker gasket prevents the combustion chamber from shrinking.
Thoroughly clean the holes in the cylinder head from oil and other objects. Attention: Oil must not remain in the blind holes, otherwise the bolts will not fully tighten the cylinder head, although they will be tightened to the correct torque. In addition, the motor block may crack.
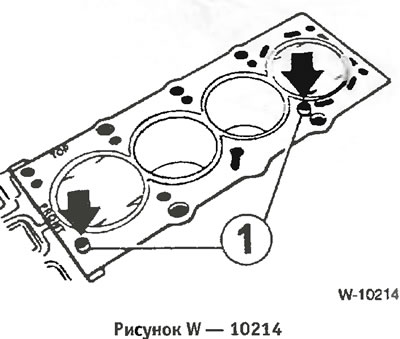
If the oil check valve -1- was removed, insert it flush against the crankcase into the lubrication channel of the cylinder head. Insert rubberized spacer -2-.
Be sure to replace the cylinder head gasket. Apply a new gasket without sealing compound so that it does not block the holes. Inscription "FRONT" should be directed upwards, and the inscription "TOR" to the engine chain drive.
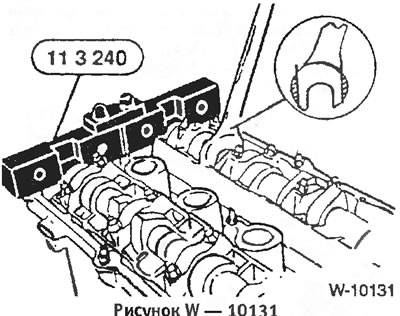
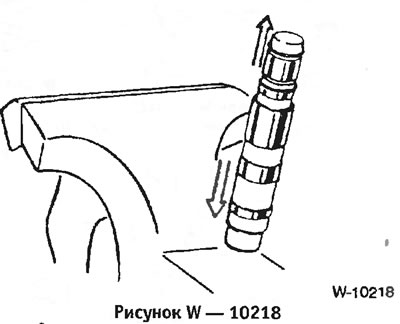
Secure the camshafts with the BMW tool shown in the illustration. If required, turn the camshafts using a 27 mm hexagon.
Attention: Do not damage the camshaft housing. If necessary, file the wrench so that it becomes narrower.
If the camshaft has to be turned so much that the valves of the 1st and 4th cylinders begin to move, then first unscrew the crankshaft by about 90" and only then turn the camshaft. This eliminates the contact of the valves with the pistons.
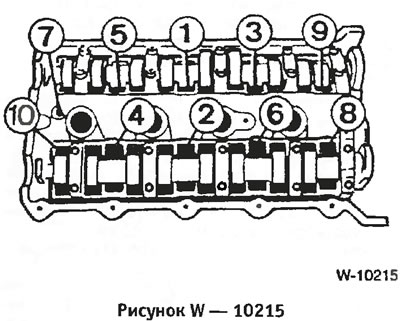
Tighten the cylinder head bolts in three passes each time in sequence 1 to 10:
- 1st pass: tighten the bolts in sequence from 1 to 10 with a torque wrench to a tightening torque of 30 Nm.
- 2nd pass: tighten the bolts with a hard wrench to 90".
- 3rd pass: Tighten the bolts with a rigid wrench by 90°.
Caution: Be very careful when tightening the cylinder head bolts. Before tightening the bolts, check the accuracy of the torque wrench. In addition, a protractor, such as HAZET 6690, is required to tighten the cylinder head bolts. If a protractor is not available, place the key on the bolt head, attach a square to the key handle and mark the desired angle with chalk. Subsequently, turn the key handle in one pass to the line marked with chalk.
Install the gasket on the gear box.
Screw chain sprockets to camshaft flanges. The arrows on the stars should point up. Tighten the bolts with a torque of 15 Nm, that is, not much.
Tighten the right guide screw and install the upper chain guide.
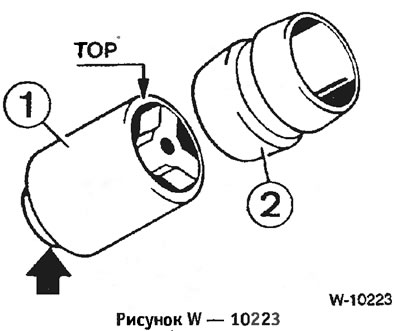
Attention: Set the hydraulic chain tensioner to the basic installation position. Attention: Before each installation, the hydraulic chain tensioner must be brought to the main installation position, since the fully extended hydraulic pusher jams and therefore no longer has spring properties. If this is not observed, serious engine damage can occur due to an incorrectly tensioned or broken chain.
Hit the chain tensioner with the outer bushing on a hard surface (for example, on a vice). In this case, the piston is released.
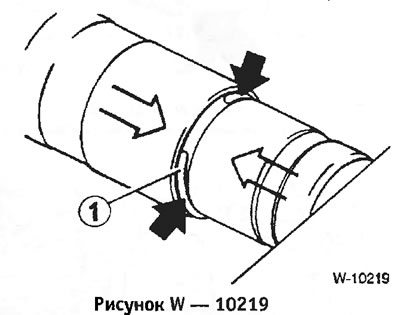
Clamp the chain tensioner in a vise and compress it. To avoid damage to the pistons, lay gaskets in the cheeks of the vise. When compressed, the circlip -1- sinks into the tensioner sleeve.
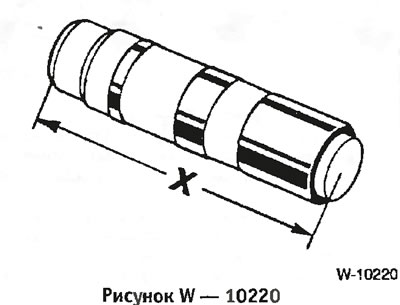
Compress the chain tensioner to a dimension X = 68.5 mm, in this position you should hear how the outer spring ring jumps in. Release the vise, the tensioner should retain its size. If this does not happen, the fixation point has not been reached or passed, repeat the adjustment.
Screw in lower chain tensioner with O-ring and tighten to 25 Nm. Fill the joints of the gaskets of the gear box cover with an elastic mass "3 Bond 1209".
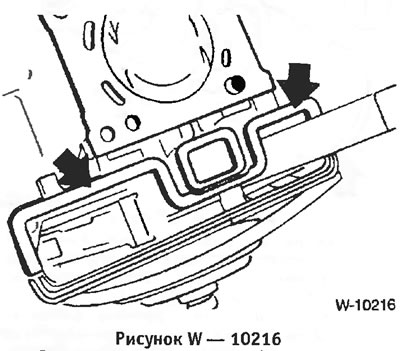
Install the gear box cover with a new gasket. At the same time, tighten the Mb bolts to a torque of 10 Nm, and the M8 bolts to a torque of 22 Nm. When tightening the bolts, press the cover down with a screwdriver, as shown in the figure, so that it is flush with the top edge of the cylinder head.
Remove the camshaft retainer.
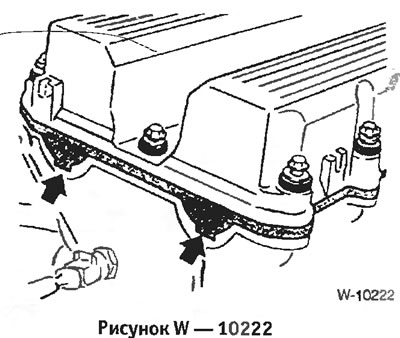
Fit the cylinder head cover gasket, paying particular attention to its position in the cylinder head cutouts from the front. Replace damaged gasket.
Tighten cylinder head cover bolts evenly to 10 Nm.
Install the cooling system thermostat.
Connect the throttle cable to the throttle lever.
Connect and clamp all water, fuel and vacuum hoses.
Connect electrical wires.
Lay the ignition wires and connect the spark plugs.
Screw the exhaust manifold with a new gasket to the cylinder head with a tightening torque of 25 Nm. The gasket groove must face the cylinder head. Coat the studs with high temperature paste.
Screw the front muffler pipe to the exhaust manifold.
Attention: Before starting the engine, pull out the fixing rod for setting the top dead center.
Pour coolant into the engine.
Check engine oil level, top up if necessary. If the cylinder head was removed to replace a blown cylinder head gasket, it is recommended to change the oil with an oil filter change, as coolant may have entered the oil.