



The following procedures are used to check the liquid level every 400 km or weekly. Other fluid level checks can be described later in the Sections on specific maintenance procedures. Regardless of the scheduled check intervals, do not allow fluid to leak under the vehicle, as such leaks indicate a malfunction that should be corrected immediately.
Examination
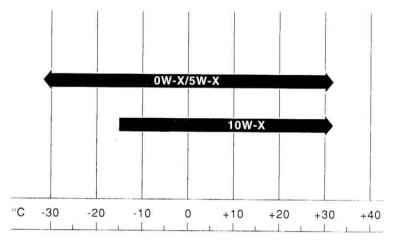
1. Fluids are an integral part of the lubrication, cooling, braking and windshield washer systems. Due to gradual consumption and/or contamination of fluids during normal vehicle operation, they should be replaced periodically. Refer to the "Types and Volumes of Lubricants and Fluids" section of the Specifications before adding fluid to any of these components.
Whenever checking the fluid level, the vehicle must be on a level surface.
Engine oil
2. Check the engine oil level using the dipstick located on the side of the engine (refer to the engine compartment illustrations provided in this Chapter to determine its location). The dipstick passes through the metal tube downwards, reaching the bottom of the engine oil pan.
3. The engine oil level is measured before starting the engine or at least 15 minutes after turning it off.
If you start measuring the engine oil level immediately after turning off the engine, some oil will remain in the upper part of the engine, which will significantly affect the accuracy of the dipstick readings.
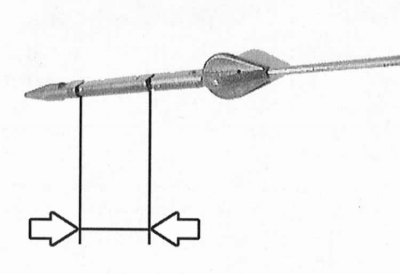
4. Remove the dipstick and wipe its blade dry with a clean rag or paper towel. Insert the dipstick all the way back and remove it again. The height of the oil-soaked section of the blade will correspond to the oil level in the engine. This level should be between the two marks on the dipstick.
5. It takes one liter of oil to raise the oil level from the minimum mark on the dipstick to the maximum. Do not allow the level to fall below the minimum mark, as oil starvation can cause engine damage. On the other hand, overfilling the engine with oil (topping up above the maximum mark) may cause spark plugs to become oily, oil leaks or seals to fail.
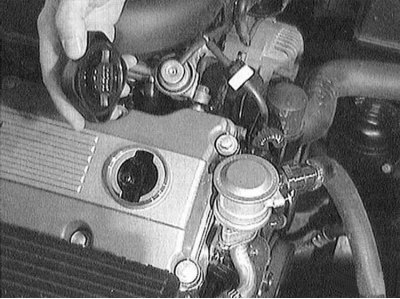
6. To add oil, unscrew the filler cap located on the cylinder head cover. After adding oil, wait a few minutes for the oil level to stabilize, then remove the dipstick and check the level again. Add more oil if necessary. Close the filler cap and tighten it by hand.
7. Checking the oil level is an important preventive procedure. The engine should not consume more than 0.7 liters of oil per 1,000 km. A constant drop in the oil level indicates either leaks through damaged seals or loose connections, or its burning out (internal leaks through worn piston rings or through valve guides). In addition, you should pay attention to the condition of the oil itself. If the oil is milky or if you can see drops of water in it, this indicates a possible leak in the cylinder head gasket or a crack in the head or cylinder block. In this case, the engine should be repaired immediately. Each time you measure the oil level, before wiping the dipstick blade, run your thumb and forefinger over it. If you find dirt or metal particles stuck to the dipstick, the oil should be replaced (refer to Section Changing engine oil and oil filter).
Engine cooler
Do not allow antifreeze to come into contact with your skin or the painted surfaces of your vehicle. If this does happen, rinse off the antifreeze immediately with plenty of water. Antifreeze is extremely toxic if ingested. Never leave it unattended in an open container or spilled on the floor; children or animals may be attracted to its sweet smell and may drink it. Arrange with local authorities for disposal of used antifreeze.
8. All vehicles covered by this Manual are equipped with a compensating overpressure cooling system. Expansion tank (or coolant reservoir) is located in the engine compartment and is connected to the radiator. As the engine warms up during operation, the expanding coolant fills the tank. When the engine cools down, the coolant automatically flows back into the cooling system, which ensures that its level is maintained at a constant value.
9. The coolant level should be checked regularly. Unscrew the cap on the expansion tank. The fluid level is normal if, on a cold engine (coolant temperature +20°C), the upper edge of the red float is at the same height as the edge of the filling pipe. If the fluid level is lower, you should top up the fluid. Top up the coolant only on a cold engine to avoid damaging it.
Do not remove the expansion tank filler cap or radiator cap to check the coolant level until the engine has cooled down completely! The level in the reservoir fluctuates depending on engine temperature.
10. Run the vehicle and measure the coolant level again. If only a small amount of coolant needs to be added to the required level, you can use clean water to do this. However, frequent additions of water will dilute the antifreeze. To ensure the correct ratio of antifreeze to water, always add the required mixture to the required level.
11. If the coolant level drops regularly, there may be a leak in the system. Inspect the radiator, hoses, filler cap, drain plugs and water pump. If no leaks are found, have the expansion tank cap and radiator checked for leaks at a BMW service station.
12. If you need to remove the cover, wait until the engine has cooled down completely, then wrap a thick rag around the cover and unscrew it to the first stop. If steam or coolant starts escaping from under the cover, allow the engine to cool down a little more before removing the cover.
13. It is also necessary to check the condition of the cooler. It should be relatively clean. If the liquid is brown or rusty, it must be drained, the system flushed and filled with a new mixture. Even if the cooler looks normal, the corrosion inhibitors in its composition lose their effectiveness over time, so it should be replaced at certain intervals.
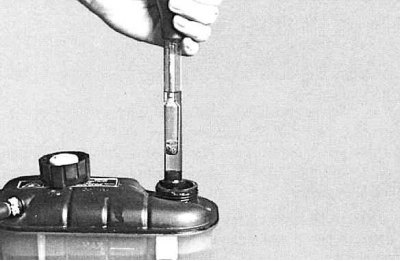
14. To check the frost resistance of the coolant, it is necessary to use a hydrometer (see also Section Checking the functioning of the cooling system and frost resistance of the coolant). Draw up the coolant with a bulb and read the float reading. To ensure frost resistance down to -35°C, the volume ratio of water to antifreeze is 1:1. If necessary, add antifreeze according to Specifications.
15. Close the expansion tank cap and test drive the vehicle again to check the antifreeze concentration.
Excessively high concentration of antifreeze leads to a decrease in the protective effect and cooling properties of the liquid. This is manifested at an antifreeze concentration of about 60%.
Brake and clutch fluid
A drop in brake fluid level below the MIN mark is indicated to the driver on the dashboard. However, it is recommended to inspect the reservoir regularly.
Brake fluid can cause eye damage and damage the painted surfaces of your vehicle, so be extremely careful when handling it. Do not use brake fluid that has been open for a long time or that is more than one year old. Brake fluid tends to absorb moisture from the air, which can lead to a dangerous loss of braking efficiency. Use only the recommended type of brake fluid. Mixing different types of fluid (such as DOT 3 or 4 and DOT 5) may result in failure of the braking system.
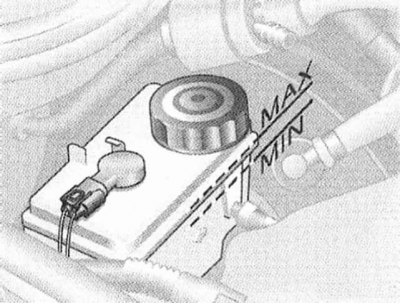
16. The brake master cylinder is installed in the rear left corner of the engine compartment.
17 The fluid level is checked visually, using the marks on the plastic reservoir mounted on the master cylinder. The fluid level should be between the "MAX" and "MIN" marks. If the level is below the acceptable level, first wipe the top of the reservoir and the cap with a clean rag to prevent dirt from getting into the system after removing the cap. Top up to the required level with the recommended fluid, but do not overfill.
18. While the reservoir cap is removed, check the fluid and master cylinder reservoir for contamination. If there are rust particles, dirt or water droplets, the fluid in the system should be drained and replaced with new fluid.
19. After filling the reservoir to the required level, make sure the lid is installed level to avoid liquid leakage and/or dirt ingress.
20. The fluid level in the master cylinder will drop slightly as the brake pads wear. There is no need to top it up as long as the level remains near the "MIN" mark; it will rise after replacing the linings. A very low level may indicate worn brake pads. Check them for wear (refer to Section Lubrication of door hinges and locks).
21. If the brake fluid level drops continuously, immediately check the entire system for leaks. Inspect the brake lines, hoses and fittings, together with the calipers, wheel cylinders and master cylinder (refer to Section Brake system checks).
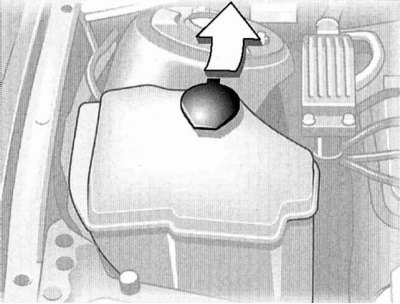
22. If, when checking the fluid level, the reservoir is empty or nearly empty, the brake or clutch system should be checked for leaks and bled.
Windshield washer fluid
23. The windshield washer fluid is located in a plastic reservoir on the right side of the engine compartment. The reservoir capacity is given in the Specifications.
24. In areas with a moderate climate, the system can be filled with ordinary water, but it is recommended to add a glass cleaner with a solvent for wax preservatives to the water. The reservoir should be filled no more than two-thirds full, so that there is free space in case the water expands when freezing. In areas with cold climates, a special antifreeze for the windshield washer system should be used, which lowers the freezing point of the liquid, which can be purchased at any auto accessory store. It is usually sold in concentrated or ready-made form. If you purchased concentrated antifreeze, mix it with water according to the manufacturer's instructions on the package.
Power steering fluid
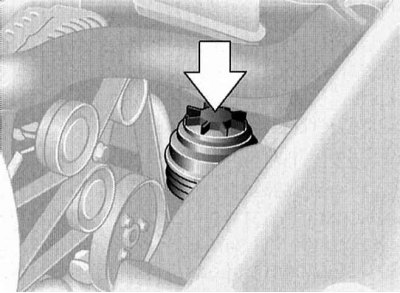
25. To check the power steering fluid level, refer to Section Checking the power steering fluid level.
[The original article is located on «www.bmwman.ru»]