
Table of contents: Selection of inserts ↓ Installing the shaft ↓
- Home
- BMW 3 Series
- E46
- Power unit
- Engine overhaul
- Crankshaft — installation
Crankshaft — installation (BMW 3 Series E46)
Selection of inserts
1. Give the crankshaft to the service station specialists. They will perform the necessary measurements, if necessary, turn the shaft journals and select liners of the required diameter.
Installing the shaft
Note: New bolts are required to secure the caps or main bearing cap assembly.
2. Make sure that the oil jets for cooling the pistons (if they are provided for by the design) stand in their places in the shaft supports.
3. Wipe the back sides of the liners and the bores for the liners in the engine crankcase and in the bearing caps.
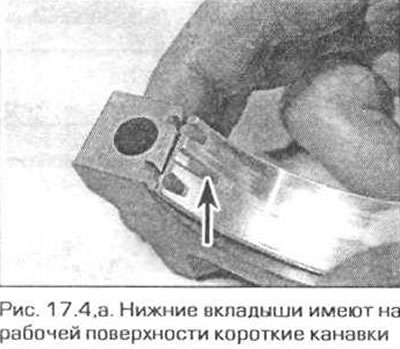
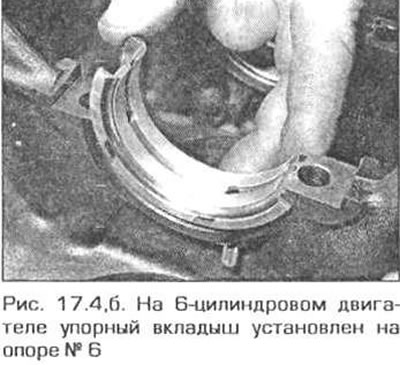
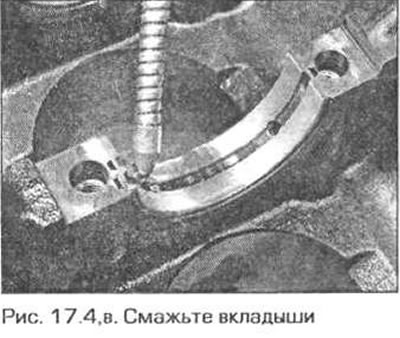
4. Insert the bearing shells into the main bearing bores and into the caps. Make sure that the tabs in the bearing shells fit into the cutouts in the bores. Do not touch the bearing surfaces with your fingers. Note that the upper bearing shells have one long oil groove running the entire length of the bearing shell, while the lower bearing shells have a short groove at each end. Install the thrust bearing shell into bearing shell #4 or #5 (4-cylinder engine) or on support no. 6 (6-cylinder engine) (fig. 17.4,a,b). If the bearings are coated with protective grease, wash it off with kerosene. Wipe the bearings dry with a lint-free cloth. Lubricate the surfaces of all bearings with motor oil (fig. 17.4,c).
5. Lower the crankshaft into the supports so that the crankpins of cylinders No.1 and 4 (4-cylinder engine) or #1 and 6 (6-cylinder engine) are at BDC, ready for connecting rod installation. Check the crankshaft end play as described in paragraph 8 of 13.
6. Lubricate the cover liners with engine oil. Make sure that the tabs on the liners fit into the corresponding cutouts on the covers.
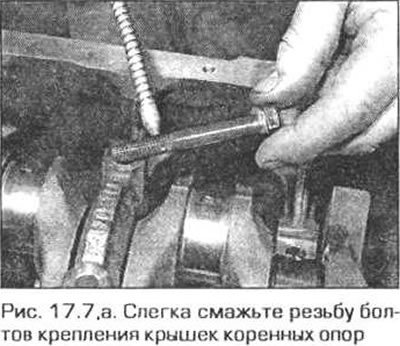
7. Replace the covers with inserts, turning them in the desired direction (the protrusions of the liners in the crankcase bores and in the covers must be on one side). On a 4-cylinder N42 engine, install the cover block, making sure that the dowel pins are present. Clean the new cover mounting bolts thoroughly and lubricate their threads with engine oil. Screw in and lightly tighten the bolts for now. On a 6-cylinder engine, do not forget to secure the oil pickup pipe bracket with cover bolts #5 (fig. 17.7, a, b).

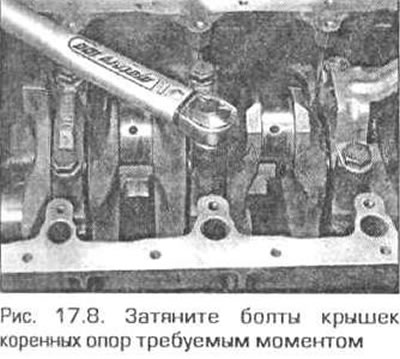
8. Tighten the cover bolts to the specified torque (Fig. 17.8). On the 4-cylinder N42 engine, tighten the inner row of cover block bolts first, then the outer row.
9. Check if the shaft rotates easily.
M43TU engines and 6-cylinder engines
10. Insert the new oil seal into the rear crankshaft oil seal housing. Install the housing with the oil seal and the new gasket onto the engine as described in Chapter 2A or 2B.
11. On a 6-cylinder engine, install the oil pump sprocket and drive chain onto the shaft as described in Chapter 25.
4-cylinder engine N42
12. Install the oil pump and balance shaft drive chain, as well as the damper and crankshaft pulley hub, as described in Chapter 2A.
13. Press the front and rear crankshaft seals into place (see chapter 2A). Install the cuffs so that the grooves on their surfaces coincide with the engine crankcase connector.
14. Obtain a sealant press kit from your BMW dealer. This kit contains Loctite primer. Apply the primer to the mating surfaces of the cylinder block and lower crankcase using a brush.
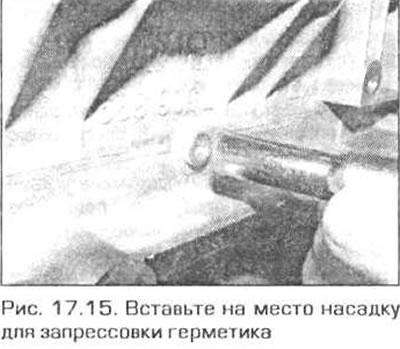
15. Insert new nozzles for pressing the sealant into the joint of the cylinder block and the lower crankcase. There is a special BMW device 119 360 for this operation, but you can also get by with a suitable punch (fig. 17.15).
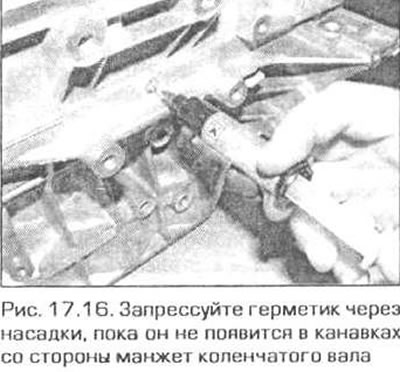
16. Using the syringe provided in the kit, press the sealant through the nozzle (fig. 17.16), until the sealant appears in the grooves of the front and rear crankshaft seals. Repeat this operation on the other side of the engine.
17. Also coat the sealant that appears in the grooves of the cuffs with a primer to bind the sealant.
All engines
18. Insert the pistons with connecting rods into the engine as described in the next paragraph.
19. On a 4-cylinder engine, install the flywheel (or a faceplate), timing chain and its housing, oil separator and sump (see chapter 2A).
20. On a 6-cylinder engine, install the flywheel (or a faceplate), primary timing chain and sump (see chapter 2B).
This article is available at russian, bulgarian, belarusian, ukrainian, serbian, croatian, romanian, polish, slovak, hungarian
Article verified: Ilyinsky Matvey
Share information:
Previous articles
БМВ E46: Engine overhaul
Next articles
Similar articles on other types of BMW cars:
Removal and installation the oil pan BMW 5 Series E12 (1972-1981)
Crankshaft — Installation and Checking of Main Bearing Oil Clearance BMW 7 Series E32 (1986-1994)
Pistons — removal and installation BMW X3 E83 (2003-2010)
Crankshaft and flywheel — design description BMW X5 E53 (1999-2006)
Removal and installation the oil pan BMW 5 Series E12 (1972-1981)
Crankshaft — Installation and Checking of Main Bearing Oil Clearance BMW 7 Series E32 (1986-1994)
Pistons — removal and installation BMW X3 E83 (2003-2010)
Crankshaft and flywheel — design description BMW X5 E53 (1999-2006)
Link in different formats to this page
Visitor comments
No comments yet
- General information
- Manual
- Maintenance
- Power unit
- Engine repair
- Cooling system
- Power system (gasoline)
- Injection system (gasoline)
- Fuel system (diesel)
- Exhaust system
- Ignition system
- Charge and launch systems
- Transmission
- Car gearbox
- Clutch and drive shafts
- Chassis
- Brake system
- Suspension front and rear
- Steering
- Body
- Body care and repair
- Exterior
- Interior
- Electrical equipment
- Troubleshooting
- Lighting and signaling
- Equipment and devices
- Heater and air conditioner
- Electrical circuits
- General information
- Manual
- Repair on the road
- Weekly checks
- Maintenance
- Troubleshooting
- Power unit
- 4 cylinder engines
- 6 cylinder engines
- Engine overhaul
- Cooling and heating
- Fuel and exhaust system
- Starting and charging system
- Ignition system
- Transmission
- Clutch
- Mechanical gearbox
- Automatic gearbox
- Cardan and drive shafts
- Chassis
- Brake system
- Wheel suspension
- Steering
- Body
- Exterior
- Interior
- Electrical equipment
- Equipment and devices
- Electrical circuits
- General information
- Maintenance
- Power unit
- Engine repair
- Cooling system
- Ignition system
- Supply system
- Fuel injection system
- Exhaust system
- Transmission
- Clutch
- Car gearbox
- Front and rear axle
- Chassis
- Steering
- Brake system
- Body
- Exterior
- Interior
- Electrical equipment
- Heating system
- Equipment and devices
- Power devices
- Electrical circuits
- Power unit
- M10/M20 engine
- M40 engine
- Ignition system
- Lubrication system
- Cooling system
- Supply system
- Fuel injection
- Exhaust system
- Transmission
- Clutch
- Manual gearbox
- Front axle
- Rear axle
- Chassis
- Steering
- Brake system
- Body
- Exterior
- Interior
- Electrical equipment
- Heating system
- Equipment and devices
- Electrical circuits
- General information
- Specifications
- Operation and maintenance
- 4-cylinder engine
- Engine repair
- Cooling and lubrication system
- Supply system
- Ignition system
- 6-cylinder engine
- Engine repair
- Cooling and lubrication system
- Supply system
- Fuel injection system
- Ignition system
- Transmission
- Clutch
- 4-speed manual gearbox
- 5-speed manual gearbox
- Automatic gearbox
- Cardan and rear axle
- Chassis
- Steering
- Front suspension
- Rear suspension
- Brake system
- Electrical equipment
- Equipment and devices
- Electrical circuits