



2. Lay out the pistons with connecting rods and new track sets so that the groups of parts are together during and after checking the joint clearances.
3. Take the top compression ring of piston #1 and insert it into the first cylinder from above. Push it down with the piston crown - this will ensure that the ring is perpendicular to the cylinder walls. Position the ring at the bottom of the cylinder, approximately where it would be when the piston is at bottom dead center. Remember that the top and second compression rings are different. The second compression ring is easily distinguished by the presence of a step on the bottom surface.
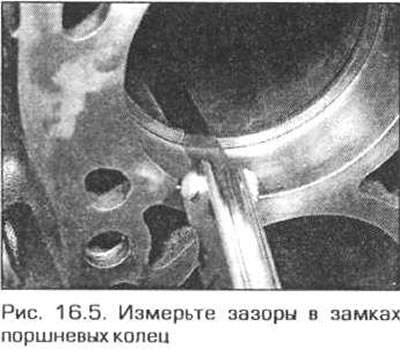
4. Measure the thermal gap in the ring lock with a feeler gauge.
5. Repeat the measurement in the upper position of the ring (Fig. 16.5). Compare the measurement results with the values in the Technical Data section.
6. If the gap is too small (which is unlikely). it must be increased, otherwise during engine operation the ends of the ring will rest against each other, which will most likely lead to serious engine failure. You can increase the gap by carefully filing the ends of the ring with a small file. Clamp the file in a vice with soft jaws and move the ring along the file. Be careful - the ring has sharp edges. The ring is also very fragile - it is easy to break.
7. If the rings are new, the gap in them is unlikely to be too large. If this happens, check whether the rings are selected correctly and whether they match your engine.
8. Repeat similar measurements for the remaining rings of cylinder #1, and then for the remaining cylinders. Do not forget that the cylinder - piston - rings form a single set.
9. After checking and, if necessary, adjusting the clearances in the locks, the rings can be installed in the pistons.
10. When installing the rings, use the same technology as when removing them. Install the lower, oil scraper ring first. When installing a three-piece oil scraper ring, insert the expander first, then the lower ring, turning its lock away from the expander lock by 120°. Then insert the upper ring and turn its lock by 120° relative to the lower ring lock. If the oil scraper ring consists of two parts, install the expander first, then the ring. Rotate the gaps of the expander and the ring at an angle of 180°. The second and upper compression rings differ from each other in cross-section. The cross-section of the upper ring is symmetrical, while the second ring has a stepped cross-section with a step on the lower surface. As a rule, the upper side of the second ring has a TOP mark or a dot applied with paint. Insert the second ring, taking into account its distinctive features. Then insert the upper ring with either side up (fig. 16.10,a,b). After installing the compression rings, rotate the locks at an angle of 120° in both directions relative to the oil scraper ring lock. Just make sure that the track locks do not end up above the hole for the pin.
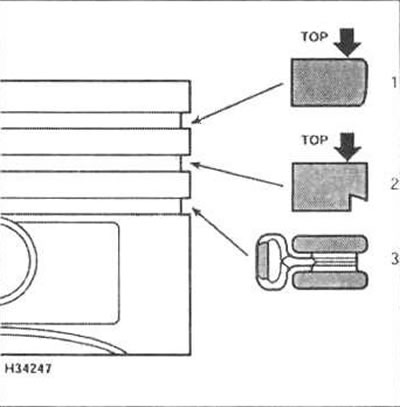
Fig. 16.10,a. Piston rings of a 4-cylinder engine
1 Upper compression ring
2 Second compression ring
3 Oil scraper ring (three parts)
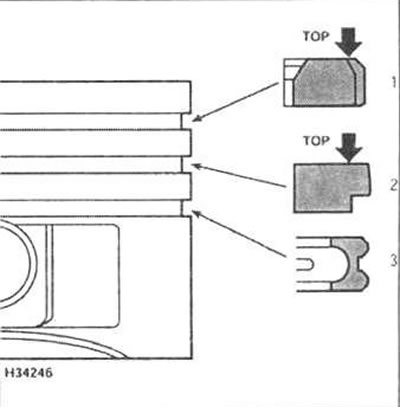
Fig. 16.10.6. Piston rings of a 6-cylinder engine
1 Upper compression ring
2 Second compression ring
3 Oil scraper ring (two parts)
Note: Always follow the instructions supplied with new rings - different manufacturers may prescribe different procedures. Do not confuse the first and second compression rings - they have different cross-sections.