
Lay out new pistons and rings with connecting rods so that the clearance between the ends of the rings will be checked on those pistons and in those cylinders where these rings will be installed.
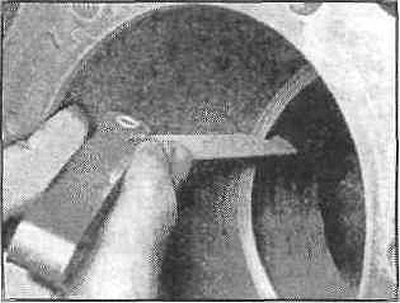
Insert the top (№1) ring into the first cylinder and position it perpendicular to the walls, pushing it with the piston. The ring should be located near the bottom of the cylinder near the extreme point of the ring travel.

To measure the gap between the ends of the rings, insert feeler plates of different thicknesses into the gap until a feeler gauge is found equal to the width of the gap. The feeler gauge should slide between the ends of the ring with little effort. Compare the resulting gap value with the technical data. If the gap is more or less than normal, check again if you took the correct ring size.
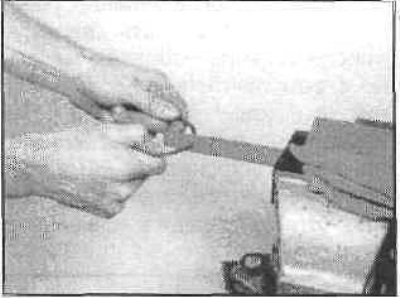
If the gap is too small, it must be increased, otherwise the ends of the rings may touch each other while the engine is running, which can cause serious damage. The gap can be increased by carefully filing the ends of the rings with a fine file. Hold the file in a vise and slowly move the ends of the rings over the file so that the metal is removed from the outside to the inside. Sawing is done at a right angle and all burrs must be removed before assembly.
Repeat the above procedure for all remaining rings.
After checking the gap between the ends of the rings, the rings can be installed on the pistons. The oil scraper ring is usually installed first (lowest). It usually consists of three separate components. Insert the expander into the groove.
If an anti-rotation tab is used, insert it into the hole drilled in the groove. Next, insert the bottom eraser.
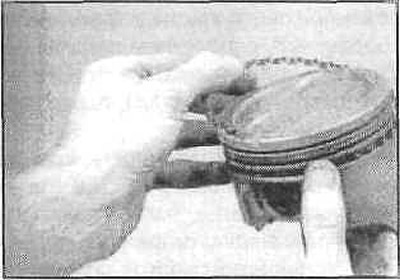
Do not use ring inserters in case of oil ring wear edges, as the edges may break. Insert one end of the wear lip into the groove between the expander and the groove wall, hold it firmly in place and, moving the end around the piston, push the lip into the groove. Then insert the top eraser in the same way.
After all three parts of the oil scraper ring are installed, make sure that the upper and lower wear lips rotate easily in the groove.
Ring No. 2 is installed next (average). It usually has a stamp on it (TOR), which should be facing up,
Attention: Do not confuse the upper and middle rings - they have a different cross section.

Piston ring position
Use a ring setting device and make sure the mark (arrow) points upwards, then insert the ring into the middle groove of the piston. Do not stretch the ring more than is necessary for the piston to pass through it.
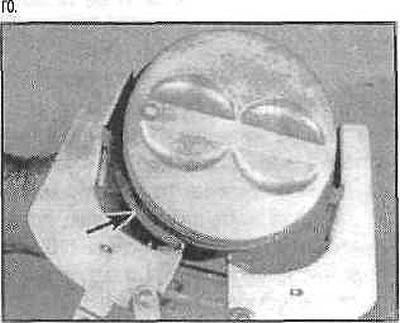
Install the top in the same way (№1) ring. Make sure the label is facing up.
Repeat the above operations for all pistons and rings.