
- Home
- BMW 3 Series
- E46
- Transmission
- Clutch
- Clutch assembly — removal, inspection and installation
Clutch assembly — removal, inspection and installation (BMW 3 Series E46)
Warning! Dust generated by wear of clutch friction linings may contain asbestos, which is hazardous to health. Do not blow compressed air into clutch components or inhale this air. Do not use gasoline (or mineral based solvents) to clean the clutch from dust. To clean the clutch components, use only brake system cleaners or methyl alcohol. After cleaning the clutch components with a rag, throw this rag into a special container with a sealed lid.
Note: If you are going to reinstall the pressure plate, you will need BMW tool 212 170 to compress the diaphragm spring before installing the clutch cover. You may need tool 212 142 to center the plate.
Removal
1. Remove the gearbox (see chapter 7A).
2. If you plan to reinstall the clutch assembly, mark the position of the clutch housing relative to the flywheel to facilitate installation of the assembly in the same position.
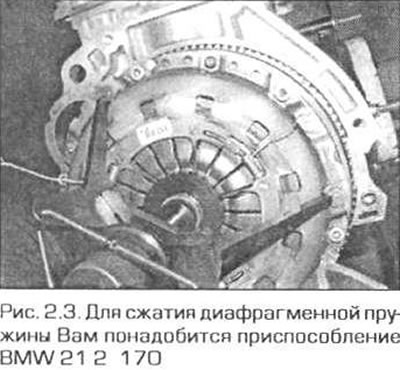
3. If you plan to reinstall the pressure plate, insert the three protrusions of the tool (No. 21 2 170) into the holes in the casing in the area of the adjusting springs (Fig. 2.3). Screw in the knurled ring of the tool to secure the fingers. Then screw in the shaft of the tool and compress the diaphragm spring.
4. Regardless of whether you are going to change the pressure plate or not, gradually unscrew the bolts securing the clutch housing to the flywheel and remove the washers (if they exist).
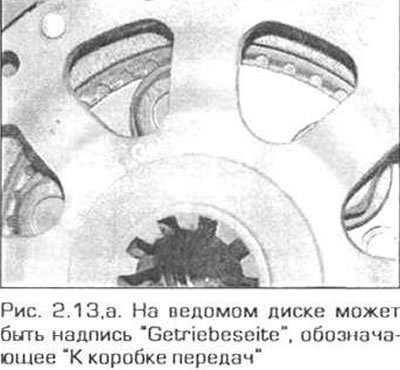
5. Remove the flywheel housing. Be prepared to support the clutch disc, which may fall when the housing is removed. Note the location of the clutch disc. There are usually markings on the disc "Engine side" ("To the engine") and "Transmission side" ("To the transmission"). The more protruding side of the disc hub should be facing away from the flywheel.
Examination
6. After removing the clutch assembly, clean it from dust with a dry cloth. Although most clutch discs use asbestos-free linings, some linings may still contain asbestos, so precautions must be taken. Asbestos dust is hazardous to health and should not be inhaled.
7. Inspect the driven disc surfaces and make sure there is no excessive wear of the linings or damage to the rivets. Make sure that the disc is not warped, damaged or its splines are not worn. The surface of the linings may have small shiny spots. If there are traces of oil on the disc (having the appearance of black spots), the disc must be replaced. The location of the oil leak must be found and the fault must be corrected before reinstalling the clutch assembly. Typically, oil can leak through the rear crankshaft oil seal or through the primary shaft oil seal of the gearbox (or through both cuffs). The replacement of these cuffs is described in the relevant section chapters 2 and in chapter 7A. The driven disk must also be replaced if the linings are excessively worn or the distance from the lining surface to the rivet heads is less than the minimum allowable (see Technical data).
8. Inspect the flywheel and pressure plate surfaces. If there are any scratches or large chips, replace them. The pressure plate should also be replaced if there are cracks or the diaphragm spring is broken.
9. Inspect the release bearing (see paragraph 3).
10. Inspect the crankshaft centering bearing. The bearing should rotate smoothly and quietly. If the surface of the bearing that contacts the transmission input shaft is damaged or worn, replace the bearing (see the relevant part of Chapter 2).
Installation
11. If you are installing new clutch assembly parts, clean them from preservative.
12. It is very important to prevent oil or dirt from getting on the surface of the driven disk linings, as well as on the working surfaces of the flywheel and pressure plate. Install the clutch assembly only with clean hands; wipe the flywheel and pressure plate with clean rags.
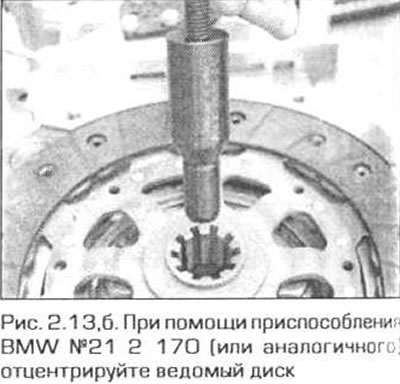
13. Apply a small amount of grease containing molybdenum disulfide to the splines of the driven disc, then place the disc on the flywheel with the longer side of the hub facing away from the flywheel (most discs are marked "To Engine" or "To Transmission") (fig. 2.13.a). Using the BMW tool #212 170, center the driven disk on the flywheel. If you do not have this tool, make your own (fig. 2.13.b).
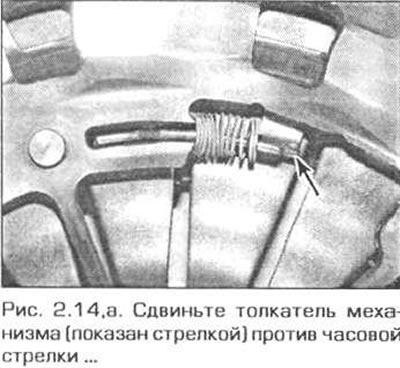
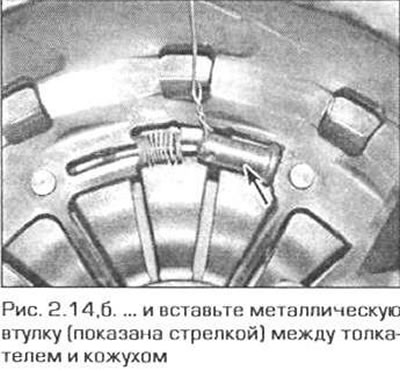
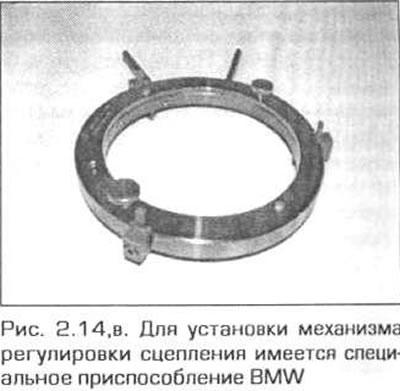
14. If you are reinstalling the old pressure plate or housing, align the pins of the BMW tool #212 170 with the housing (if you removed this device) and compress the diaphragm spring as described in point 3. Using a screwdriver, set the automatic clutch adjustment mechanism to the initial position. To do this, move the device pushers counterclockwise until they stop, slightly loosening the force of the device. After the adjusting ring is set to the initial position, compress the diaphragm spring again with the device and insert temporary stops between the device pushers and the clutch housing. Keep in mind that there is a special BMW device for setting the mechanism to the initial position (fig. 2.14,a-c).
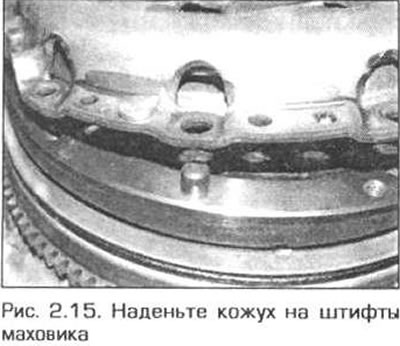
15. Install the clutch assembly in place, aligning the marks on the casing and flywheel. The casing should sit on the flywheel pins (Fig. 2.15). Insert the bolts with washers and tighten them to the required torque.
16. If you are installing a new housing, insert a 14mm Allen key into the center of the diaphragm spring retainer and turn it clockwise to release the spring.
17. If you are installing the old casing, remove the diaphragm spring compressor. Remove the bushings that held the clutch adjustment mechanism pushers in place (Fig. 2.17).
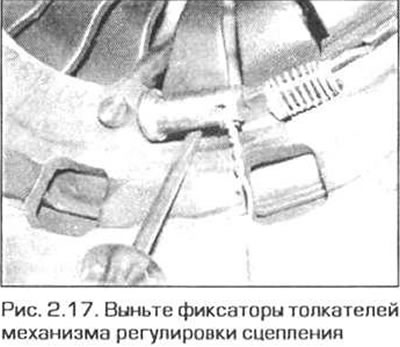
Caution: The mechanism ring may swing out suddenly after the last locking pin is removed. Keep your hands away from the adjustment mechanism.
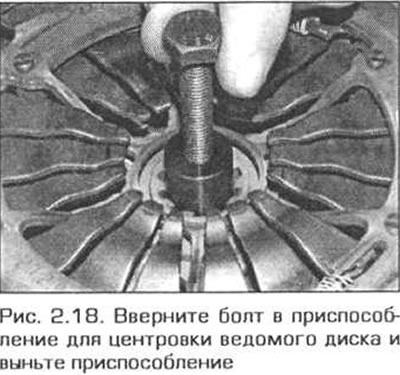
18. Remove the driven disk centering device. To do this, screw a 10 mm diameter bolt into the device and remove the device using pliers (Fig. 2.18).
19. Install the gearbox (see chapter 7A).
This article is available at russian, bulgarian, belarusian, ukrainian, serbian, croatian, romanian, polish, slovak, hungarian
Article verified: Ilyinsky Matvey
Share information:
Previous articles
БМВ E46: Clutch
Next articles
Similar articles on other types of BMW cars:
Removal, inspection and installation of clutch components BMW 5 Series E28 (1981-1988)
Removal and installation the clutch master cylinder BMW 5 Series E12 (1972-1981)
Drive chain and sprockets — removal, inspection and installation BMW 7 Series E32 (1986-1994)
Removal and installation the clutch pedal BMW 7 Series E38 (1994-2001)
Removal and installation the clutch assembly BMW X3 E83 (2003-2010)
Removal and installation the clutch BMW X5 E53 (1999-2006)
Link in different formats to this page
Visitor comments
No comments yet
- General information
- Manual
- Maintenance
- Power unit
- Engine repair
- Cooling system
- Power system (gasoline)
- Injection system (gasoline)
- Fuel system (diesel)
- Exhaust system
- Ignition system
- Charge and launch systems
- Transmission
- Car gearbox
- Clutch and drive shafts
- Chassis
- Brake system
- Suspension front and rear
- Steering
- Body
- Body care and repair
- Exterior
- Interior
- Electrical equipment
- Troubleshooting
- Lighting and signaling
- Equipment and devices
- Heater and air conditioner
- Electrical circuits
- General information
- Manual
- Repair on the road
- Weekly checks
- Maintenance
- Troubleshooting
- Power unit
- 4 cylinder engines
- 6 cylinder engines
- Engine overhaul
- Cooling and heating
- Fuel and exhaust system
- Starting and charging system
- Ignition system
- Transmission
- Clutch
- Mechanical gearbox
- Automatic gearbox
- Cardan and drive shafts
- Chassis
- Brake system
- Wheel suspension
- Steering
- Body
- Exterior
- Interior
- Electrical equipment
- Equipment and devices
- Electrical circuits
- General information
- Maintenance
- Power unit
- Engine repair
- Cooling system
- Ignition system
- Supply system
- Fuel injection system
- Exhaust system
- Transmission
- Clutch
- Car gearbox
- Front and rear axle
- Chassis
- Steering
- Brake system
- Body
- Exterior
- Interior
- Electrical equipment
- Heating system
- Equipment and devices
- Power devices
- Electrical circuits
- Power unit
- M10/M20 engine
- M40 engine
- Ignition system
- Lubrication system
- Cooling system
- Supply system
- Fuel injection
- Exhaust system
- Transmission
- Clutch
- Manual gearbox
- Front axle
- Rear axle
- Chassis
- Steering
- Brake system
- Body
- Exterior
- Interior
- Electrical equipment
- Heating system
- Equipment and devices
- Electrical circuits
- General information
- Specifications
- Operation and maintenance
- 4-cylinder engine
- Engine repair
- Cooling and lubrication system
- Supply system
- Ignition system
- 6-cylinder engine
- Engine repair
- Cooling and lubrication system
- Supply system
- Fuel injection system
- Ignition system
- Transmission
- Clutch
- 4-speed manual gearbox
- 5-speed manual gearbox
- Automatic gearbox
- Cardan and rear axle
- Chassis
- Steering
- Front suspension
- Rear suspension
- Brake system
- Electrical equipment
- Equipment and devices
- Electrical circuits