
- Home
- BMW 5 Series
- E12
- Power unit
- Ecotronic power supply system
- Checking the removed 1st chamber throttle servo
Checking the removed 1st chamber throttle servo (BMW 5 Series E12)
Removal the servo drive
Remove the air filter.
Disconnect the servo connector.
Disconnect the vacuum and atmospheric valve hoses from the servo drive.
Disconnect the idle speed switch connector.
Remove the servo from the carburetor by unscrewing the three mounting nuts (to make this operation easier, you can first remove the carburetor from the engine).
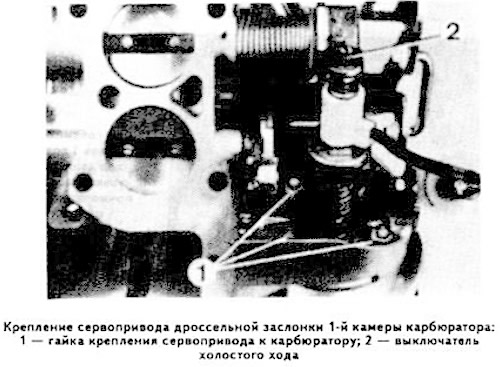
Checking for leaks
Apply 12V to the servo connector pin "2" and connect the connector pin "3" to ground; at the same time, the contacts of the vacuum valve open.
Connect the tester (in ohmmeter mode) to plugs "4" and "7" of the servo drive connector.
Attach the hand vacuum pump hose to the "A" port of the servo and create a vacuum (the servo pusher is pushed in), at which the tester will show a resistance of 500-700 Ohms.
Disconnect the ground wire from the servo connector plug "3"; at the same time, the contacts of the vacuum valve close.
Disconnect the vacuum pump hose from the servo motor port "A". If the resistance value increases by more than 200 ohms within 1 minute, replace the servo motor.
Checking the stroke length and retraction duration of the servo pusher
Using a hand vacuum pump, apply a constant vacuum of approximately 250 mbar to port "A" of the servo drive.
Apply 12V to the servo connector plug "2" and connect the servo connector plug "3" to ground. The servo pusher should move in quickly (no more than 1 sec).
Disconnect the electrical wires and vacuum pump hose from the servo drive.
Measure the distance (see photo) between the end of the servo housing and the end of the idle switch (in a free position), which should be within 56.8-59.2 mm.
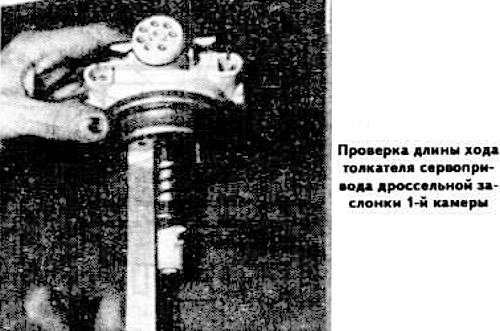
If the duration or length of the pushrod retraction stroke is not within specification, replace the servo.
Apply 12 V to the servo drive connector plug "2" and connect the connector plug "8" to ground. The servo drive pusher should extend for no more than 1 sec.
Measure the distance (see photo) between the end of the servo housing and the end of the idle switch (in a free position), which should be within 69.5-71.5 mm.
If the pushrod extension stroke duration or length is not within specification, replace the actuator.
Checking the idle switch
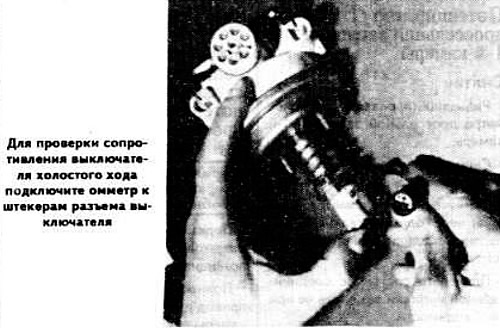
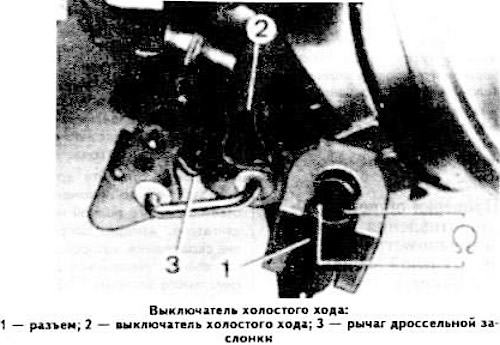
Connect the tester (in ohmmeter mode) to the plugs of the idle switch connector and measure the resistance, which when the switch is closed should be 9 Ohm, when the switch is opened - R = ∞.
Checking the vacuum and atmospheric valves
Connect the tester (in ohmmeter mode) to the plugs "2" and "3" of the servo drive connector and measure the resistance of the vacuum valve winding. Then connect the tester to the plugs "2" and "8" of the servo drive connector and measure the resistance of the atmospheric valve winding. In both cases, the resistance value should be within 35-80 Ohms.
Potentiometer check
Connect the tester (in ohmmeter mode) to the plugs "4" and "5" of the servo connector and check the total resistance of the potentiometer, which should be within 1.3-2.5 kOhm.
Connect the tester to terminals "4" and "7" of the servo connector and measure the resistance with the servo pusher extended, which should be within 0.9-1.9 kOhm.
Slowly push the servo pusher in and measure the potentiometer resistance, which should be between 0-500 ohms.
If the resistance values are not within the specified limits, replace the servo.
Installing the servo drive
The servo drive is installed in the reverse order of removal. If it is necessary to adjust the servo drive, replace the idle stop screw.
This article is available at russian, bulgarian, belarusian, ukrainian, serbian, croatian, romanian, polish, slovak, hungarian
Article verified: Polikarpov Saveliy
Share information:
Previous articles
БМВ E12: Ecotronic power supply system
Next articles
Similar articles on other types of BMW cars:
Adjusting the pneumatic drive of the throttle valve of the 1st chamber BMW 3 Series E21 (1975-1983)
Removal and installation, checking of the throttle valve regulator BMW 3 Series E30 (1982-1994)
Checking the engine oil level BMW 7 Series E32 (1986-1994)
Bleeding the cooling system and checking it for leaks (M54, N46, N47,… BMW X3 E83 (2003-2010)
Checking the tightness between the cooling system and the combustion… BMW X5 E53 (1999-2006)
Adjusting the pneumatic drive of the throttle valve of the 1st chamber BMW 3 Series E21 (1975-1983)
Removal and installation, checking of the throttle valve regulator BMW 3 Series E30 (1982-1994)
Checking the engine oil level BMW 7 Series E32 (1986-1994)
Bleeding the cooling system and checking it for leaks (M54, N46, N47,… BMW X3 E83 (2003-2010)
Checking the tightness between the cooling system and the combustion… BMW X5 E53 (1999-2006)
Link in different formats to this page
Visitor comments
No comments yet
- General information
- Governing bodies
- Manual
- Maintenance
- Power unit
- Engine repair
- Lubrication system
- Cooling system
- Ignition system
- Supply system
- Injection system (gasoline)
- Injection system (diesel)
- Exhaust system
- Transmission
- Clutch
- Car gearbox
- Front axle
- Rear axle
- Chassis
- Steering
- Brake system
- Wheels and tires
- Body
- Interior
- Exterior
- Heating system
- Electrical equipment
- Equipment and devices
- Power devices
- Windscreen wipers
- Electrical circuits
- General information
- Manual
- Maintenance
- Power unit
- Engine repair
- Ignition system
- Engine lubrication system
- Cooling system
- Fuel system (gasoline)
- Fuel system (diesel)
- Exhaust system
- Transmission
- Clutch
- Car gearbox
- Chassis
- Front and rear suspension
- Steering
- Brake system
- Body
- Exterior
- Interior
- Electrical equipment
- Heating system
- Equipment and devices
- Power devices
- Electrical circuits
- General information
- Manual
- Maintenance
- Power unit
- Engine in a car
- Engine overhaul
- Cooling system
- Supply system
- Ignition system
- Control system
- Transmission
- Clutch
- Manual gearbox
- Automatic gearbox
- Transmission line
- Chassis
- Steering
- Front suspension
- Rear suspension
- Brake system
- Body
- Body elements
- Car care and painting
- Electrical equipment
- Heater and air conditioner
- Equipment and devices
- Starter and generator
- Electrical circuits
- General information
- Operation and maintenance
- Specifications
- Power unit
- Engine repair
- Cooling and lubrication system
- Supply system
- Ecotronic power supply system
- Fuel injection system
- Ignition system
- Transmission
- Clutch
- Gearbox BMW 242/4
- Gearbox Getrag 262/8
- Gearbox Getrag 265/6
- Automatic gearbox
- Cardan gear
- Rear axle
- Chassis
- Steering
- Front suspension
- Rear suspension
- Brake system
- Electrical equipment
- Equipment and devices
- Electrical circuits