
Disconnect the propeller shaft from the output shaft flange by unscrewing the nuts of the elastin coupling bolts on the side of the box so that the flexible coupling remains on the propeller shaft.
Disconnect the rear propeller shaft from the final drive gear flange.
Detach the intermediate support cross member from the body floor.
Remove the driveline assembly by removing the front driveshaft from the centering sleeve of the transmission output flange.
Installing the driveline assembly is carried out in the reverse order of removal, taking into account the following:
- after installing the driveline assembly, screw on the fastening bolts without tightening them, and check the centering of the driveshaft using tool 6006-4 or a self-made template;
- if necessary, adjust the centering by lateral displacement of the intermediate support (displacement of the mounting bolts in the oval holes of the mounting cross member) or by adjusting its position in height by placing washers on the bolts securing the cross member of the intermediate support to the bottom of the body;
- preload the intermediate support with 2 mm towards the front of the vehicle by moving its cross member before tightening the nuts of the cross member mounting bolts;
- to prevent deformation of the flexible coupling, tighten its bolts by turning the nuts while holding the bolt heads.

Note. The cardan gear is balanced in the assembled state. Therefore, if one of the driveshafts is damaged, the driveline assembly must be replaced.
On vehicles from model year 1977, the installation of the cardan transmission is carried out taking into account the following:
- check the condition of the centering unit of the front propeller shaft and, if necessary, lubricate it with Longterm 2 grease. In case of malfunction, replace it;
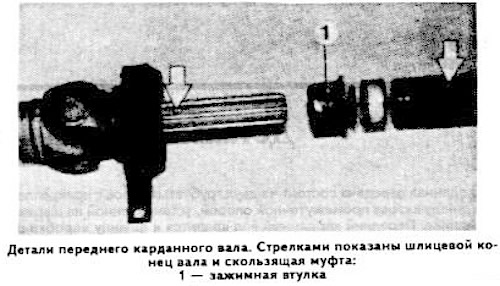
- if there is a knocking or scraping noise in motion, eliminate the play of the splined end of the front shaft by applying a special adhesive such as Loctite He 75 green. To do this, mark the position of the slots with a core. Unscrew clamping sleeve 1 (see photo) and remove the felt ring. Clean the splines and spray them with Aktivator Q. Apply special adhesive to the shaft splines. Assemble the cardan shaft and tighten the clamping sleeve. Hardening time of special adhesive type Loctite No. 75 approx. 2 hours.
Warning. The driveline is balanced as an assembly, so the driveshaft must be set to its original position when connecting the front and rear shafts.