
Table of contents: Removal ↓ Installation ↓
- Home
- BMW 5 Series
- E34
- Power unit
- Engine repair
- Removal and installation the cylinder head — model 518i
Removal and installation the cylinder head — model 518i (BMW 5 Series E34)
The cylinder head is removed on a cold engine. The intake and exhaust manifolds do not unscrew.
Signs of a defective cylinder head gasket are:
Disconnect the ground wire from the battery.
Remove the timing belt.
Remove the camshaft timing pulley.
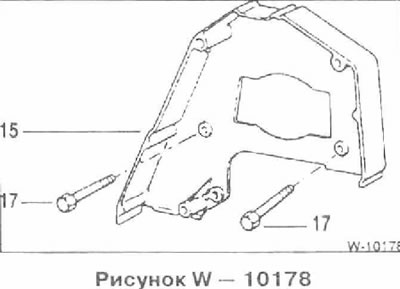
Unscrew 2 bolts 17 of the inner casing of the toothed belt 15. Remove the casing.
Remove the throttle lever cover. To do this, unscrew the bolts, tilt the cover up and unscrew the 2 front bolts.
Disconnect the throttle cable 1 by pulling the clamp in the direction of the arrow.
Automatic transmission. Disconnect cable 2
Unscrew bolts 3 and put the cables with the bracket aside.
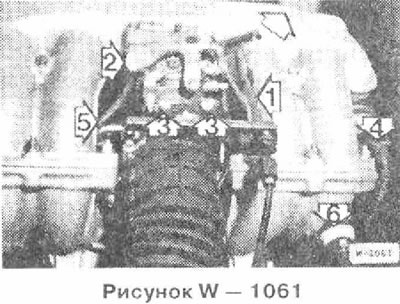
Disconnect idle speed control valve connector 4 and vacuum hoses 5 and 6.
Loosen the clamps and disconnect the air intake hose.
Turn left and disconnect connector 1 of the air flow meter. Disconnect connector 2 of the fuel tank ventilation valve.
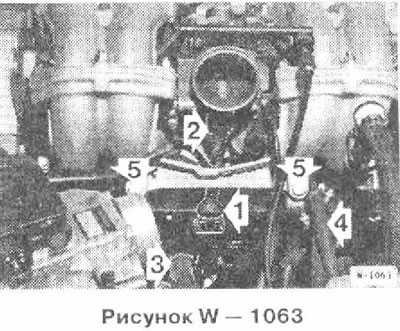
Disconnect connector 1 of the injectors and connector 2 of the throttle switch.
Disconnect heating hose 3.
Disconnect fuel hoses 4 and close them with plugs.
Unscrew the fuel hose bracket.
Loosen the bolts securing the 5 intake manifold support.
Remove the water hose.
Raise the car.
Unscrew the front muffler pipe from the exhaust manifold.
Drain the coolant by unscrewing the drain plug on the side of the engine block under the exhaust manifold. After draining, immediately screw on and tighten the drain plug.
Disconnect the ventilation hose.
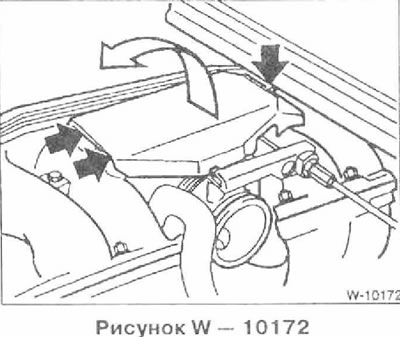
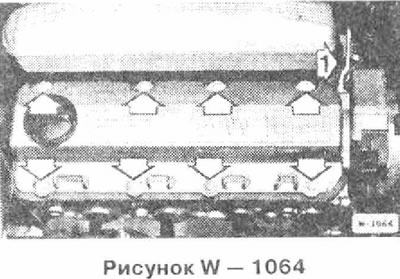
Remove the cylinder head cover.
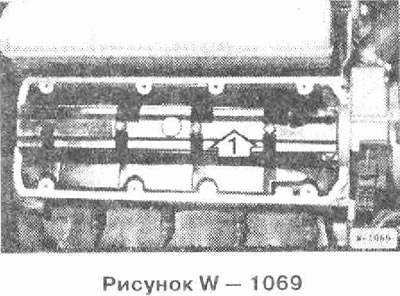
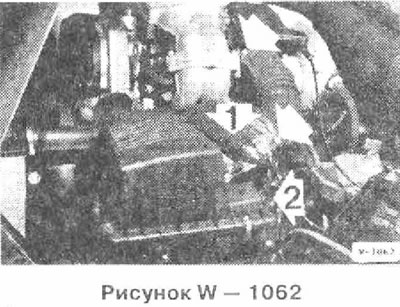
Remove camshaft housing 1.
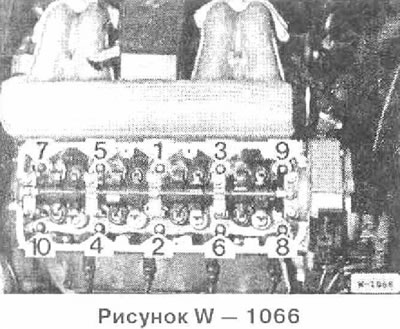
Loosen the cylinder head bolts in reverse order from 10 to 1 by ½ turn, then unscrew. A Torx key for E12 bolts is required to unscrew the bolts.
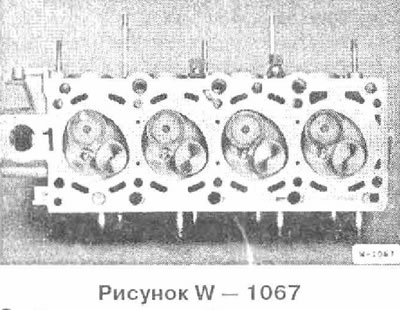
Remove the cylinder head.
Before installation, clean the cylinder head and cylinder block from the remains of the old seal. Do not allow the remains of the seal to get into the cylinder holes. Cover the holes with rags.
Measure the flatness of the cylinder head and engine block with a steel ruler in the longitudinal and transverse directions and, if necessary, mill it (work at a service station). The maximum permissible flatness is 0.03 mm. See Table 1.
Table 1

Thoroughly clean the cylinder head holes from oil and other objects.
It is imperative to replace the cylinder head gasket.
Apply the new gasket without the sealing compound so that the holes are not covered. The inscription "TOP" should be located on top, and the inscription "FRONT" should be on the side of the toothed belt.
Replace O-ring 1 for hole in engine block.
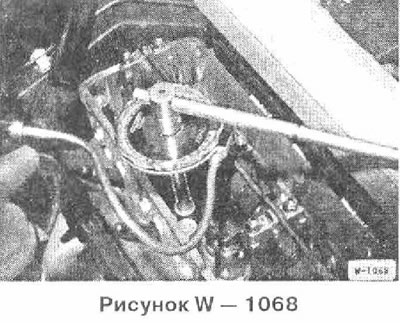
Before installing the cylinder head, check that the camshaft is at top dead center.
Install the cylinder head.
Lubricate new cylinder head bolts with engine oil and screw them in by hand. Be sure to install only new bolts.
Tighten the cylinder head bolts in three passes each time in sequence 1 through 10:
Insert and screw on the inner timing belt cover.
Install the timing belt.
Insert the camshaft housing.
Check the integrity of the cylinder head cover gasket and replace if necessary.
Install the cylinder head cover, tighten the bolts in a crosswise sequence from the inside out to a torque of 9 Nm.
Connect the ventilation hose
Screw the front muffler pipe with a new gasket and new self-locking nuts. Pre-coated the bolts with copper (high temperature) paste. First tighten all the bolts to a torque of 30 Nm, and then tighten them to a torque of 50 Nm.
Tighten the intake manifold support mounting bolts.
Connect all hoses and secure them with clamps.
Connect the electrical wires.
Screw on the fuel hose bracket.
Screw on the cable bracket and secure the cables in the clamps.
Install the throttle lever cover.
Connect the ground wire to the battery.
Check the engine oil level, top up if necessary. If the cylinder head was removed to replace a blown cylinder head gasket, it is recommended to change the oil and replace the oil filter, as coolant may have gotten into the oil.
Signs of a defective cylinder head gasket are:
- loss of engine power
- decrease in coolant level, white smoke from exhaust gases when the engine is warm
- coolant in engine oil. Oil level does not decrease, but on the contrary increases. Gray color of oil in the engine, foam on the oil dipstick. Oil dilution.
- engine oil in the coolant, oil loss. Attention: In this case, after repairs, it is necessary to remove the radiator and flush it with "Solvethane", to remove any remaining oil from the radiator.
- strong bubbling of coolant.
- lack of compression in two adjacent cylinders.
Removal
Disconnect the ground wire from the battery.
Caution: When the battery is disconnected, the information in the electronic memory devices, such as the engine fault memory or the radio security code memory, is erased. When disconnecting the battery, follow the instructions in the section "Removing and installing the battery".
Remove the timing belt.
Remove the camshaft timing pulley.
Unscrew 2 bolts 17 of the inner casing of the toothed belt 15. Remove the casing.
Remove the throttle lever cover. To do this, unscrew the bolts, tilt the cover up and unscrew the 2 front bolts.
Disconnect the throttle cable 1 by pulling the clamp in the direction of the arrow.
Automatic transmission. Disconnect cable 2
Unscrew bolts 3 and put the cables with the bracket aside.
Disconnect idle speed control valve connector 4 and vacuum hoses 5 and 6.
Loosen the clamps and disconnect the air intake hose.
Turn left and disconnect connector 1 of the air flow meter. Disconnect connector 2 of the fuel tank ventilation valve.
Disconnect connector 1 of the injectors and connector 2 of the throttle switch.
Disconnect heating hose 3.
Disconnect fuel hoses 4 and close them with plugs.
Unscrew the fuel hose bracket.
Loosen the bolts securing the 5 intake manifold support.
Remove the water hose.
Raise the car.
Unscrew the front muffler pipe from the exhaust manifold.
Drain the coolant by unscrewing the drain plug on the side of the engine block under the exhaust manifold. After draining, immediately screw on and tighten the drain plug.
Disconnect the ventilation hose.
Remove the cylinder head cover.
Remove camshaft housing 1.
Loosen the cylinder head bolts in reverse order from 10 to 1 by ½ turn, then unscrew. A Torx key for E12 bolts is required to unscrew the bolts.
Remove the cylinder head.
Caution: Do not place the cylinder head on the contact surface after removal, otherwise the fully open valves may be damaged. Therefore, the cylinder head should be placed on 2 wooden pads.
Installation
Before installation, clean the cylinder head and cylinder block from the remains of the old seal. Do not allow the remains of the seal to get into the cylinder holes. Cover the holes with rags.
Measure the flatness of the cylinder head and engine block with a steel ruler in the longitudinal and transverse directions and, if necessary, mill it (work at a service station). The maximum permissible flatness is 0.03 mm. See Table 1.
Table 1
Note: With a milled cylinder head, depending on the height of the cylinder head after machining, it is possible to install a cylinder head gasket of either the original thickness or one 0.3 mm thicker. Installing a thicker gasket prevents a reduction in the volume of the combustion chamber. It should also be taken into account that the circular cross-section sealing ring 1 of the cooling channel must be correspondingly thicker, see the figure.
Thoroughly clean the cylinder head holes from oil and other objects.
Caution: There should be no oil left in the blind holes, otherwise the bolts will not fully tighten the cylinder head, even though they are tightened to the correct torque. In addition, the engine block may crack.
It is imperative to replace the cylinder head gasket.
Apply the new gasket without the sealing compound so that the holes are not covered. The inscription "TOP" should be located on top, and the inscription "FRONT" should be on the side of the toothed belt.
Replace O-ring 1 for hole in engine block.
Before installing the cylinder head, check that the camshaft is at top dead center.
Install the cylinder head.
Lubricate new cylinder head bolts with engine oil and screw them in by hand. Be sure to install only new bolts.
Attention: Tighten the cylinder head bolts very carefully. Before tightening the bolts, check the accuracy of the torque wrench. In addition, a protractor is required to tighten the cylinder head bolts, for example, the HAZET 6690. If you do not have a protractor, place the wrench on the bolt head, attach a square to the wrench handle and mark the desired angle with chalk. Then turn the wrench handle in one pass to the line marked with chalk.
Tighten the cylinder head bolts in three passes each time in sequence 1 through 10:
- 1st pass: tighten the bolts with a torque wrench to a tightening torque of 30 Nm.
- 2nd pass: tighten the bolts with a hard wrench to 90°.
- 3rd pass: tighten the bolts with a rigid wrench to 90°.
Insert and screw on the inner timing belt cover.
Install the timing belt.
Insert the camshaft housing.
Check the integrity of the cylinder head cover gasket and replace if necessary.
Install the cylinder head cover, tighten the bolts in a crosswise sequence from the inside out to a torque of 9 Nm.
Connect the ventilation hose
Screw the front muffler pipe with a new gasket and new self-locking nuts. Pre-coated the bolts with copper (high temperature) paste. First tighten all the bolts to a torque of 30 Nm, and then tighten them to a torque of 50 Nm.
Tighten the intake manifold support mounting bolts.
Connect all hoses and secure them with clamps.
Connect the electrical wires.
Screw on the fuel hose bracket.
Screw on the cable bracket and secure the cables in the clamps.
Install the throttle lever cover.
Connect the ground wire to the battery.
Check the engine oil level, top up if necessary. If the cylinder head was removed to replace a blown cylinder head gasket, it is recommended to change the oil and replace the oil filter, as coolant may have gotten into the oil.
Note: After 1000 km, there is no need to tighten the cylinder head bolts.
This article is available at russian, bulgarian, belarusian, ukrainian, serbian, croatian, romanian, polish, slovak, hungarian
Article verified: Polikarpov Saveliy
Share information:
Previous articles
БМВ E34: Engine repair
Next articles
Similar articles on other types of BMW cars:
Removal and installation the cylinder head BMW 3 Series E30 (1982-1994)
Removal and installation the cylinder head. Models 318is, 318ti BMW 3 Series E36 (1990-2000)
Cylinder head of gasoline engines of the M52 series — removal and… BMW 7 Series E32 (1986-1994)
Removal and installation cylinder head covers BMW 7 Series E38 (1994-2001)
Removal and installation the cylinder head BMW X3 E83 (2003-2010)
Removal and installation the lock cylinder BMW X5 E53 (1999-2006)
Link in different formats to this page
Visitor comments
No comments yet
- General information
- Governing bodies
- Manual
- Maintenance
- Power unit
- Engine repair
- Lubrication system
- Cooling system
- Ignition system
- Supply system
- Injection system (gasoline)
- Injection system (diesel)
- Exhaust system
- Transmission
- Clutch
- Car gearbox
- Front axle
- Rear axle
- Chassis
- Steering
- Brake system
- Wheels and tires
- Body
- Interior
- Exterior
- Heating system
- Electrical equipment
- Equipment and devices
- Power devices
- Windscreen wipers
- Electrical circuits
- General information
- Manual
- Maintenance
- Power unit
- Engine repair
- Ignition system
- Engine lubrication system
- Cooling system
- Fuel system (gasoline)
- Fuel system (diesel)
- Exhaust system
- Transmission
- Clutch
- Car gearbox
- Chassis
- Front and rear suspension
- Steering
- Brake system
- Body
- Exterior
- Interior
- Electrical equipment
- Heating system
- Equipment and devices
- Power devices
- Electrical circuits
- General information
- Manual
- Maintenance
- Power unit
- Engine in a car
- Engine overhaul
- Cooling system
- Supply system
- Ignition system
- Control system
- Transmission
- Clutch
- Manual gearbox
- Automatic gearbox
- Transmission line
- Chassis
- Steering
- Front suspension
- Rear suspension
- Brake system
- Body
- Body elements
- Car care and painting
- Electrical equipment
- Heater and air conditioner
- Equipment and devices
- Starter and generator
- Electrical circuits
- General information
- Operation and maintenance
- Specifications
- Power unit
- Engine repair
- Cooling and lubrication system
- Supply system
- Ecotronic power supply system
- Fuel injection system
- Ignition system
- Transmission
- Clutch
- Gearbox BMW 242/4
- Gearbox Getrag 262/8
- Gearbox Getrag 265/6
- Automatic gearbox
- Cardan gear
- Rear axle
- Chassis
- Steering
- Front suspension
- Rear suspension
- Brake system
- Electrical equipment
- Equipment and devices
- Electrical circuits