
With further lowering of the float, the contact of the signaling device closes and a warning lamp for the remaining fuel lights up on the dashboard.
Withdrawal
Attention: Do not make open fire! Fire hazard! When removing the fuel gauge, the fuel tank must not be completely filled. Therefore pump the fuel into a suitable container. Fuel vapors are poisonous, do not inhale fuel vapors. If possible, work outdoors or ensure adequate ventilation.
Disconnect the positive and ground wires from the battery.
Pull out the luggage compartment floor trim.
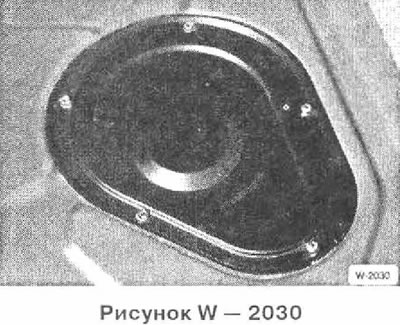
Loosen the screws and remove the cover.
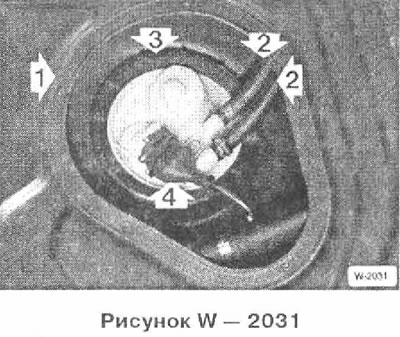
Mark fuel hoses 2 with adhesive tape and disconnect them from the fuel reserve sensor 1, to do this release the clamps.
Caution: The fuel system is pressurized, so disconnect the hoses slowly and wipe off the leaking fuel with a rag.
Disconnect the connector 4. To do this, move the metal strip to the side and disconnect the connector.
Carefully knock off the union nut - 3 strokes to the left. To do this, BMW workshops use tool 161020. This can also be done with a hardwood rod or a large screwdriver.
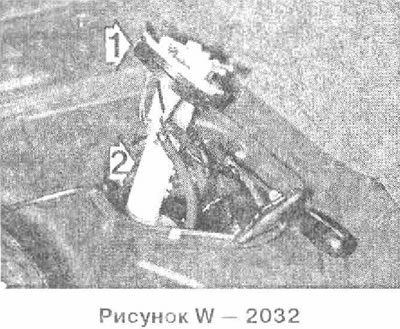
Raise the fuel gauge 1, tilt it to the side and pull it out. When doing this, lay a rag and wipe off the escaping fuel.
If only the fuel gauge is being removed, mark the fuel hoses with adhesive tape before disconnecting them.
Examination
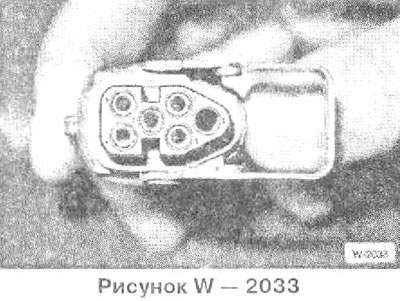
The list of contacts of the pump connector in the fuel tank and the fuel reserve sensor:
- 1 Mass of the fuel reserve sensor
- 2 Pilot lamp
- 3 Fuel gauge
- 4 Fuel pump weight
- 5 Fuel pump 1
Connect an ohmmeter to the fuel gauge to terminals G and 31. On the connector, these are pins 1 and 3.
Keep the fuel gauge in the installation position, the float is down when the display on the vehicle would show "reserve". Set value: 86.7±2.5 ohms.
Turn the sensor 180°, the float is in the upper position when the display on the vehicle would show "full". Set value: 3.2±0.7 ohm.
Check the contact of the remaining fuel indicator: Connect an ohmmeter to terminals W and 31 of the fuel reserve sensor. Set value at the working position of the sensor: 0 Ohm; when reversed by 180°: infinity.
Installation
Connect the fuel pump fuel hoses to the fuel gauge.
Insert the fuel gauge with a new gasket. First insert the O-ring into the hole in the fuel tank, and then insert the sensor.
Install the fuel gauge so that the connectors are facing the fuel hoses.
Screw on and tighten the union nut.
Connect fuel hoses and secure with new clamps.
Connect the connector and secure it with a metal bracket.
Install and tighten the cover screws ensuring that the gasket is properly seated.
Connect the positive and ground wires to the battery.
Check the fuel gauge on the dashboard.