
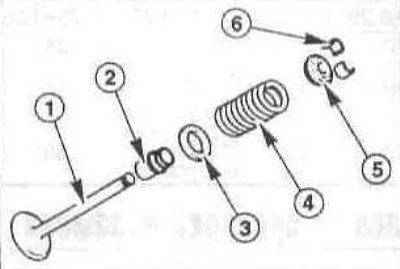
Sequence of installation of valve elements
1 — valve;
2 - valve stem seal;
3 - lower spring plate;
4 - valve spring;
5 - upper spring plate;
6 - valve crackers.
Before starting assembly, make sure the head is thoroughly cleaned.
Install new oil slingers on each valve guide. Do not tilt the oil slinger when installing, otherwise it will leak.
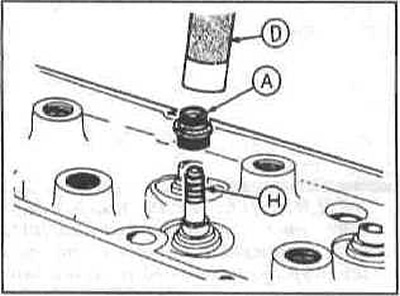
Lightly lubricate the valve stem oil deflector rings (A) and push them in until they stop using rod (D).
Caution: To avoid damaging the seal, place the mounting sleeve (H) on the stem before installing it. If there is no sleeve, seal the grooves on the stem with adhesive tape up to the valve crackers. Remove the adhesive tape after installation. Lubricate and install the first valve from the edge of the head. Apply consistent grease or clean engine oil to the valve stem. Install the springs and valve plates in place and apply pressure.
Install the keepers into the top groove, then slowly release the spring and make sure the keepers are seated. If necessary, apply a small amount of grease to each keeper to hold them in place.
Repeat this operation for the remaining valves. All parts should be installed in their original places.
Check the assembled valve spring height with a ruler or calipers. The height is measured from the top of the spring seat (or washer) to the bottom surface of the disc.
Tap the springs with a rubber mallet.
Apply molybdenum grease to the surface of the rocker arms and joints, and then install the rocker arms and joints onto the cylinder head in their original locations.
Install the removed elements in the reverse order of removal.
(Information taken from this resource «BMWMAN.RU»)