
Warning! Always replace the brake pads on both front brakes at the same time. Replacing the pads on only one wheel may result in uneven braking. Dust from worn brake pads may contain asbestos, which is very dangerous to health. Do not blow off dust with compressed air or inhale air containing asbestos. Use a respirator when working on the brakes. Do not use gasoline (or gasoline-based solvents) to clean dust, use brake cleaner or methyl alcohol.
1. Apply the parking brake, then raise the front of the vehicle and support it on stands (see "Lifting and installing the car on supports"). Remove the front wheels.
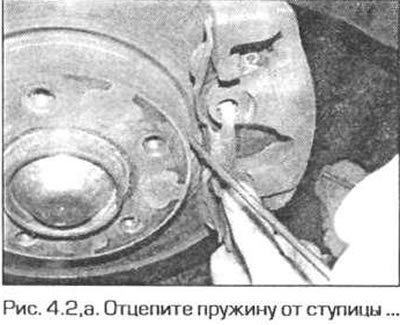
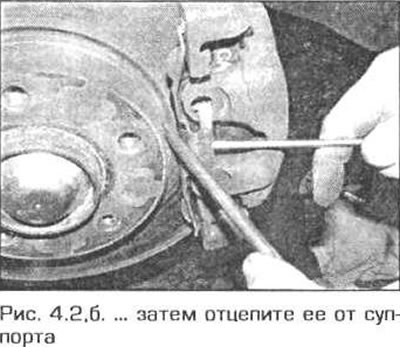
2. Using a screwdriver, carefully unhook the anti-noise spring from the side wall of the caliper, remembering its location (fig. 4.2, a, b).
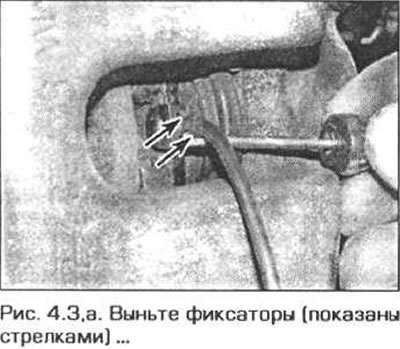
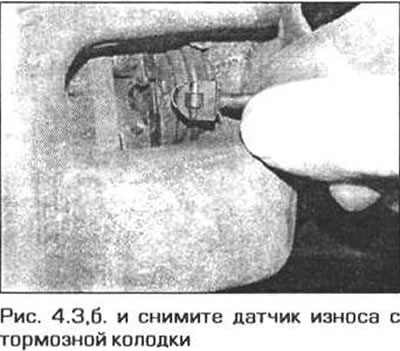
3. Remove the wear sensor from the pad (if it exists), then remove it from the caliper hole (fig. 4.3, a, b).
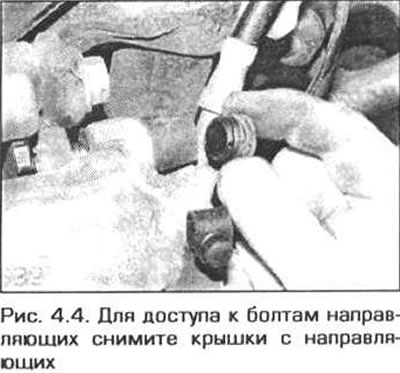
4. To access the guide bolts, remove the plastic covers from the caliper guides (Fig. 4.4).
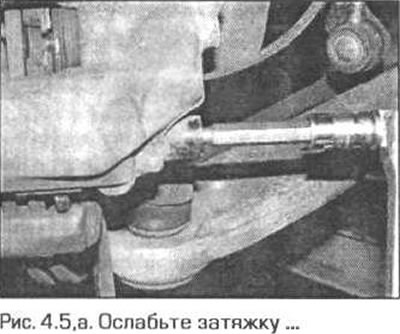
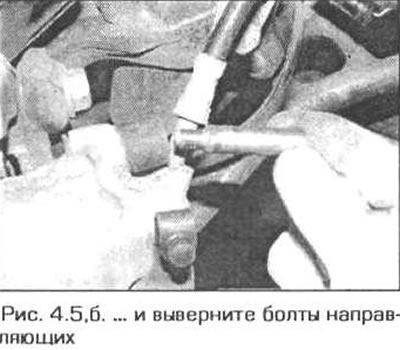
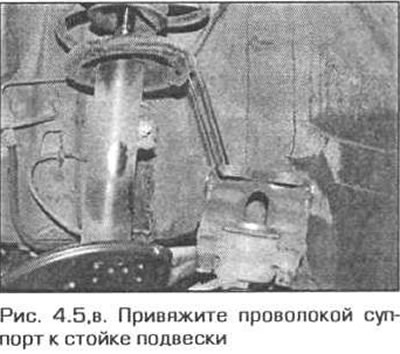
5. Using a hex key, loosen and remove the guide bolts. Remove the caliper from the bracket and secure it to the suspension strut using a piece of wire (fig. 4.5, a-c). Do not allow the caliper hose to become strained.
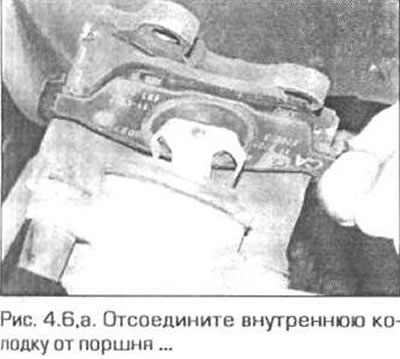
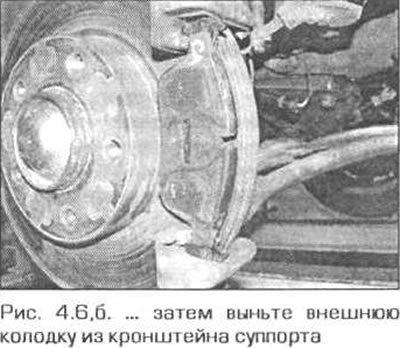
6. Disconnect the inner pad from the piston, then remove the outer pad from the caliper bracket (fig. 4.6, a, b).
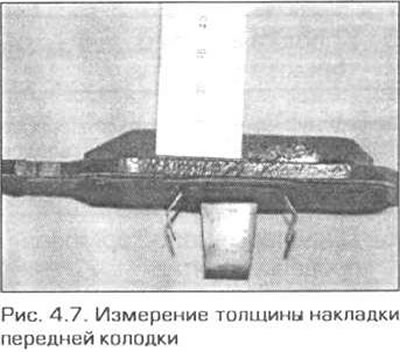
7. First of all, measure the thickness of the pad of each shoe (Fig. 4.7). If the thickness of any of the shoes is at the limit in any place, (or below it), then all four pads must be replaced. The pads should also be replaced if any of them are oily, as there is no reliable way to remove such contamination from the friction material. If one of the pads wears unevenly or is contaminated with oil, the cause must be identified and corrected before assembly begins.
If the condition of the pads is satisfactory, clean them thoroughly with a soft brush (or something similar), not forgetting the sides and back of the metal base. Clean the grooves on the surface of the overlay (if they exist) and remove any large particles of dirt or wear products embedded in the material. Thoroughly clean the pad installation areas in the caliper and support bracket.
9. Before installing the pads, make sure the guide pins are tight enough to slide freely in the caliper bracket. Brush off any dust or dirt from the caliper and piston. Do not inhale dust, as it is hazardous to your health. Inspect the piston dust seal for damage and the piston for leaks, corrosion or damage. If any of these components require attention, contact paragraph 8.
10. If you are installing new brake pads, the caliper piston must be pressed into the cylinder to provide space for the pads. Use a clamp or a wooden block as a lever for this. Clamp the caliper brake hose and connect the brake system bleeding kit to the air bleed screw. Then unscrew the bleed screw and press the piston into the cylinder. The brake fluid displaced in this process will collect in the bleed kit container (Fig. 4.10). Before you finish pressing the piston in, tighten the bleed screw. This will prevent air from entering the brake system.
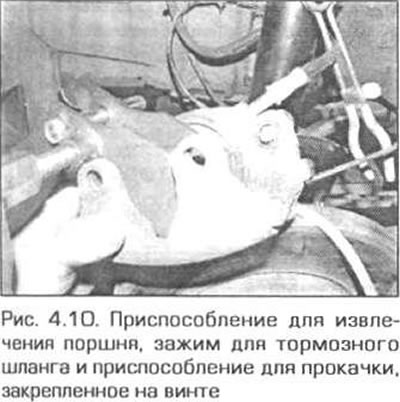
Note: ABS systems are very sensitive to dirt in the brake fluid. Even small particles of dirt can cause blockages in the system. The method of recessing the piston described above avoids the risk of contamination of the system and damage to the seals of the brake master cylinder.
11. Apply brake grease to the back of each pad. Be careful not to apply too much grease or let it come into contact with the friction material.
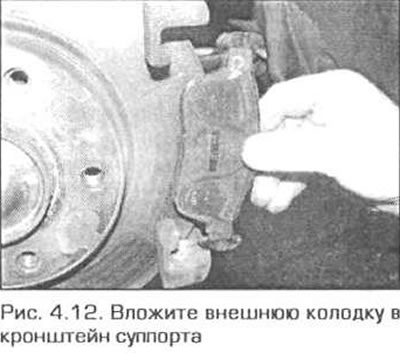
12. Insert the outer pad into the caliper bracket with the working side facing the brake disc (Fig. 4.12).
13. Secure the inner shoe to the piston, then install the caliper in place (Fig. 4.13).

14. Screw in the guide pin mounting bolts and tighten them to the specified torque. Place the covers on the guides.
15. Install the wear sensor on the outer shoe. Make sure that its wiring is correctly routed (see Fig. 4.3, a, b).
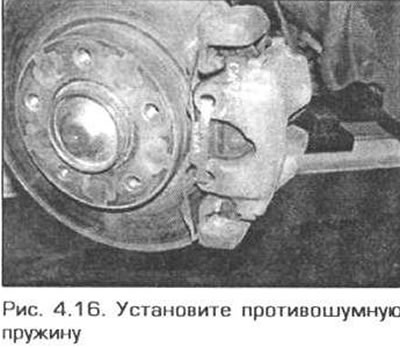
16. Fasten the anti-noise spring to the caliper (Fig. 4.16). Press the brake pedal several times to ensure that the pads approach the disc and that the brake pedal's working travel is restored.
17. Repeat the above procedure for the other front brake.
New pads do not provide maximum braking performance until they have been broken in. With this in mind, avoid heavy braking for several hundred kilometers after replacing the pads if possible.