
Annually or every 20,000 km.
This procedure does not apply to the M10 engine, which has automatic regulators.
Valve clearances can be checked with either a hot or cold engine, but keep in mind that the values obtained will vary depending on engine temperature. If you are going to check and adjust the clearances with a hot engine, you must start the engine, warm it up to normal operating temperature, and then turn it off.
If valve clearances are adjusted when the engine is hot, special care should be taken to avoid burns.
1. Remove the cylinder head cover from the engine (see Part Repair work carried out without removing the engine from the vehicle).
2. Turn the engine over until the front piston #1 is at top dead center (TDC) of the compression stroke (see section Repair work carried out without removing the engine from the vehicle).
3. Check the valve clearances for cylinder #1. The required clearance values are given in Table of sizes and adjustment data at the end of the Guide.
4. The clearance is measured by inserting a feeler gauge of the required size between the end of the valve stem and the adjusting eccentric of the valve lever. The feeler gauge should pass into the clearance with some resistance.
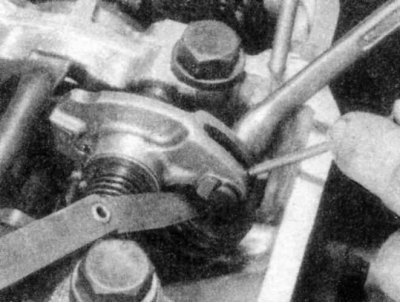
5. If the gap is too large or too small, loosen the lock nut, insert a hook made of thick metal wire and turn the eccentric until the desired gap is achieved.
6. After setting the clearance, tighten the lock nut securely, holding the eccentric in the achieved position with a hook. Check the clearance size again - sometimes it changes slightly after tightening the lock nut. In this case, adjust it to the desired value.
7. On M10 engines, the valves are adjusted in the order of cylinder operation, namely 1-3-4-2. After adjusting the valves of the first cylinder, turn the crankshaft half a turn (180°), then check and adjust the valves on the third cylinder. Repeat the procedure on the remaining cylinders.
8. On M20 and M30 engines, the valves are also adjusted in the order of cylinder operation, namely 1-5-3-6-2-4. After adjusting the valves of the first cylinder, turn the crankshaft by a third of a turn (120°), then check and adjust the valves on the fifth cylinder. Repeat the procedure on the remaining cylinders.
9. Install the cylinder head cover (use a new gasket) and tighten the mounting nuts evenly and securely.
10. Start the engine and check for oil leaks between the cylinder head cover and the cylinder head.