
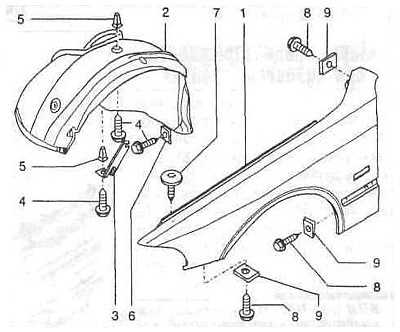
1 - left wing;
2 - inner wing (wheel arch cover);
3 — holder of the inner wing;
4 - self-tapping bolt with a hexagonal head;
5 - expanding nut;
6 - tin nut;
7 - TORX head screw;
8 - self-tapping bolt with a hexagonal head;
9 - tin nut.
Withdrawal
Squeeze the protective strip from the wing with a wide plastic spatula.
Remove the side turn signal.
Remove the headlight cover. To do this, unhook the shield from the inside, press it down from the two holders in the middle and unhook it from the outside of the hooks.
Pull the protective seal up.
Remove the top seal from the wing. Mark the position of the front wheel on the hub so that you can then reinstall the balanced wheel in its original position. Loosen the wheel bolts with the vehicle on the ground. Raise and support the vehicle in front and remove the front wheel.
Loosen the screws of the arch protection panel and pull the panel out to the side.
Loosen the screws securing the inner wing. Pull out the sliding clamps by first knocking out the sliding pins inward with a suitable punch. If there are covers on the pins, then you need to pry the pins with a screwdriver, and then remove the clip. Take out the inner wing.
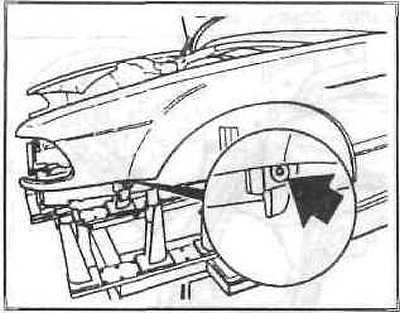
Remove the wing mounting bolts from the front strut.
Loosen the bumper.
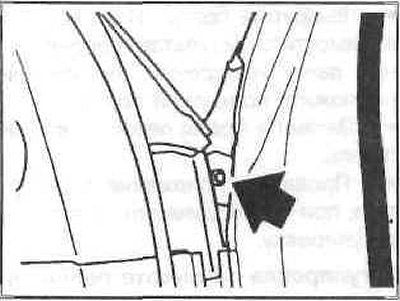
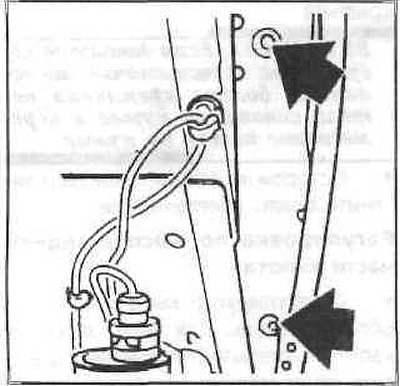
Open the door and unscrew the fastening bolt on the A-pillar through the gap.
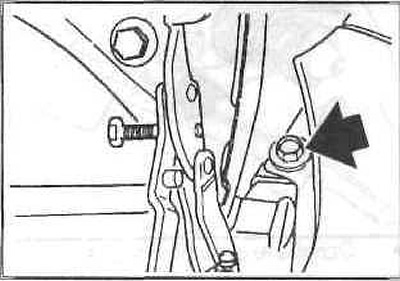
Loosen the top rear bolt (arrow).
Attention: Be careful not to lose the washers under the mounting bolts.
Due to the protective layer of the underbody, the wing sits very tightly. To weaken the wing, therefore, an industrial hair dryer is needed, which heats the air to a temperature of at least 400°C.
Point the blow dryer at the top and back of the wing and soften the protective layer. Then release the wing from the protective layer from below in front of the wing. In this place, everything must be done carefully so as not to damage the wing during removal.
Installation
Installation is carried out in the reverse order of removal.