
2. Remove one wheel mounting bolt from each rear wheel. Then place chocks under the front wheels. Raise the rear of the vehicle and support it (see "Raising and Supporting the Vehicle").
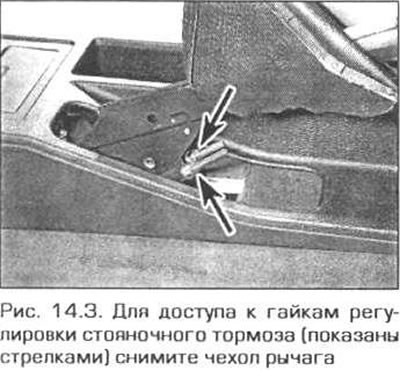
3. The parking brake cable adjuster nuts are located under the parking brake lever boot on the center console (Fig. 14.3). To make it easier to access the nuts, remove the rear section of the center console (see chapter 11).
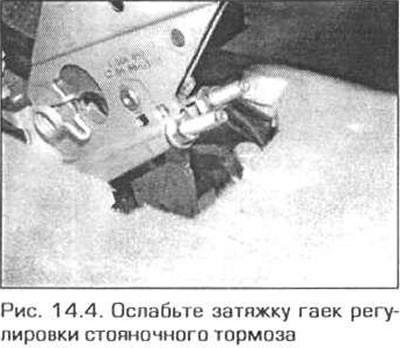
4. With the parking brake fully released, loosen the lock nuts and loosen the adjustment nuts until the cables are loose (Fig. 14.4).
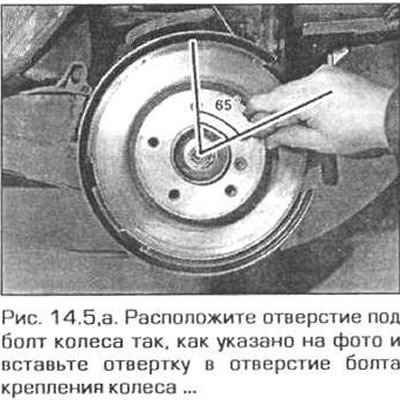
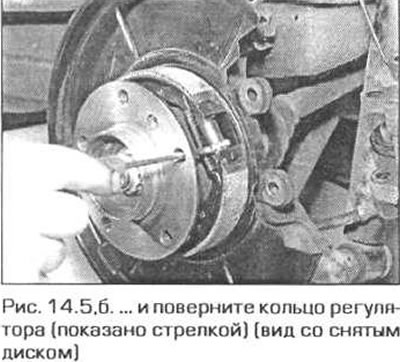
5. Starting with the rear left wheel, rotate the wheel and disc so that the free bolt hole is approximately 65° to the vertical. Make sure that the parking brake is fully released. Then insert a screwdriver into the bolt hole and fully spread the parking brake shoes by turning the knurled adjuster ring. If the wheel and disc no longer rotate, turn the knurled ring back 10 teeth so that the wheel can be turned freely (fig. 14.5, a, b).
6. Repeat the procedure described in step 5. to adjust the rear right brake.
7. Raise the parking brake lever six clicks and turn the adjuster nuts until both rear wheels begin to rotate with difficulty. Then release the parking brake and make sure that the wheels rotate freely. Slowly raise the parking brake lever. The parking brake shoes should begin to touch the drums on the second click of the ratchet mechanism. Check the parking brake adjustment by tightening the lever, counting the number of clicks. If necessary, repeat the adjustment.
8. After completing the cable adjustment, hold the adjustment nuts and tighten the lock nuts securely. Check the operation of the parking brake warning lamp, then reinstall the center console and parking brake lever boot. Install the wheels, then lower the vehicle to the ground and tighten the wheel mounting bolts to the specified torque.