
Table of contents: Removal ↓ Installation ↓
- Home
- BMW 3 Series
- E46
- Power unit
- 6 cylinder engines
- Crankshaft pulley and vibration damper — removal and installation
Crankshaft pulley and vibration damper — removal and installation (BMW 3 Series E46)
Note: If you remove the pulley hub, you will need to replace the mounting bolt when installing it. You will also need a torque wrench capable of creating a torque of 410 Nm.
Removal
1. Remove the crankcase guard from under the engine.
2. Remove the cooling system fan with the shroud (see chapter 3).
3. Remove the accessory drive belts as shown in chapter 1.
4. Different models may have pulleys of two different designs. On some models, the pulley with the damper is screwed to the hub (collapsible design). On others, the pulley and hub are one piece (non-separable design).
Pulley with damper and hub - dismountable design
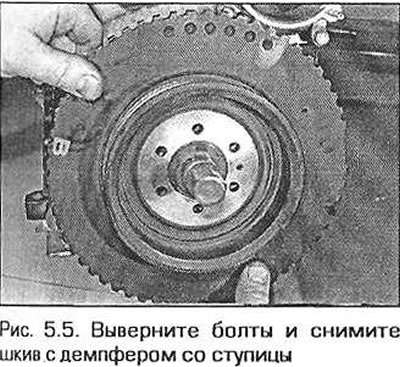
5. Unscrew the bolts securing the pulley to the hub and remove the pulley with the damper (Fig. 5.5).
6. To remove the hub, you need to unscrew the central bolt.
Warning! The hub bolt is very tight. To prevent the shaft from turning, it must be held securely. Do not try to loosen the bolt using an unsuitable or faulty tool.
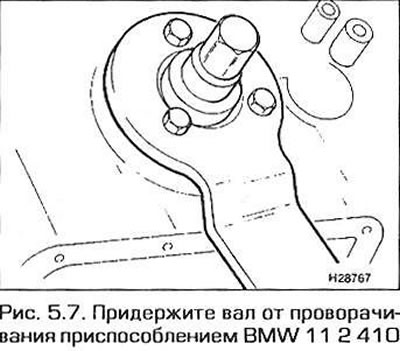
7. Make a tool that will hold the shaft while you loosen the bolt. Take two steel strips and connect them with a large bolt in the shape of the letter Y. Screw the ends of the device to the hub with pulley mounting bolts. If you can get hold of a branded tool, use it (Fig. 5.7),
8. Loosen the hub bolt. Remember that it is tightened very tightly.
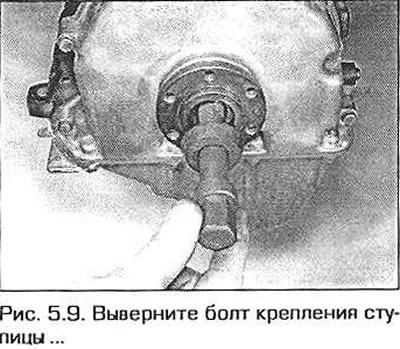
9. Unscrew the bolt and remove the washer (Fig. 5.9). The bolt can be discarded - it should be replaced during installation.
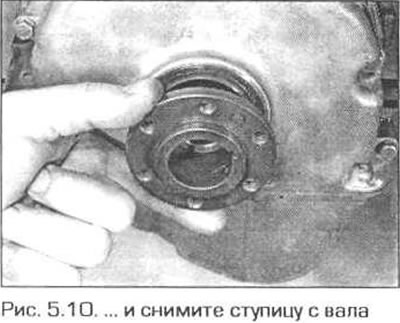
10. Remove the hub from the shaft nose (Fig. 5.10). If the hub cannot be removed by hand, use a puller.
11. If the key does not fit well in the shaft groove, remove it and save it.
The pulley with damper and hub are a non-separable design
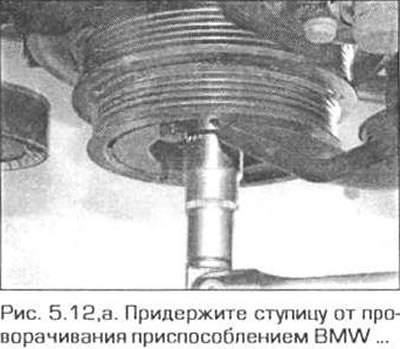
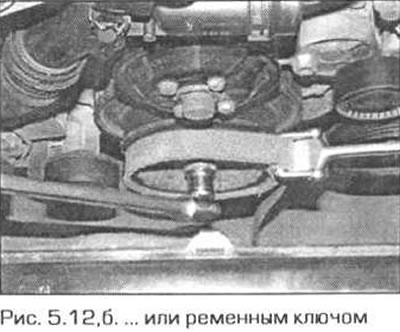
12. To prevent the hub from turning, the manufacturer recommends using BMW devices 11 8190 and 11 8 200. If you do not have the original device, you can try to hold the shaft by grasping the hub with a chain or belt wrench for oil filters (fig. 5.12,a,b). The bolt is very tight and you may need an assistant.
13. Unscrew the pulley bolt and remove the washer. The bolt can be thrown away - a new one will be required for installation.
14. Remove the hub from the crankshaft nose. If the hub cannot be removed by hand, use a puller.
15. If the key does not hold well on the shaft nose, remove it as well.
Installation
16. If the hub is removed from the shaft, take this opportunity to replace the front crankshaft oil seal. The oil seal is located in the timing chain cover (see paragraph 6).
17. If the hub has been removed, continue with the next step, otherwise go to step 21 (for separate pulley and hub).
18. Insert the key into the crankshaft groove (if it was removed from there), then place the hub on the shaft, aligning the groove in the hub with the key.
19. Place the washer on the new bolt. The protrusion on the washer should face the hub.
Pulley with damper and hub - dismountable design
20. Screw the locking device to the hub as for removal, and tighten the hub mounting bolt to the required torque.
21. Loosen the locking device mounting bolts and install the pulley with the damper on the hub. The mounting pin in the hub must fit into the corresponding hole in the pulley.
22. Screw in the pulley mounting bolts and tighten them to the required torque.
The pulley with damper and hub are a non-separable design
23. Tighten the center bolt to the specified torque.
All models
24. Install the accessory drive belts as specified in chapter 1.
25. Install the cooling system fan with the shroud (see chapter 3).
26. Install the crankcase guard under the engine.
This article is available at russian, bulgarian, belarusian, ukrainian, serbian, croatian, romanian, polish, slovak, hungarian
Article verified: Ilyinsky Matvey
Share information:
Previous articles
БМВ E46: 6 cylinder engines
Next articles
Similar articles on other types of BMW cars:
Removal and installation the oil pan BMW 5 Series E12 (1972-1981)
Removal and installation the torsional vibration damper BMW 7 Series E38 (1994-2001)
Cylinder Head Cover — Removal and Installation BMW 7 Series E32 (1986-1994)
Pistons — removal and installation BMW X3 E83 (2003-2010)
Torsional vibration damper BMW X5 E53 (1999-2006)
Link in different formats to this page
Visitor comments
No comments yet
- General information
- Manual
- Maintenance
- Power unit
- Engine repair
- Cooling system
- Power system (gasoline)
- Injection system (gasoline)
- Fuel system (diesel)
- Exhaust system
- Ignition system
- Charge and launch systems
- Transmission
- Car gearbox
- Clutch and drive shafts
- Chassis
- Brake system
- Suspension front and rear
- Steering
- Body
- Body care and repair
- Exterior
- Interior
- Electrical equipment
- Troubleshooting
- Lighting and signaling
- Equipment and devices
- Heater and air conditioner
- Electrical circuits
- General information
- Manual
- Repair on the road
- Weekly checks
- Maintenance
- Troubleshooting
- Power unit
- 4 cylinder engines
- 6 cylinder engines
- Engine overhaul
- Cooling and heating
- Fuel and exhaust system
- Starting and charging system
- Ignition system
- Transmission
- Clutch
- Mechanical gearbox
- Automatic gearbox
- Cardan and drive shafts
- Chassis
- Brake system
- Wheel suspension
- Steering
- Body
- Exterior
- Interior
- Electrical equipment
- Equipment and devices
- Electrical circuits
- General information
- Maintenance
- Power unit
- Engine repair
- Cooling system
- Ignition system
- Supply system
- Fuel injection system
- Exhaust system
- Transmission
- Clutch
- Car gearbox
- Front and rear axle
- Chassis
- Steering
- Brake system
- Body
- Exterior
- Interior
- Electrical equipment
- Heating system
- Equipment and devices
- Power devices
- Electrical circuits
- Power unit
- M10/M20 engine
- M40 engine
- Ignition system
- Lubrication system
- Cooling system
- Supply system
- Fuel injection
- Exhaust system
- Transmission
- Clutch
- Manual gearbox
- Front axle
- Rear axle
- Chassis
- Steering
- Brake system
- Body
- Exterior
- Interior
- Electrical equipment
- Heating system
- Equipment and devices
- Electrical circuits
- General information
- Specifications
- Operation and maintenance
- 4-cylinder engine
- Engine repair
- Cooling and lubrication system
- Supply system
- Ignition system
- 6-cylinder engine
- Engine repair
- Cooling and lubrication system
- Supply system
- Fuel injection system
- Ignition system
- Transmission
- Clutch
- 4-speed manual gearbox
- 5-speed manual gearbox
- Automatic gearbox
- Cardan and rear axle
- Chassis
- Steering
- Front suspension
- Rear suspension
- Brake system
- Electrical equipment
- Equipment and devices
- Electrical circuits