
- Home
- BMW 5 Series
- E28
- Power unit
- Supply system
- Checking fuel pressure/fuel pump
Checking fuel pressure/fuel pump (BMW 5 Series E28)
Fuel is extremely flammable, so take extra precautions when working on any part of the fuel system. Do not smoke or allow open flames or bare lamps near the work area. Also, do not work in a garage with natural gas equipment with a burning wick.
Carburetor engines
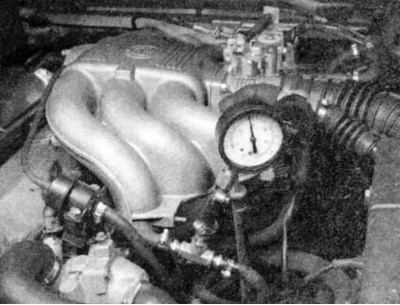
To check the fuel pump, it is necessary to connect a suitable pressure gauge between the fuel pump outlet and the fuel supply pipe to the carburetor.
This test requires bypassing the fuel check valve that is normally connected in the fuel line from the fuel pump to the carburetor.
When the engine is idling, the pump pressure should be between 0.1 and 0.3 atm.
If a pressure gauge is not available, the fuel pump can be checked in the following simpler way: (but also less accurate). Disconnect the fuel pump outlet hose.
Disconnect the high-tension wire from the ignition coil to prevent the fuel from flashing in the engine, then turn the engine over with the starter. Fuel should flow out of the outlet hose with distinct jolts.
Fuel Injected Engines
On later models, the electric fuel pump is located inside the fuel tank, while on early models, it is located next to the tank. Early models also have a booster pump located in the fuel tank. The booster pump feeds the main pump, but is not capable of producing the high pressure required by the system.
The fuel pump in Motronic systems is activated by a low signal from the Motronic control unit (ECU). The fuel pump runs for a few seconds after the ignition is turned on and then continues to operate only when the engine starts.
The following checks assume that the fuel filter is in good condition. If there is any doubt about the quality of the fuel filter, replace it (see chapter Routine car maintenance).
To obtain accurate test results, it is recommended to measure the pressure of both the main fuel pump and the intermediate pump, if used.
Checking the operation of the fuel pump/intermediate pump
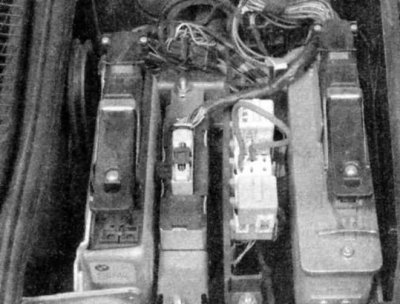
1. Connect the contacts of the connector related to the fuel pump relay, namely 30 and 87b, with a suitable wire (l-Jetronic systems)...
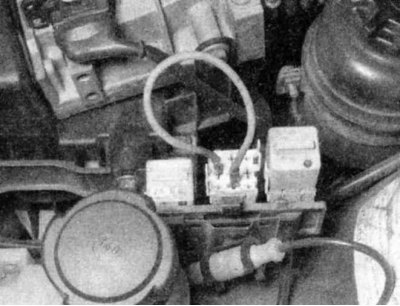
...or 30 and 87 (motronic systems).
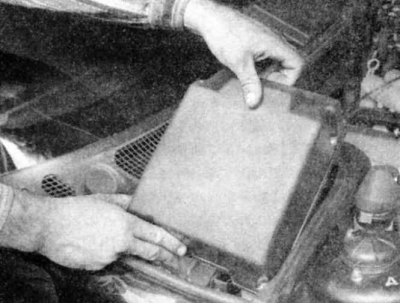
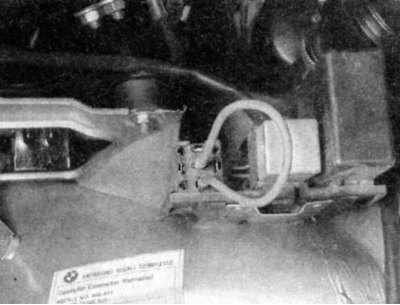
2. On all models from 1989 onwards, to gain access to the fuel pump relay and ECU, remove the four bolts and protective cover...
...then use a jumper to connect contacts 30 and 87 in the connector, which correspond to the fuel pump relay
3. Have an assistant turn on the ignition while you listen to the sounds in the fuel tank. A buzzing sound should be heard for a few seconds.
This check also applies to the intermediate pump. If there is no buzzing noise, the problem is in the fuel pump circuit. First check the main relay and the fuel pump fuse (see chapter On-board electrical equipment system). If the main relay is OK, then check the fuel pump relay.
Checking the fuel system pressure
1. Relieve the pressure in the fuel system (see section Relieving pressure in the fuel injection system).
2. Disconnect the negative battery cable.
If your vehicle's radio has an anti-theft system, make sure you know the correct activation code before disconnecting the battery. Refer to Section 1 for information before disconnecting the wire Anti-theft audio system and instrument cluster language of this guide.
If a message in another language appears on the instrument cluster display after disconnecting the battery, refer to Section 1 for the language setting procedure Anti-theft audio system and instrument cluster language.

3. Disconnect the fuel feed line from the L-Jetronic or early Motronic system fuel line or, on later Motronic systems, disconnect the main fuel line from the fuel filter.
4. Without disturbing the normal fuel flow, connect the fuel pressure gauge using a tee, a short piece of high-pressure fuel hose and clamps.
Do not use a plastic tee for this test. It will not withstand the pressure in the fuel system.
5. Connect the battery.
6. Short-circuit the fuel pump relay terminals with a piece of wire.
7. Turn on the ignition.
8. Record the pressure value and compare it with the given value in Table of sizes and adjustment data at the end of the Guide.
9. If the pressure in the fuel system is lower than required:
- Check for leaks in the system. Fix any leaks and repeat the pressure test
- If there are no leaks, install a new fuel filter and recheck the fuel pressure.
- If the pressure is still low, check the fuel pump pressure (see below) and fuel pressure regulator (see section Checking the operation and replacing the fuel pressure regulator).
10. If the pressure is higher than required, check for blockage in the fuel return line. If the line is OK, replace the fuel pressure regulator.
11. Turn off the ignition, wait five minutes and check the pressure gauge reading. Compare the reading with the value of the residual pressure in the system given in Table of sizes and adjustment data at the end of the Manual. If the residual pressure is lower than required:
- Check for leaks in the system. Fix any leaks and repeat the pressure test.
- Check the fuel pump pressure.
- Check the fuel pressure regulator (see section Checking the operation and replacing the fuel pressure regulator).
- Check the injectors (see section Checking the operation and replacing fuel injectors).
Checking the operation of the fuel pump
This test requires a pressure gauge with a bleed valve. Once the test is complete, the normal pressure relief procedure will not be acceptable because the gauge is connected directly to the fuel pump.
1. Relieve the pressure in the fuel system (see section Relieving pressure in the fuel injection system).
2. Connect the negative battery cable.
If your car radio has an anti-theft system, make sure you know the correct activation code before disconnecting the battery. Before disconnecting the wire, refer to Section Anti-theft audio system and instrument cluster language of this guide.
If a message in another language appears on the instrument panel display after connecting the battery, refer to Section 1 for the language setting procedure Anti-theft audio system and instrument cluster language.
3. Disconnect the fuel supply hose from the fuel line and connect the pressure gauge directly to the hose.
If the meter still has a tee attached, plug the open end.
4. Connect the battery.
5. Use a piece of wire to short-circuit the fuel pump relay contacts.
6. Turn on the ignition to start the fuel pump.
7. Record the pressure meter reading and compare the pressure value with the value given in Table of sizes and adjustment data at the end of the Guide.
8. If the measured pressure is less than the required pressure, inspect the fuel line between the pump and the gauge for leaks. If no leaks are found, replace the fuel pump.
9. Turn off the ignition and wait five minutes. Record the reading on the gauge and compare it with the residual fuel pump pressure value given in Table of sizes and adjustment data at the end of the manual. If the residual pressure is less than required, check for leaks in the fuel line between the pump and the gauge. If no leaks are found, replace the fuel pump.
10. Disconnect the jumper. Relieve the pressure by opening the bleed valve on the gauge and draining the fuel into a suitable container. Disconnect the gauge and reconnect the fuel line.
Checking the intermediate pump pressure
1. Relieve the pressure in the fuel system (see section Relieving pressure in the fuel injection system).
2. Disconnect the negative battery cable.
If your car's radio is protected against theft, make sure you know the correct activation code before disconnecting the battery. Before disconnecting the wire, refer to Section Anti-theft audio system and instrument cluster language.
If a message in another language appears on the instrument panel display after connecting the battery, refer to Section 1 for the language setting procedure Anti-theft audio system and instrument cluster language.
3. Remove the access hatch to the intermediate pump (on some models it is located under the rear seat, on others - under the luggage compartment carpet). Disconnect the outlet hose from the intermediate pump and connect the fuel pressure gauge to the outlet pipe.
4. Connect the battery.
5. Use a jumper to short-circuit the fuel pump relay contacts.
6. To turn on the fuel pump, turn on the ignition.
7. Record the meter reading and compare it with the value given in Table of sizes and adjustment data at the end of the Guide.
8. If the measured pressure is less than required, replace the intermediate pump.
Checking the fuel pump relay
1. Turn on the ignition.
2. Using a voltmeter on the back of the relay connector, check the voltage on the contacts. Check for battery voltage on contact 30 (engines M20 and M30) or contact 15 (engines M10 and M40).
If there is no voltage on models with a battery located in the luggage compartment, check the fuse wire. The 50 amp fuse wire is located in a black sheath 15 cm from the battery.
3. Turn off the ignition and disconnect the relay from the connector. Using a voltmeter, check the voltage at the corresponding fuel pump relay contacts 85 (-) and 86 () for M20 and M30 engines or between contact 50 and the housing on M10 and M40 engines. When the assistant turns on the ignition, take the voltmeter readings. The voltmeter should show battery voltage.
4. If there is no voltage, check the fuse (fuses) and the fuel pump relay wires. If the readings are correct and the fuel pump only works with the jumper, replace the relay.
5. If the fuel pump still does not work, check the voltage at the fuel pump terminals (see section Removal and installation the fuel pump, intermediate pump and fuel level sensor). Replace the fuel pump if necessary.
This article is available at russian, bulgarian, belarusian, ukrainian, serbian, croatian, romanian, polish, slovak, hungarian
Article verified: Zhuravleva Isolda
Share information:
Previous articles
БМВ E28: Supply system
Next articles
Similar articles on other types of BMW cars:
Checking the start of the high pressure fuel pump BMW 3 Series E36 (1990-2000)
Mechanical fuel pump — checking, adjustment, removal and installation BMW 3 Series E21 (1975-1983)
High pressure fuel pump BMW 7 Series E32 (1986-1994)
Removal and installation the fuel pump BMW 7 Series E38 (1994-2001)
High-pressure fuel pump (M57TU/M57T2) BMW X3 E83 (2003-2010)
Checking the fuel supply pressure BMW X5 E53 (1999-2006)
Link in different formats to this page
Visitor comments
No comments yet
- General information
- Governing bodies
- Manual
- Maintenance
- Power unit
- Engine repair
- Lubrication system
- Cooling system
- Ignition system
- Supply system
- Injection system (gasoline)
- Injection system (diesel)
- Exhaust system
- Transmission
- Clutch
- Car gearbox
- Front axle
- Rear axle
- Chassis
- Steering
- Brake system
- Wheels and tires
- Body
- Interior
- Exterior
- Heating system
- Electrical equipment
- Equipment and devices
- Power devices
- Windscreen wipers
- Electrical circuits
- General information
- Manual
- Maintenance
- Power unit
- Engine repair
- Ignition system
- Engine lubrication system
- Cooling system
- Fuel system (gasoline)
- Fuel system (diesel)
- Exhaust system
- Transmission
- Clutch
- Car gearbox
- Chassis
- Front and rear suspension
- Steering
- Brake system
- Body
- Exterior
- Interior
- Electrical equipment
- Heating system
- Equipment and devices
- Power devices
- Electrical circuits
- General information
- Manual
- Maintenance
- Power unit
- Engine in a car
- Engine overhaul
- Cooling system
- Supply system
- Ignition system
- Control system
- Transmission
- Clutch
- Manual gearbox
- Automatic gearbox
- Transmission line
- Chassis
- Steering
- Front suspension
- Rear suspension
- Brake system
- Body
- Body elements
- Car care and painting
- Electrical equipment
- Heater and air conditioner
- Equipment and devices
- Starter and generator
- Electrical circuits
- General information
- Operation and maintenance
- Specifications
- Power unit
- Engine repair
- Cooling and lubrication system
- Supply system
- Ecotronic power supply system
- Fuel injection system
- Ignition system
- Transmission
- Clutch
- Gearbox BMW 242/4
- Gearbox Getrag 262/8
- Gearbox Getrag 265/6
- Automatic gearbox
- Cardan gear
- Rear axle
- Chassis
- Steering
- Front suspension
- Rear suspension
- Brake system
- Electrical equipment
- Equipment and devices
- Electrical circuits