
The fuel supply pressure in the pressure line is maintained for a long time. The fuel pump is closed by a check valve, and the fuel supply pressure is maintained in the line, which ensures a reduction in engine starting time. The fuel supply pressure must be checked in the following order. Prepare the tools "13.3.010", "13.5.220" and "61.3.050", DIS tester and turn off the ignition.
Attention! Fuel in the pipelines is under pressure of about 3.5 bar. Collect any spilled fuel and send it for disposal.
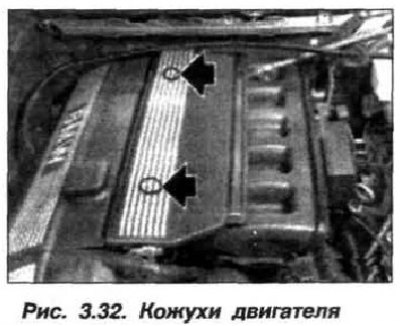
Remove the plugs (Fig. 3.32), unscrew the bolts and remove the protective casing of the injectors and ignition coils. Remove the dust cap from the measuring valve of the distribution line.
Assemble the "13.5.220" device (Fig. 3.33), consisting of the "13.5.221" and "13.5.222" devices. Unscrew the shut-off valve (1) on the "13.5.220" device set.
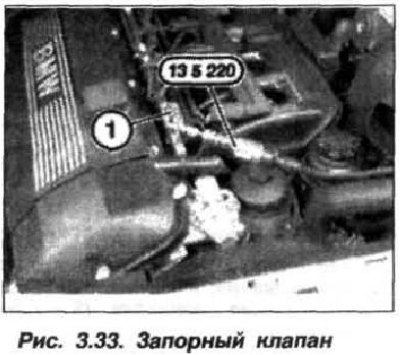
Install the "13.5.220" tool kit on the fuel distribution line measuring valve and tighten the knurled nut by hand. Start the engine.
Attention! It is strictly forbidden to screw the shut-off valve (1) to the mechanical stop, due to the possibility of failure of the fuel pressure regulator.
Gradually screw in the shut-off valve (1) until the DIS tester indicates pressure. Measure the fuel supply pressure, for which:
- connect the pressure sensor to the DIS-tester and start the engine;
- select the "Measurement System" mode;
- after the "Multimeter" function appears, select the "Pressure Check" mode;
- read the fuel supply pressure value and compare the actual test pressure value with the set value - 3.5±0.2 bar;
- turn off the engine and analyze the results obtained.
Check the fuel pump, for which:
- remove the fuel pump relay so that the pump is not started by the engine control unit, and install the "61.3.050" device on contacts "87" and "30" of the relay block:
- press the button on the device and read the fuel pump supply pressure readings on the DIS tester;
- compare the actual value with the set value of fuel supply - 3.5±0.2 bar.
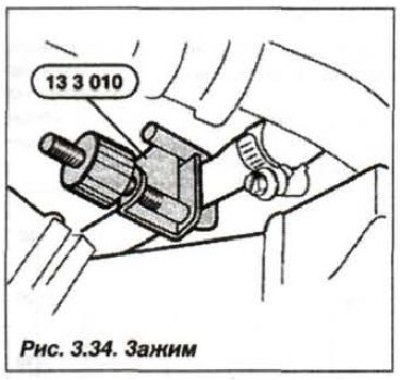
Install the device "13.3.010" (fig. 3.34, see Fig.) to carry out subsequent checks.
This publication was borrowed from an online resource: «BMWMAN»