
- Home
- BMW 5 Series
- E28
- Chassis
- Brake system
- Inspection, removal and installation of the brake disc
Inspection, removal and installation of the brake disc (BMW 5 Series E28)
This procedure applies to both front and rear brake discs. Brake discs should always be replaced or repaired in pairs (both front or both rear discs), even if only one of them is damaged.
Inspection
1. Loosen the wheel mounting bolts, jack up the car and secure it on axle stands. Remove the wheel and install three bolts to hold the disc in place. If you are working on the rear brake disc, release the parking brake.
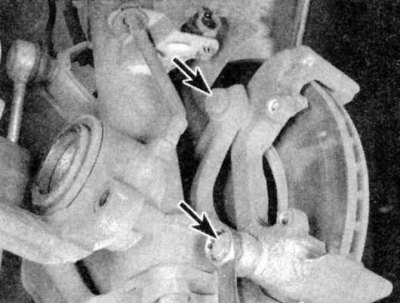
2. Remove the brake caliper as described in Section Removal, major repair and installation of the disc brake caliper. There is no need to disconnect the brake hose. After removing the caliper, hang it on a piece of wire to the side so that it does not interfere with the work. Remove the caliper support bracket.
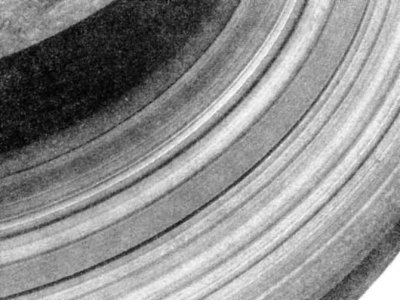
3. Inspect the disc surface for scratches, cracks, and other damage. Light scratches and shallow grooves are acceptable and usually do not affect brake performance, but deep scratches require the disc to be removed and replaced, or, if possible, resurfaced by a professional at a workshop. If cracks are present, the disc must be replaced. Remember to inspect both sides of the disc.
4. If strong vibrations were noticed during the operation of the brakes, then there may be deformation of the disc (excessive beating). If your vehicle is equipped with ABS, do not confuse vibration caused by disc deformation with normal ABS operation. When this system is operating, a slight vibration in the brake pedal is usually felt.
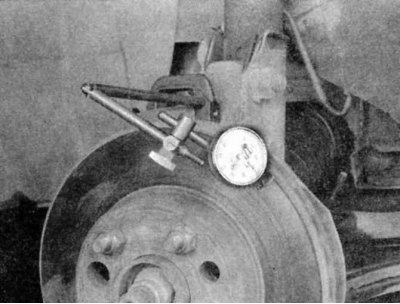
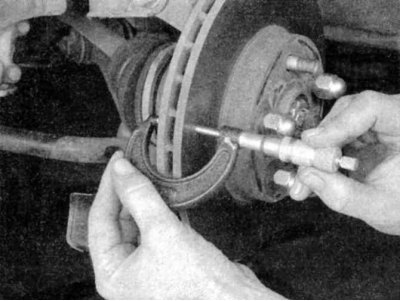
5. To measure the disc runout, place a dial indicator at a point approximately 13 mm from the outer edge of the disc. Set the indicator to zero and rotate the disc. The indicator reading should not exceed the limit specified in Table of sizes and adjustment data at the end of the Guide.
6. If they still exceed the set value (and if the beating does not occur due to wear of the wheel bearing), the disc should be replaced or, if possible, resurfaced at a workshop.
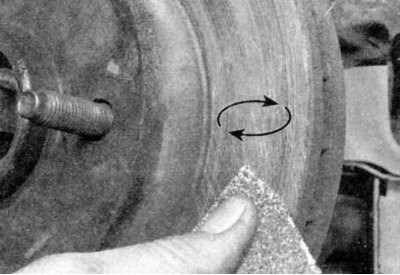
It is recommended to grind the discs regardless of the indicator readings in order to achieve a smooth, flat surface, which in turn will help to avoid brake pedal vibrations and other undesirable symptoms associated with the operation of the discs. In case you still decide not to grind the discs, at least remove the gloss from their surface with sandpaper or emery paper, using circular motions.
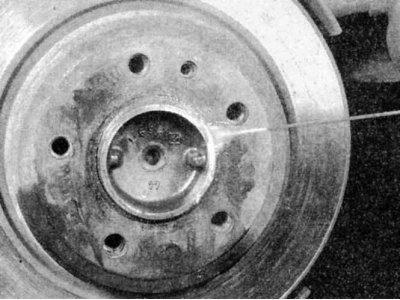
7. It is very important to ensure that after turning the thickness of the disc does not become less than the maximum value specified in Table of sizes and adjustment data at the end of the Manual. The minimum allowable disc thickness is stamped on the disc hub. The disc thickness can be measured with a micrometer.
Removal
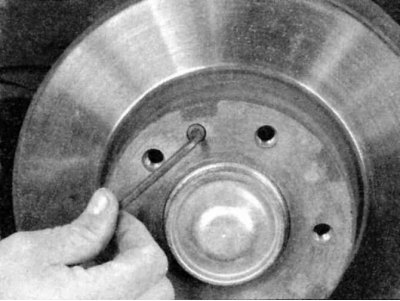
1. Loosen the disk mounting screw...
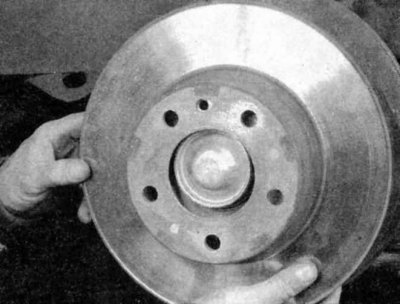
...and remove the disc from the hub.
2. If the disc is stuck to the hub, spray a generous amount of oil into the area between the hub and disc and leave for a few minutes to soften the rust between the two components.
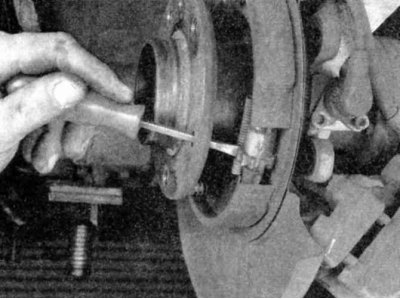
3. If the rear disc still does not separate, insert a thin flat-head screwdriver through the hole in the hub flange, turn the sprocket on the parking brake adjusting screw, and squeeze the parking brake shoes.
If the front disc is "stuck", some discs allow you to insert two or three bolts into special holes and tighten them. Turn the bolts one by one a couple of turns at a time until the disc comes free.
Installation
1. Before installation, make sure the disc is completely clean. If oil was used to remove the disc, make sure there are no traces of it left on it. Install the disc on the hub and fit the disc mounting screw. Tighten it to the required torque.
2. Install the caliper support bracket (if it was removed), brake pads and caliper (see sections Replacing disc brake pads and Removal, major repair and installation of the disc brake caliper). Tighten all fasteners to the required torque.
3. Install the wheel, then lower the car to the ground. Depress the brake pedal several times to bring the brake pads into contact with the disc.
4. If necessary, adjust the parking brake shoes (Section Adjusting the parking brake).
5. Check the brakes thoroughly before starting normal operation of the vehicle.
This article is available at russian, bulgarian, belarusian, ukrainian, serbian, croatian, romanian, polish, slovak, hungarian
Article verified: Zhuravleva Isolda
Share information:
Previous articles
БМВ E28: Brake system
Next articles
Similar articles on other types of BMW cars:
Rear brake disc — inspection, removal and installation BMW 3 Series E46 (1998-2006, petrol)
Removal and installation the brake disc BMW 3 Series E21 (1975-1983)
Brake disc — removal and installation BMW 7 Series E32 (1986-1994)
Removal and installation the brake booster BMW X3 E83 (2003-2010)
Rear disc — removal and installation BMW X5 E53 (1999-2006)
Link in different formats to this page
Visitor comments
No comments yet
- General information
- Governing bodies
- Manual
- Maintenance
- Power unit
- Engine repair
- Lubrication system
- Cooling system
- Ignition system
- Supply system
- Injection system (gasoline)
- Injection system (diesel)
- Exhaust system
- Transmission
- Clutch
- Car gearbox
- Front axle
- Rear axle
- Chassis
- Steering
- Brake system
- Wheels and tires
- Body
- Interior
- Exterior
- Heating system
- Electrical equipment
- Equipment and devices
- Power devices
- Windscreen wipers
- Electrical circuits
- General information
- Manual
- Maintenance
- Power unit
- Engine repair
- Ignition system
- Engine lubrication system
- Cooling system
- Fuel system (gasoline)
- Fuel system (diesel)
- Exhaust system
- Transmission
- Clutch
- Car gearbox
- Chassis
- Front and rear suspension
- Steering
- Brake system
- Body
- Exterior
- Interior
- Electrical equipment
- Heating system
- Equipment and devices
- Power devices
- Electrical circuits
- General information
- Manual
- Maintenance
- Power unit
- Engine in a car
- Engine overhaul
- Cooling system
- Supply system
- Ignition system
- Control system
- Transmission
- Clutch
- Manual gearbox
- Automatic gearbox
- Transmission line
- Chassis
- Steering
- Front suspension
- Rear suspension
- Brake system
- Body
- Body elements
- Car care and painting
- Electrical equipment
- Heater and air conditioner
- Equipment and devices
- Starter and generator
- Electrical circuits
- General information
- Operation and maintenance
- Specifications
- Power unit
- Engine repair
- Cooling and lubrication system
- Supply system
- Ecotronic power supply system
- Fuel injection system
- Ignition system
- Transmission
- Clutch
- Gearbox BMW 242/4
- Gearbox Getrag 262/8
- Gearbox Getrag 265/6
- Automatic gearbox
- Cardan gear
- Rear axle
- Chassis
- Steering
- Front suspension
- Rear suspension
- Brake system
- Electrical equipment
- Equipment and devices
- Electrical circuits