
Disc brake pads must be replaced on both wheels at the same time - NEVER replace the pads on just one wheel. In addition, the dust created by the brake system may contain asbestos, which is harmful to your health. Never remove it with compressed air or inhale it. When working on the brakes, wear a special filter mask. Never, under any circumstances, use gasoline-based solvents to clean brake parts. Use only brake system cleaner! When servicing disc brakes, use only original or high-quality branded brake pads.
Brake fluid is poisonous. It is also a strong paint solvent. See Warning at the beginning of Section Bleeding the hydraulic brake system.
The procedure described below applies to both front and rear disc brakes.
1. Remove the cap(s) from the brake fluid reservoir and drain about two-thirds of the fluid from the reservoir. If you don't do this, fluid will overflow from the reservoir when you press the caliper pistons into their bores.
2. Loosen the wheel mounting bolts, jack up the front or rear of the vehicle and securely place it on the axle supports.
3. Remove the front or rear wheels as needed. Work on each side of the brakes in turn so that the assembled side can serve as a reference for reassembly if needed.
4. Carefully inspect the brake disc as described in Section Inspection, removal and installation of the brake disc. If machining is required, remove the disc as described in the same Section, and the pads can also be removed from the calipers.
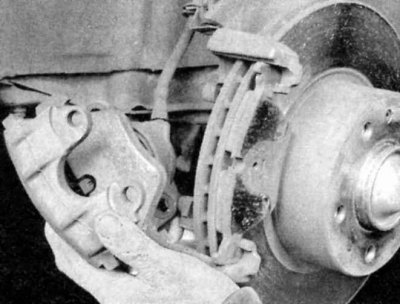
5. Follow the descriptions in the illustrations below to remove the brake pads.
There are no photos included here describing the procedure for the rear calipers; although slightly different in size, they are identical in design to the front brake calipers.
Some models may have different numbers and types of anti-squeal pads and other parts than those shown in this Chapter. Before disassembling, pay attention to how the parts are installed in the car, so that you can reassemble them correctly later.
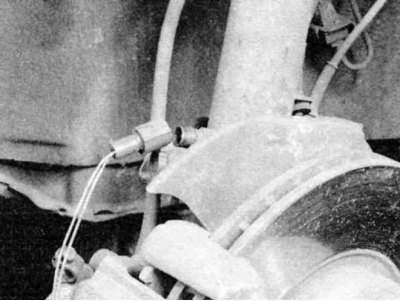
6. Disconnect the brake pad wear sensor electrical connector.
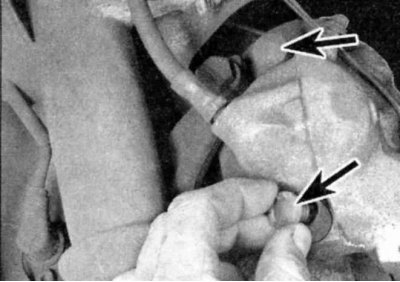
7. Remove the plugs from the brake caliper mounting bolts and remove the bolts.
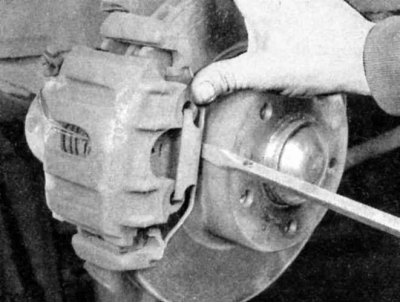
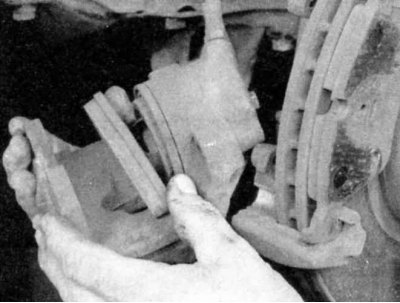
8. Remove the anti-squeal spring.
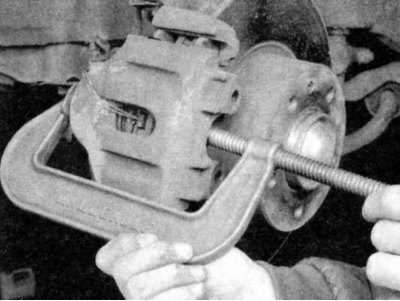
9. Push the piston in with the C-clamp.
10. Remove the caliper and inner brake pad.
11. Remove the inner brake shoe from the piston.

12. Hang the caliper on a piece of wire so that it does not interfere with your work.
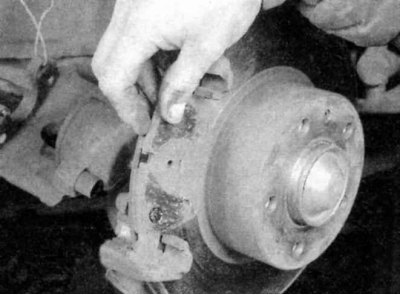
13. Remove the outer brake shoe - to install new shoes, repeat the procedure in reverse order.
14. Don't forget to inspect the brake pad wear sensors (front left wheel only, or front left and rear right wheels). If they are OK, reinstall them from the old pads to the new ones; if they are worn out from friction, install new sensors on new pads.
15. Installing new pads is the reverse of the removal procedure. When installing the caliper, make sure that all mounting bolts are tightened to the required torque.
16. When you have finished, press the brake pedal firmly several times to bring the pads into contact with the discs. The pedal should be at a normal height from the floor and not sink. Check the brake fluid level and add more to the reservoir if necessary. Check carefully for fluid leaks and proper brake function before starting normal operation of the vehicle.
17. If possible, avoid sharp braking for the first 80-100 km of driving until the new pads have worn into place.
You can read the original on the website: BMWMAN.ru