
The brake shoes must be replaced on both wheels at the same time - never replace the shoes on just one wheel. In addition, dust that collects on the brake system may contain asbestos, which is harmful to your health. Never remove it with compressed air or inhale it. When working on the brakes, wear a special filter mask. Never, under any circumstances, use gasoline-based solvents to clean brake parts. Use only a special brake system cleaner.
When replacing shoes, always replace the tension and retaining springs, as well as the thermal clamps of the automatic regulator. Due to the constant temperature changes to which the springs are subjected, they lose their elasticity after a certain period of time, which can lead to the shoes being pulled towards the drum, and as a consequence, to their premature wear. When replacing brake shoes, use only original parts or high-quality parts from recognized manufacturers.
All four rear brake shoes should be replaced at the same time, but to avoid mixing up the components, work on one assembly at a time. Some rear brake components are different on the left and right sides, so be careful not to mix them up.
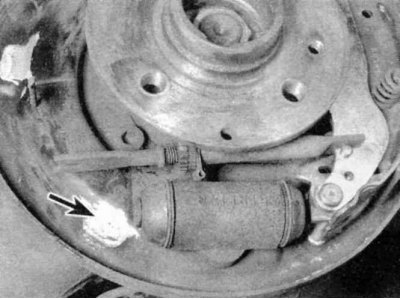
If a wheel cylinder is found to be leaking or otherwise faulty, replace it after replacing the brake shoes. This is done by simply disconnecting the hydraulic line and removing the cylinder from the brake shield after unbolting it. Trying to repair a leaking cylinder will likely not produce satisfactory results, even if parts are available.
1. Block the front wheels, then loosen the rear wheel mounting bolts, jack up the rear of the vehicle and securely place it on axle stands. Remove the rear wheels and release the parking brake.
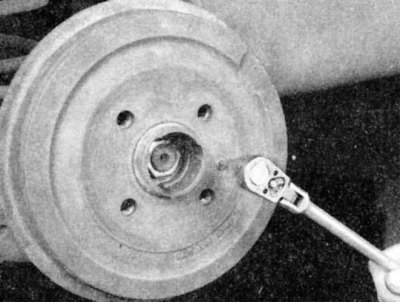
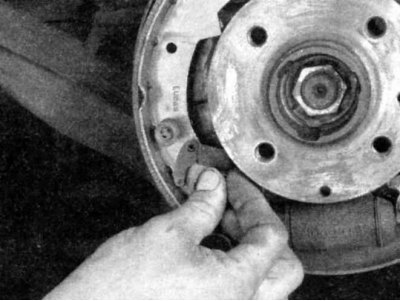
2. Loosen the drum mounting screw and remove the drum.
3. If the drum is to the hub, inject oil between the hub and the drum.
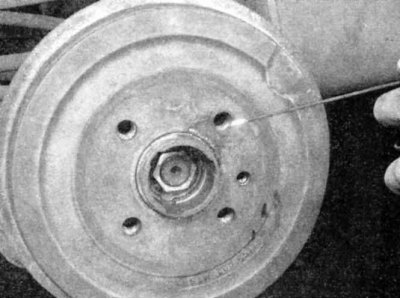
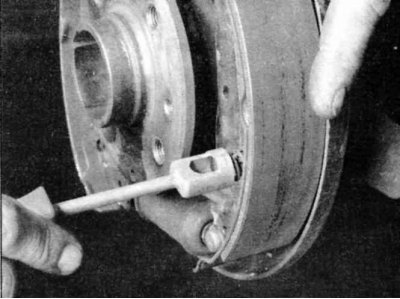
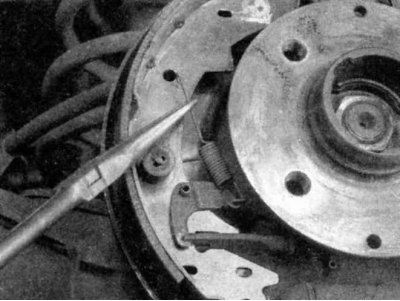
4. If the drum still won't come off, it's possible that the shoes have worn grooves in it and need to be spread apart. Insert a narrow flat-head screwdriver into one of the holes in the hub flange and turn the adjuster wheel until the drum comes off the axle.
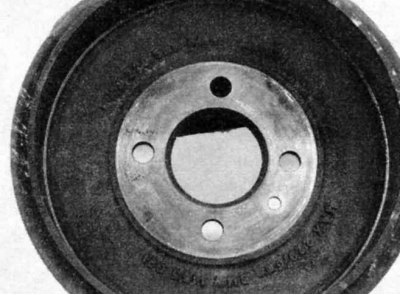
5. Inspect the drum for cracks, scratches, deep grooves and stubborn stains that look like discolored areas of the surface. If these stains cannot be removed with sandpaper, or if there is other damage, the drum should be taken to a car repair shop for resurfacing.
Professionals recommend turning brake drums every time you work on the brakes. Turning will remove possible deformation of the drums. If the drums are so worn that their deformations cannot be corrected by turning without exceeding the maximum permissible diameter indicated on the drum, then they must be replaced with new ones. If you still decide not to turn the drums, then at least remove the shine from their surface with medium sandpaper, using rotational movements.
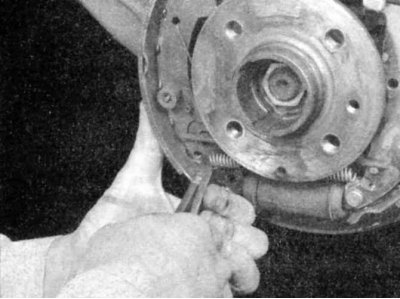
6. Unhook the lower tension spring from the front shoe,..
...then unhook it from the rear shoe and remove it.
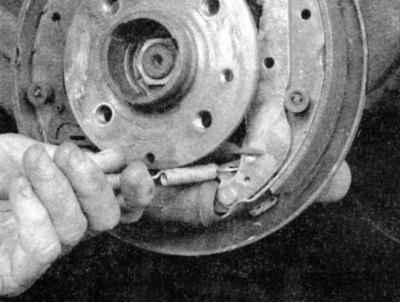
7. Unhook the upper tension spring from the front shoe,..

...then unhook it from the rear shoe and remove it.
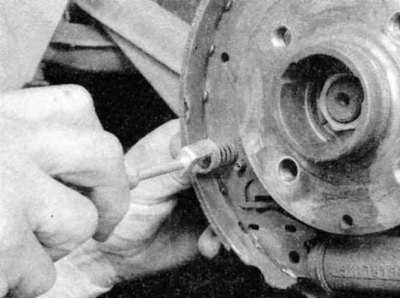
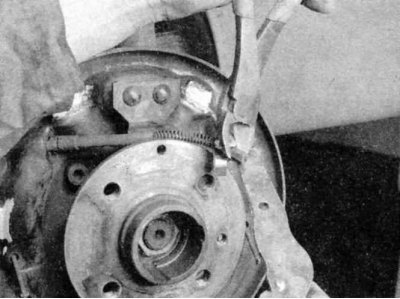
8. Remove the front shoe retaining spring...
...and the rear shoe retaining spring.
9. Remove the front shoe.
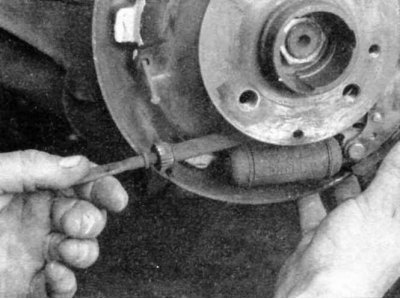
10. Remove the regulator assembly. Clean the regulator and make sure that its wheel moves freely on the threads. It is recommended to replace the heat-clamp (spring clip next to the control wheel) each time the shoes are replaced. Set the adjuster wheel so that the assembly is closest to the installation.
11. Disconnect the parking brake cable from the parking brake lever and remove the rear shoe.
12. Installation is the reverse of removal, but please note the following points.
13. Apply a coat of high-temperature brake grease to the brake shield. Be careful not to let the grease come into contact with the friction surfaces of the brake shoes or drums.
14. Make sure the adjuster assembly is properly seated in the recess in the parking brake lever.
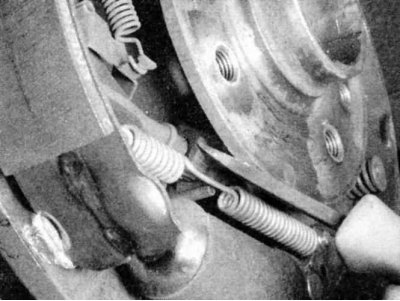
15. When installing the automatic adjustment mechanism, first install the lever on the shoe,..
...then attach the lower end of the spring to the lever and hook the upper end into the special hole in the front shoe.
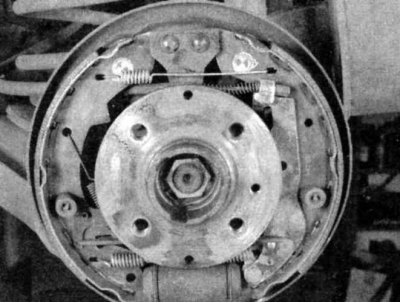
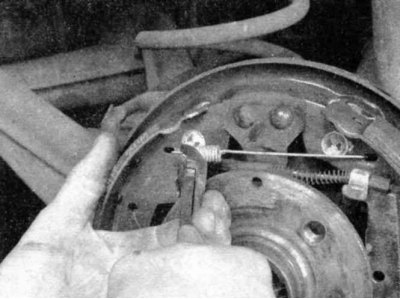
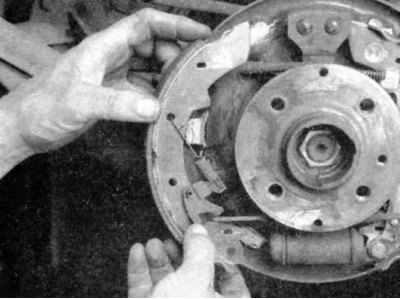
16. When the work is finished, the brake assembly should look like the one shown in the photo. Now you can move on to the next brake mechanism.
17. After finishing work with both brake mechanisms, install the brake drums.
18. If the wheel cylinder has been replaced (see Note 2), bleed the hydraulic system as described in Section Bleeding the hydraulic brake system.
19. Press the brake pedal several times to activate the self-adjusting mechanism. When loosening the adjusters, clicking sounds will be heard from the brake drums.
20. Check the parking brake adjustment.
21. Install the wheels and lug nuts. Lower the vehicle to the ground and tighten the lug nuts to the specified torque. Check the brakes thoroughly before operating the vehicle normally.