
Table of contents: Removal ↓ Installation ↓
- Home
- BMW 7 Series
- E32
- Power unit
- Minor engine repair
- Timing Chain Covers — Removal and Installation
Timing Chain Covers — Removal and Installation (BMW 7 Series E32)
Note: The upper timing chain cover can be removed separately. If both covers need to be removed, special tools are required.
Removal
Disconnect the ground cable from the battery.
If you remove the lower timing chain cover (the top cover can be removed separately), remove the fan, its shroud, radiator and fan drive belt pulley.
On engines where the distributor cap is mounted directly to the timing chain cover, remove the distributor cap, rotor and the black plastic cover located underneath.
On early M30 engines, remove the distributor from the top drive cover.
Remove the valve cover.
If the lower timing chain cover needs to be removed, remove the crankshaft pulley from the damper/hub. Hold the pulley still with a wrench (install the center bolt), unscrew the pulley bolts with another wrench.
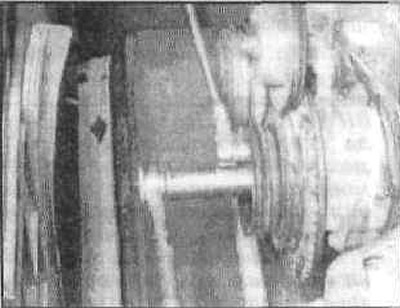
Remove the hub/vibration damper by blocking the crankshaft with the special tool and loosening the large center bolt.
If the special tool mentioned in the previous point is not available, on some engines the crankshaft can be locked by removing the flywheel/drive plate inspection cover and inserting a wide screwdriver into the ring teeth.
Unscrew the plug and remove the drive chain tensioner spring. If the tensioner plunger does not come out with the spring, remove it from the mounting hole.
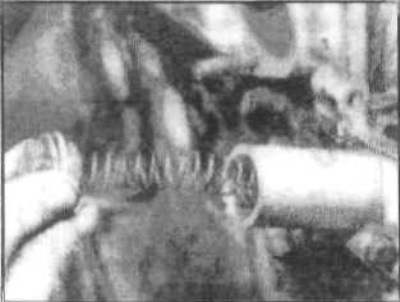
Caution: When unscrewing the tensioner plug, hold it securely as it may be pushed out by the spring.
If you are removing the upper drive cover on the engine, remove the thermostat cover and pull out the thermostat.
To remove the lower drive cover on this engine, loosen the alternator mounting bolts and move the alternator to the side. Remove the front lower mounting bracket bolt and loosen the other bolts. Also remove the power steering pump bracket and move it to the side.
Remove the bolts and nuts securing the upper timing chain cover to the engine block and remove the cover. Draw the bolt locations so you can reinstall them in the same holes they were removed from. Remove the upper timing chain cover. If the cover does not come off, tap it lightly with a rubber mallet. On early engines, remove the distributor drive shaft.
Remove the bolts and nuts securing the lower timing chain cover to the engine block. Be sure to remove the three bolts that secure the base of the cover to the front edge of the oil pan. Loosen the remaining oil pan bolts.
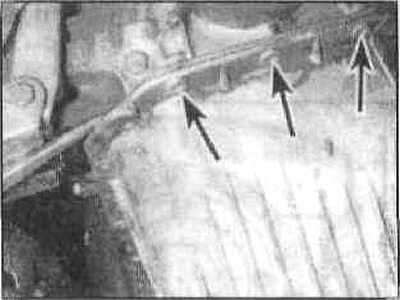
Run a sharp knife between the pan gasket and the lower drive chain cover. Be very careful not to damage or stain the gasket so that it can be reused.
Remove the lower drive chain cover by tapping it with a rubber mallet or by inserting a wooden wedge under it and hitting it with a hammer. Do not pry the cover off with a screwdriver, as this may damage the contact surfaces.
Use a scraper to remove all traces of old sealant from the cover and engine block.
Caution: Be very careful not to scratch the soft aluminum surfaces. Also, try not to damage or contaminate the pan gasket. After removing traces of sealant, wipe the surfaces with a rag soaked in the solution.
Installation
Replace the front seals. Apply a small amount of oil to the sealing lips of the seals.
Apply a thin coat of sealant to the oil pan gasket where it meets the lower timing chain cover. Apply additional sealant to the edges of the gasket that meet the engine block,
Caution: If the oil pan gasket is damaged, instead of installing a new gasket, you can cut away the damaged front section and, using this as a template, cut out a section of the new oil pan gasket. Cover the exposed inside area of the crankcase with a rag, then clean off all traces of the old sealant from the area where the gasket was removed. Secure the cut out section of the new gasket to the oil pan with a special adhesive, then apply the sealant as described at the beginning of this section.
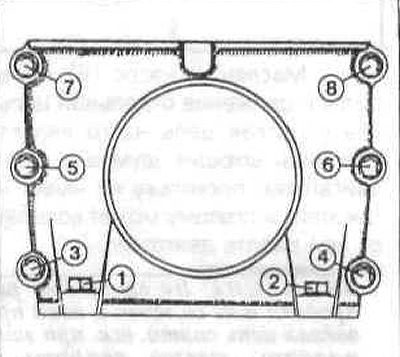
Coat both sides of the new lower timing chain cover gasket with sealant, then position the cover against the front of the engine. Install the bolts and tighten them to the specified torque. Work in a diagonal sequence.
Caution: Tighten the cover-to-engine block bolts first, then tighten the oil pan-to-cover bolts. If the gasket protrudes, cut it off.
Install the upper drive chain cover in the same way as the lower one. If the gasket protrudes, cut it off with a blade.
Note: After applying the sealant, assembly must be completed within 10 minutes, as after this time the sealant will harden.
Tighten bolts (1) and (2), then tighten the remaining bolts in the sequence shown, and only then finally tighten bolts (1) and (2).
Install in the reverse order of removal.
(The original text is available on the website: bmwman)
This article is available at russian, bulgarian, belarusian, ukrainian, serbian, croatian, romanian, polish, slovak, hungarian
Article verified: Sevastyanov Nikolay
Share information:
Previous articles
БМВ E32: Minor engine repair
Next articles
Similar articles on other types of BMW cars:
Timing Chain Covers — Removal and Installation BMW 3 Series E46 (1998-2006, petrol)
Removal and installation the timing belt BMW 3 Series E30 (1982-1994)
Removal and installation timing chain covers BMW 5 Series E28 (1981-1988)
Removal and installation the timing belt BMW 5 Series E34 (1988-1996)
Pistons — removal and installation BMW X3 E83 (2003-2010)
Removal and installation the engine BMW X5 E53 (1999-2006)
Timing Chain Covers — Removal and Installation BMW 3 Series E46 (1998-2006, petrol)
Removal and installation the timing belt BMW 3 Series E30 (1982-1994)
Removal and installation timing chain covers BMW 5 Series E28 (1981-1988)
Removal and installation the timing belt BMW 5 Series E34 (1988-1996)
Pistons — removal and installation BMW X3 E83 (2003-2010)
Removal and installation the engine BMW X5 E53 (1999-2006)
Link in different formats to this page
Visitor comments
No comments yet
- General information
- Introduction to guide
- Manual
- Maintenance
- Power unit
- Engine M60/1, M60/2 (petrol)
- M62 engine (petrol)
- M57 engine (diesel)
- M67 engine (diesel)
- Cooling system
- Fuel system (petrol)
- Fuel system (diesel)
- Exhaust system
- Ignition and control systems
- Charge and launch systems
- Transmission
- Clutch
- Mechanical gearbox
- Automatic gearbox
- Cardan and drive shafts
- Chassis
- Brake system
- Front suspension
- Rear suspension
- Steering
- Body
- Exterior
- Interior
- Electrical equipment
- Equipment and devices
- Lighting
- Heating and air conditioning
- Electrical circuits
- General information
- Care and maintenance
- Power unit
- Minor engine repair
- Engine overhaul
- Lubrication system
- Cooling system
- Ignition system
- Supply system
- Injection system (petrol)
- Injection system (diesel)
- Exhaust system
- Transmission
- Clutch
- Manual gearbox
- Automatic gearbox
- Cardan gear
- Rear axle and shafts
- Chassis
- Front suspension
- Rear suspension
- Steering
- Wheels and tires
- Brake system
- Body
- Body elements
- Electrical equipment
- Equipment and devices
- Electrical circuits