
- Home
- BMW 7 Series
- E38
- Power unit
- Fuel system (diesel)
- Removal and installation of fuel injection pump
Removal and installation of fuel injection pump (BMW 7 Series E38)
After installation, the fuel system should be bled, preventing the high-pressure fuel pump from running without fuel (dry).
Models with M51 engine
1. Disconnect the negative cable from the battery.
2. Remove the engine crankcase guard.
3. Remove the fan and its casing (see chapter Engine cooling, heating, ventilation and air conditioning systems).
4. Remove the intake manifold (see Engine).
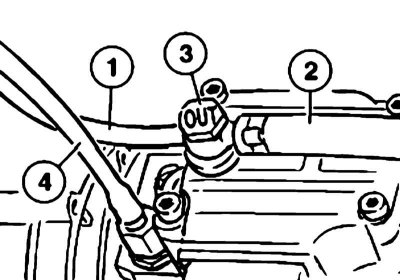
5. Disconnect the oil drain hose (1), remove the drain line (2) and disconnect the fuel line (4).
Replace the oil drain hoses.
6. Using a special split key, disconnect the distribution pipes from the injectors and the high-pressure fuel pump. Plug the open holes of the injectors and the high-pressure fuel pump.
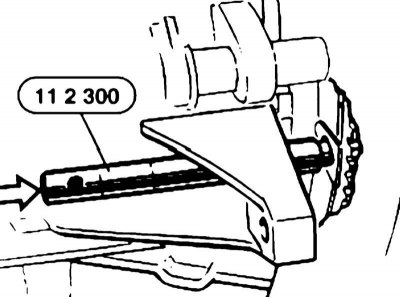
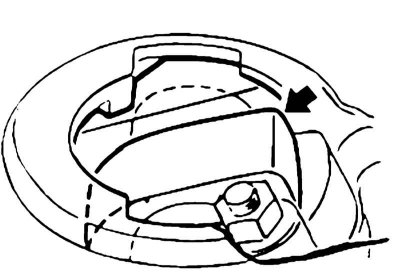
7. Lock the engine in the position of the piston of the 1st cylinder at TDC at the end of the compression stroke, using tool No.11 2 300. To ensure that TDC is set correctly, remove the oil filler cap: the camshaft cam should point upwards.
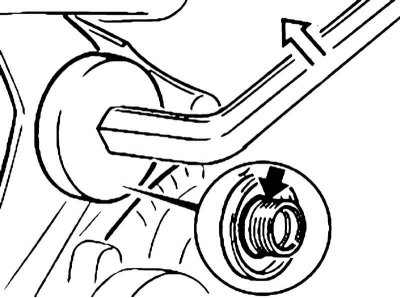
8. Remove the timing belt tensioner cap nut.
When installing, check and replace the sealing ring if necessary.
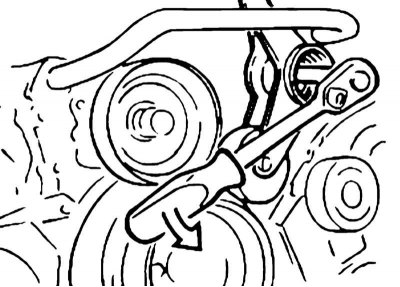
9. Remove the central nut and screw in tool No.13 5 120 without the ejector screw in its place.
10. Remove the generator air supply duct.
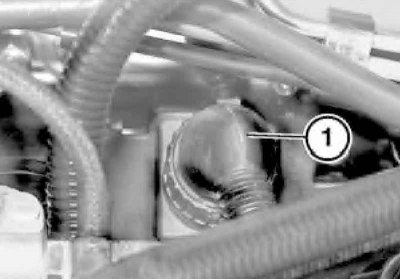
11. Disconnect the connector on the fuel injection pump.
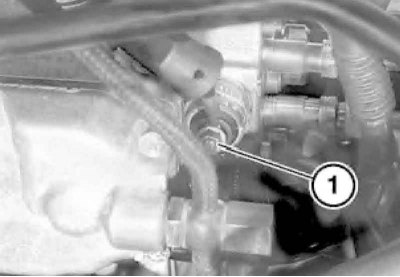
12. Remove the dust cap and loosen the nut.
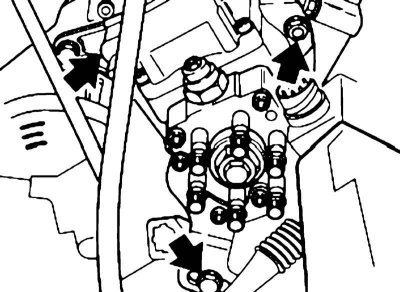
13. Unscrew the bolts on the fuel injection pump.
When installing, pay attention to the installation of spacer washers.
14. By screwing the ejector screw into tool No.13 5 120, separate the fuel injection pump from the sprocket.
Leave the tool #13 5 120 screwed in until the injection pump is installed, otherwise the sprocket will fall and the engine will have to be disassembled. Before installing the injection pump, the ejector screw of the tool #13 5 120 should be completely unscrewed.
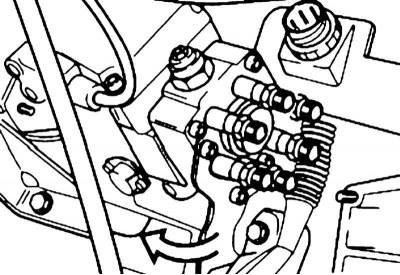
15. Turn the injection pump clockwise so that the bracket can be passed past the engine support bracket. Remove the injection pump.
When installing, replace the pump flange sealing ring.
16. Installation is carried out in reverse order.
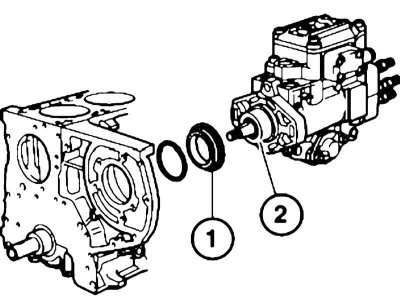
17. Depending on the fuel injection pump support, when installing it, it is necessary to install a spacer ring under the mounting hole in the support. If the mounting diameter (2) is equal to 68 mm, remove the sealing ring (1).
18. If the fuel injection pump has been removed for replacement, transfer the mounting elements to the new pump.
Models with M57 engine
Cover the generator to prevent working fluids from getting on it. The position of the fuel injection pump relative to the timing belt does not affect its operation. After disconnecting the pressure pipes, be sure to plug the holes in the fuel injection pump.
1. Remove the intake manifold (see chapter Engine).
2. Drain the coolant from the radiator of the cooling system (see chapter Vehicle settings and routine maintenance).
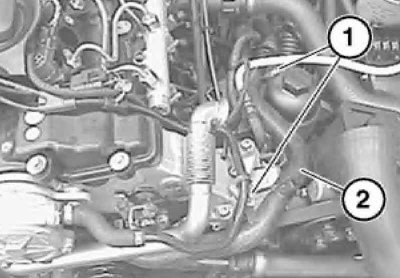
3. Loosen the bolts (1), disconnect the water hoses from the return pipe (2) and remove it.
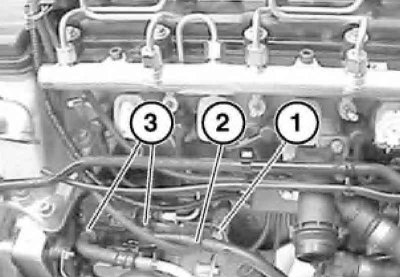
4. Disconnect the connector (1) from the fuel injection pump pressure regulator, loosen the clamps (3) and disconnect the supply and return fuel hoses (2).
Replace the clamps during installation.
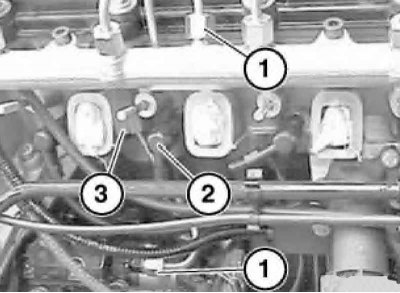
5. Disconnect the glow plug connector (2). Loosen the union nuts (1) securing the pump pipeline using special tool No.13 5 020 and remove the pipeline.
When installing, pay attention to the correct installation of the rubber-metal hinge (3).
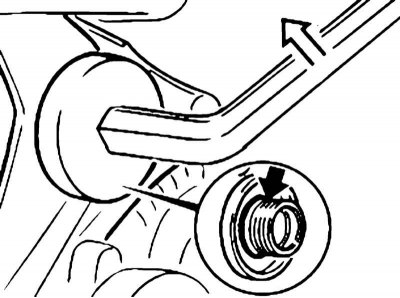
6. Loosen the fuel injection pump mounting nuts and remove the generator drive belt from the tensioner roller (see chapter Engine).
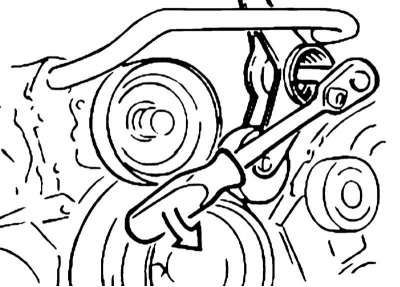
7. Unscrew the threaded plug.
Replace the sealing ring when installing.
8. Remove the fuel injection pump drive sprocket mounting nut located under the threaded plug and screw tool No.13 5 192 into its place.
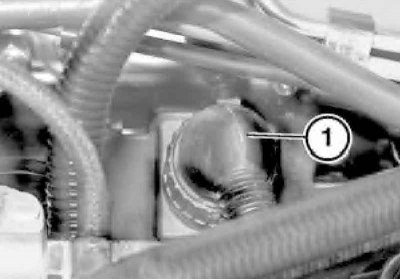
9. Install tool No.13 5 191 without the ejector bolt onto the fuel injection pump sprocket, then screw in the ejector bolt (1), first until it fits snugly, and then until the fuel injection pump separates from the sprocket.
10. Remove the fuel injection pump.
To secure the sprocket, tool No.13 5 190 should be left on the vehicle and should not be removed under any circumstances.
11. Installation is carried out in the reverse order. To install the high-pressure fuel pump, unscrew the ejector screw. Clean the mating surfaces and replace the fuel pump gasket.
12. After installation, turn on the ignition for about 1 minute to remove air from the fuel system. During this time, the fuel pump is activated and the fuel system is filled with fuel, displacing air.
Models with M67 engine
If the installed boost air hoses are not degreased and are wet, this may lead to the supercharger failure. After disconnecting the pressure pipes, be sure to plug the holes in the fuel injection pump. The position of the fuel injection pump relative to the timing belt does not affect its operation.
1. Remove the top engine covers.
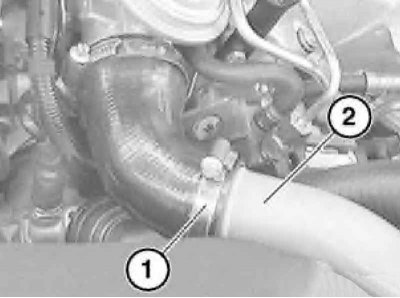
2. Loosen the clamp (1) and pull the pressure tube (2) out of the pressure hose.
3. Remove the radiator shroud (see chapter Engine cooling, heating, ventilation and air conditioning systems).
4. Drain the coolant from the engine cooling system radiator (see chapter Engine cooling, heating, ventilation and air conditioning systems).
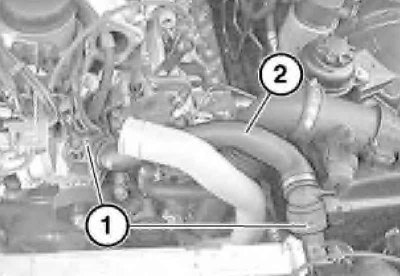
5. Open the clamps (1) of the water hose (2) and remove it.
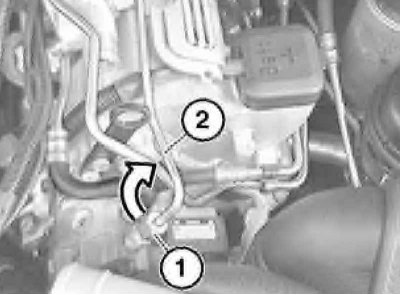
6. Loosen the union nut (1) and slightly lift the pressure pipe (2).
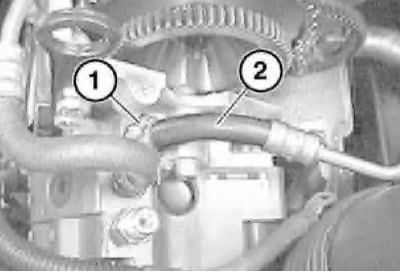
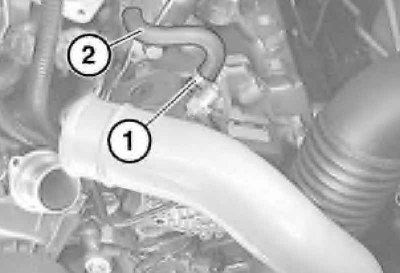
7. Loosen the clamps (1) and disconnect the fuel hoses (2).
Replace the hose clamps during installation.
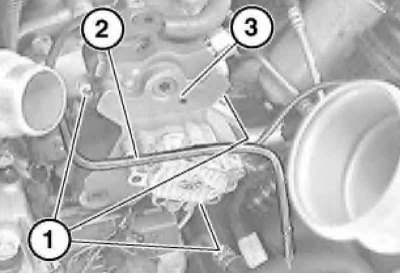
8. Unscrew the fastening bolts (1) of the high-pressure fuel pump and disconnect the shut-off valve connector from the high-pressure fuel pump. Move the wire (2) aside and remove the high-pressure fuel pump (3).
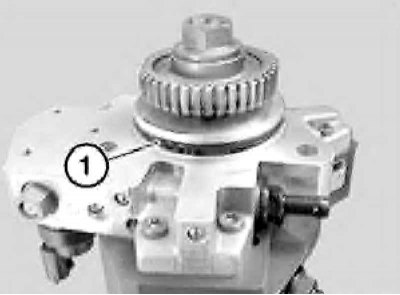
9. Installation is carried out in the reverse order. Replace the damaged fuel injection pump sealing ring.
This article is available at russian, bulgarian, belarusian, ukrainian, serbian, croatian, romanian, polish, slovak, hungarian
Article verified: Polikarpov Saveliy
Share information:
Previous articles
БМВ E38: Fuel system (diesel)
Next articles
Similar articles on other types of BMW cars:
Mechanical fuel pump — checking, adjustment, removal and installation BMW 3 Series E21 (1975-1983)
Removal and installation the fuel pump BMW 3 Series E30 (1982-1994)
Removal and installation the injection pump of the Kugelfischer system BMW 5 Series E12 (1972-1981)
Removal and installation the fuel pump BMW 5 Series E34 (1988-1996)
Removal and installation the fuel filler cap BMW X3 E83 (2003-2010)
Fuel injection control subsystem BMW X5 E53 (1999-2006)
Mechanical fuel pump — checking, adjustment, removal and installation BMW 3 Series E21 (1975-1983)
Removal and installation the fuel pump BMW 3 Series E30 (1982-1994)
Removal and installation the injection pump of the Kugelfischer system BMW 5 Series E12 (1972-1981)
Removal and installation the fuel pump BMW 5 Series E34 (1988-1996)
Removal and installation the fuel filler cap BMW X3 E83 (2003-2010)
Fuel injection control subsystem BMW X5 E53 (1999-2006)
Link in different formats to this page
Visitor comments
No comments yet
- General information
- Introduction to guide
- Manual
- Maintenance
- Power unit
- Engine M60/1, M60/2 (petrol)
- M62 engine (petrol)
- M57 engine (diesel)
- M67 engine (diesel)
- Cooling system
- Fuel system (petrol)
- Fuel system (diesel)
- Exhaust system
- Ignition and control systems
- Charge and launch systems
- Transmission
- Clutch
- Mechanical gearbox
- Automatic gearbox
- Cardan and drive shafts
- Chassis
- Brake system
- Front suspension
- Rear suspension
- Steering
- Body
- Exterior
- Interior
- Electrical equipment
- Equipment and devices
- Lighting
- Heating and air conditioning
- Electrical circuits
- General information
- Care and maintenance
- Power unit
- Minor engine repair
- Engine overhaul
- Lubrication system
- Cooling system
- Ignition system
- Supply system
- Injection system (petrol)
- Injection system (diesel)
- Exhaust system
- Transmission
- Clutch
- Manual gearbox
- Automatic gearbox
- Cardan gear
- Rear axle and shafts
- Chassis
- Front suspension
- Rear suspension
- Steering
- Wheels and tires
- Brake system
- Body
- Body elements
- Electrical equipment
- Equipment and devices
- Electrical circuits