
Press out the drive bevel gear.
Remove the front bearing race using the tool.
Remove the rear bearing race using the tool.
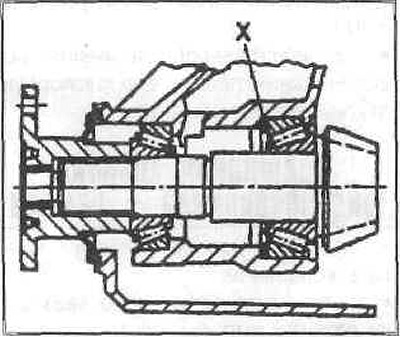
Note: There is an adjusting washer (X) located under the rear outer bearing race to adjust the correct gear position.
Press in a new bearing race using the tool. Remove the tapered roller bearing from the pinion gear using the tool.
Press in a new tapered roller bearing.
To determine the size of the adjusting washer, the drive gear is installed without a spacer sleeve.
Install the front tapered roller bearing using the fixture.
Install and tighten the drive shaft flange to a torque of 250 N·m.
Assemble and calibrate the measuring unit.
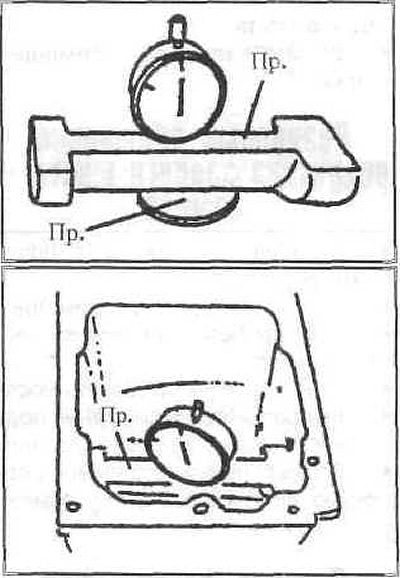
Attach the instrument to the fixture. Set to zero.
Place the measuring disc on the bevel gear and install the measuring block in the housing.
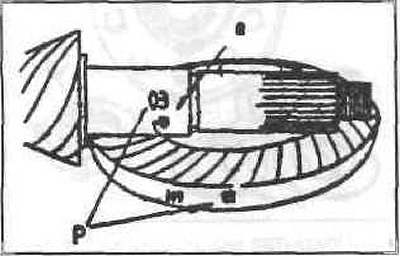
Use the diagram to determine the size of the adjusting washer.
The compensation dimension "e" is marked on the pair of gears.
Remove the drive bevel gear.
Install the adjusting washer of the required size.
Install the drive gear with the spacer sleeve.
Press in a well lubricated seal.
Install the drive shaft flange without tightening. The tension of 5000 N·m is set when adjusting the turning resistance.
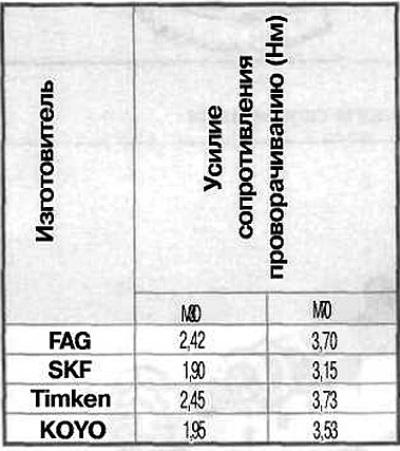
Tighten the flange nut of the drive shaft, checking the resistance to turning.
Tighten to the specified torque from the table plus 20 Nm for a new O-ring.
Tap in the new safety plate with the tool.
Install the differential, check and adjust the gear engagement pattern and engagement clearance as described.
Completely install the final drive gearbox and fill with oil. The same procedure should be followed when replacing a pair of gears.