
Withdrawal
Loosen the wheel nut
Caution: The nut is over-tightened. Therefore, for safety reasons, the vehicle must be on its wheels when the nut is loosened.
Mark the position of the rear wheels on the hubs so that the balanced wheels can then be reinstalled. Loosen the wheel bolts while the vehicle is on the ground. Raise and support the vehicle at the rear and remove the rear wheels.
Disconnect the propeller shaft from the main gear of the rear axle.
Remove the rear stabilizer bar. To do this, unscrew the nuts securing its rods on the left and right. Remove the rubber mounts from the rear axle beam and remove them together with the stabilizer. Remove the bolts, disconnect both drive shafts from the final drive and hang them on a wire.
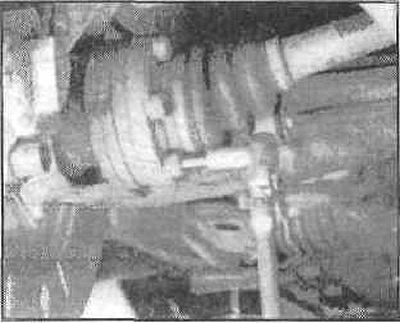
Attention: The drive shafts must not hang down, otherwise the outer CV joint will be overloaded.
Support the main gear with a jack by placing a wooden block under its head.
Loosen the nut.
Remove the end muffler of the exhaust system.
Loosen the nuts on the left and right.
Lower the main gear and disconnect it from the driveshaft flange.
Press the drive shaft out of the wheel hub.
Attention: This requires an appropriate puller. Fasten the tool support with two wheel nuts and screw the spindle along the threads, pressing it against the shaft. The spindle must fit snugly against the shaft and run smoothly along the thread.
Take out the axle shaft.
Installation
Install the drive shaft and attach it with wire.
Insert the shaft using the special tool. To do this, first screw the spindle completely into the support. Screw the threaded socket onto the spindle and shaft. On the other side, screw the nut onto the spindle and tighten them to the support. This will pull the drive shaft into the hub. Make sure that the splines of the drive shaft and the hub are aligned before installing
Lightly lubricate the new collar nut and loosen it slightly.
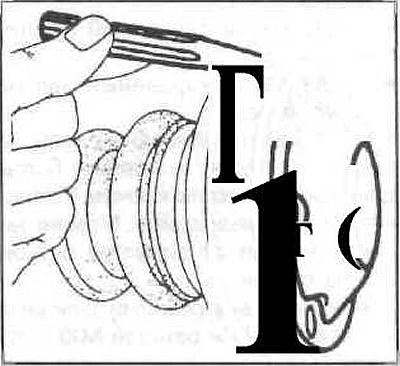
Cut the collar of the inner hinge cover with side cutters.
Insert final drive and tighten new self-locking nuts.
Tightening torques:
- Main gear mountings on the rear axle beam in front (the bolt is being pulled) - 180 Nm.
- Final drive mountings on the rear axle beam at the rear - 105 Nm.
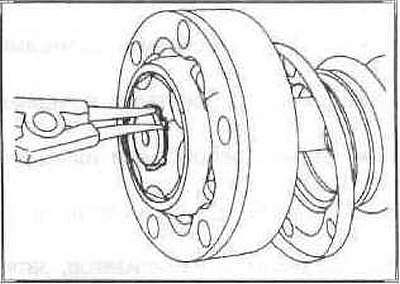
Press the cover off the hinge ring with a punch.
Install the end silencer.
Install the propeller shaft to the main gear.
Install the drive shafts to the final drive and tighten the bolts with a torque wrench. Install washers.
Tightening torque depends on thread diameter and bolt type
- Bolts with internal slots (asterisk) and M10 thread - 85 Nm
- Bolts M10 with fixation (replace bolts and washers) - 95Nm.
- Threaded bolts M12 - 110 Nm.
- Bolts with TORX head and M10 thread - 85 Nm.
- Bolts with ribbed slots M8 - 65Nm.
- Bolts with ribbed slots M10 - 100 Nm.
- Bolts with ribbed slots M12 - 160 Nm.
Unhook the wire from the drive shaft.
Install the stabilizer, tighten the nuts of the rods to a torque of 40 Nm.
Install the rear wheels according to the marks made during removal. Do not lubricate wheel bolts. Lower the car.
Tighten the collar nut to 300 Nm.
Fasten the hub nut to the drive shaft, for which purpose drive the collar of the nut with a punch into the recess on the shaft.
Tighten the wheel bolts crosswise to 100 Nm.
Check the oil level in the final drive and top up if necessary.