
2. Remove the rear underbody trim.
3. Remove the top engine cover.
4. While holding the hood, separate both retaining posts from it.
5. Bring the hood to a vertical position and secure it by screwing two M8 bolts into the hinges.
6. Using a lifting device, raise the engine by the front and rear lifting eyes enough to relieve the front axle beam.
7. Remove the cooling fan shroud.
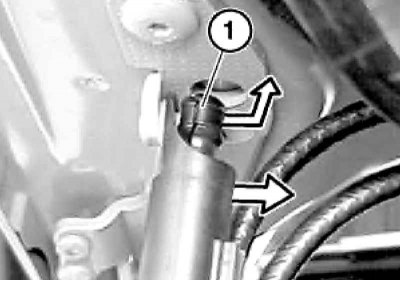
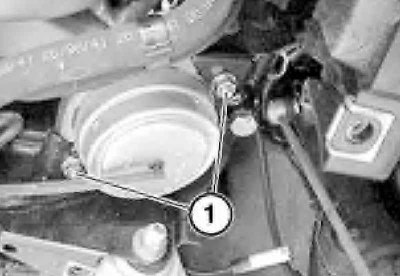
8. Unscrew the bolt (1) and disconnect the power steering line (2).
Collect the leaking power steering fluid. Replace the pipeline sealing rings if necessary.
9. Remove the lower section of the oil pan (see section Removal and installation the oil pan).
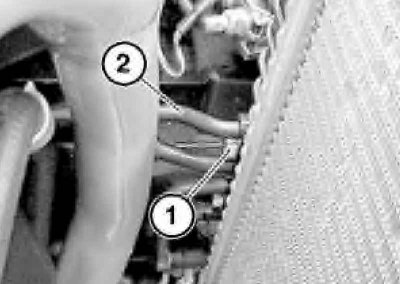
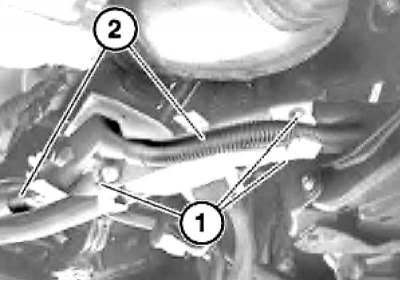
10. Loosen the clamps (1) of the oil drain line and move the hose (2) back.
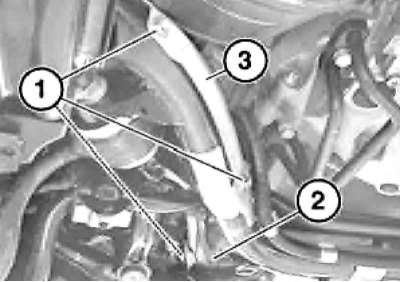
11. Loosen the bolts (1), release the clamp (2) and remove the heat shield (3).
12. Unscrew the bolts (1), disconnect the positive battery cable (2) together with the flange from the bridge beam and tie it up at the back.
13. Perform the actions described in paragraphs 10 through 18 of Section Removal and installation the upper section of the oil pan.
14. Disconnect the steering shaft from the steering gear (see chapter Suspension and steering).
To avoid damage to the coil spring in the steering column, it must be centered after completion of the work.
15. Loosen the nuts of the left and right engine mount cushions.
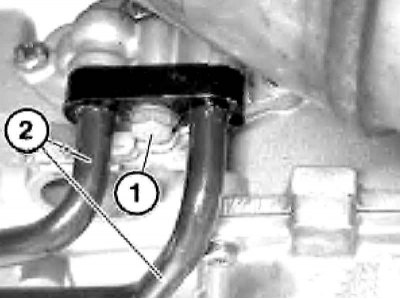
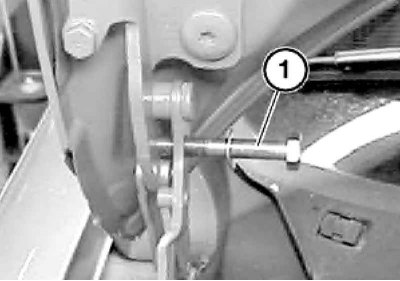
16. Unscrew the bolt (1) on the AT and disconnect the ATF pipes (2).
Replace the pipeline sealing rings if necessary.
17. Support the front axle beam using a hydraulic lift, unscrew its mounting bolts and lower the beam as low as possible (see chapter Suspension and steering).

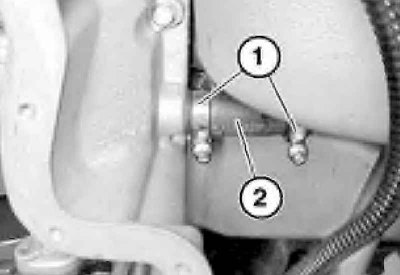
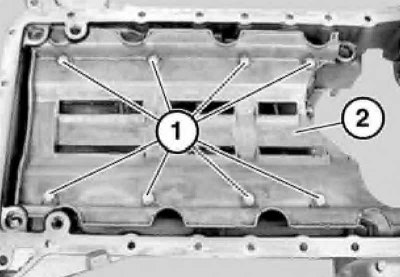
18. Remove the bolts (1) on the gearbox housing and all the bolts (2) on the upper section of the oil pan.
When installing, pay attention to the different tightening torques of the M6 and M8 bolts. Use a new oil pan upper section gasket.
19. If the upper section of the oil pan is replaced, the partition (2) should, if possible, be moved from the old pan to the new one.
20. Installation is carried out in reverse order. Please note the following points:
- Apply a strip of grease to the mating surface between the crankshaft rear oil seal cover and the engine crankcase (2mm high and 3mm wide) sealant Drei Bond 1209;
- Do not lubricate the oil pan upper section gasket with oil. Use a new gasket;
- Tighten the bolts in a crisscross pattern.
[You can find the original version on the portal «BMWMAN.ru»]