
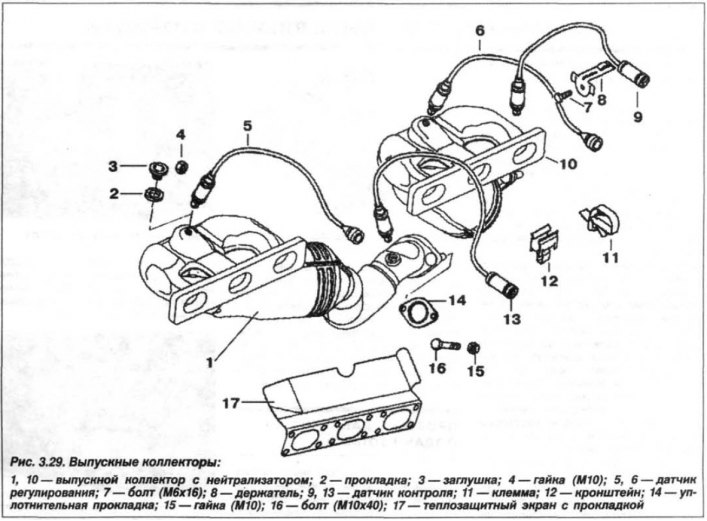
Allow the exhaust system to cool completely. The temperature should be less than 35°C or equal to the ambient temperature. Prepare the "31.2.220" tool and remove the lower gearbox casing and the stiffening plate. Disconnect the exhaust gas oxygen sensor joints and unscrew the sensors (5, 6, 9 and 13, see Fig. 3.29) oxygen content in the exhaust gas from the exhaust system.
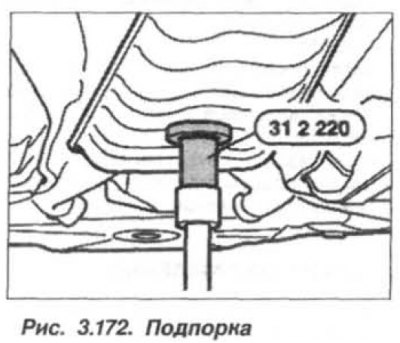
Support the exhaust system with the tool "31.2.220" (fig. 3.172), by installing it under the front muffler.
Wet all bolted connections of the exhaust system with a rust dissolving agent. The agent can be applied by spraying or brushing. Wait for some time for the rust to dissolve.
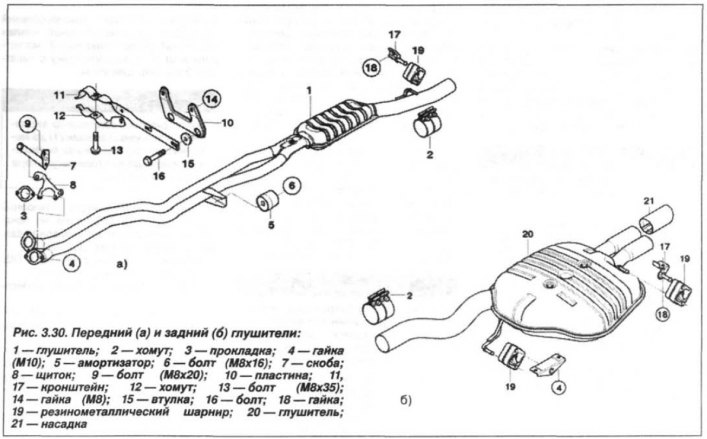
Unscrew all the nuts (4, see Fig. 3.30) fastenings of rubber-metal cushions (19) and remove the cushions from the brackets.
Fix the color of the cushions. The rubber cushions of the rear muffler on the bridge beam are red. Unscrew the bolt (6).
Loosen the nuts (4) and disconnect the exhaust system from the exhaust manifold. Remove the exhaust system as a whole.
Before installing the exhaust system, replace the sealing gaskets and all self-locking nuts, after lubricating the bolt threads with high-temperature copper-containing paste such as "Liqui Moly LM-50B-ASC" or "CRC". When installing the exhaust system on a vehicle, tighten the nuts by hand on the entire system beforehand.
When installing the bracket (17), fix it on the pin and adjust the exhaust system so that the gap between the body and the system is at least 25 mm at any point of its installation. Tighten the self-locking nuts to a torque of 30 N·m (3.0 kgf·m). Start the engine and check the tightness of the exhaust system by closing it with a cloth gag.