
Table of contents: Windshield and headlight washer…↓ Windshield and headlight washer pumps ↓ Windshield Washer Reservoir Fluid…↓ Windshield washer nozzles ↓ Headlight washer nozzles ↓ Windscreen wiper/washer control unit ↓ Rear window washer reservoir ↓ Rear window washer pump ↓ Rear window washer nozzle ↓
- Home
- BMW 3 Series
- E46
- Electrical equipment
- Equipment and devices
- Windscreen/Headlight Washer Components — Removal and Installation
Windscreen/Headlight Washer Components — Removal and Installation (BMW 3 Series E46)
Windshield and headlight washer reservoir
1. The windshield washer reservoir is located in the engine compartment. In models with headlight washers, the fluid from the reservoir is supplied by an additional pump to the headlight washer nozzles.
2. Remove fluid from the reservoir or prepare for leakage.
3. Release the heat shield from the retainer and disconnect the electrical connector from the pump. Gently turn the pump clockwise, then remove them from the tank and put them aside. Inspect the pump seals and make sure they are not damaged or worn. Replace the seals if necessary.
4. Disconnect the electrical connector from the fluid level sensor in the reservoir.
5. Release the tank from the mount, lift the tank and remove it from the engine compartment. Wash off traces of the liquid that has been drunk with cold water.
6. Installation is performed in the reverse order of removal. Make sure that the tank projections creep into the mudguard holes. Fill the tank and make sure there is no fluid leakage.
Windshield and headlight washer pumps
7. Remove fluid from the reservoir or prepare for leakage.
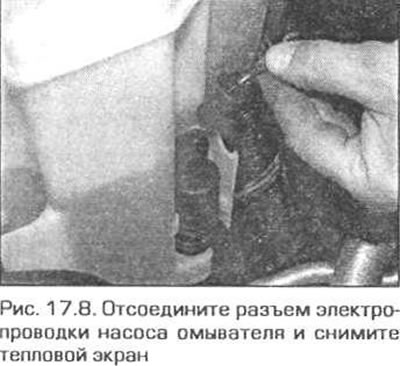
8. Release the heat shield from the retainer and disconnect the electrical connector from the pump. Gently turn the pump clockwise, then remove them from the tank and set them aside. Inspect the pump seals for damage or wear. Replace the seals if necessary (Fig. 17.8).
9. Installation is performed in the reverse order of removal. If the old seals are damaged, install new ones. Fill the tank and make sure there is no fluid leakage through the pump seal.
Windshield Washer Reservoir Fluid Level Sensor
10. Remove the tank (see above).
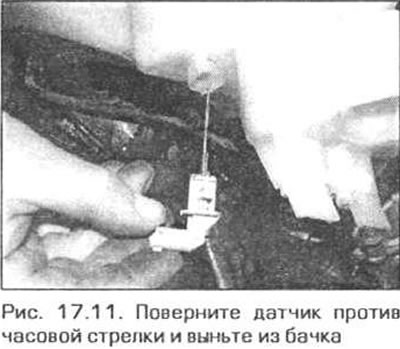
11. Turn the sensor counterclockwise and remove it from the tank (fig. 17.11).
12. Installation is performed in the reverse order of removal. If the old seal is damaged, install a new one. Fill the tank and check for fluid leaks.
Windshield washer nozzles
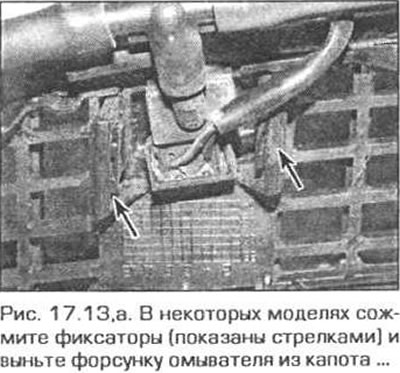
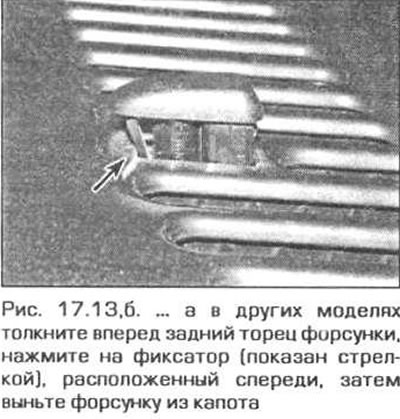
13. On early models, squeeze the tabs and carefully pull the injector out of the hood. Be careful not to scratch the paintwork. On later models, disconnect the hose and electrical connector from the injector, then push the rear end of the injector forward and up from inside the hood, press the tab located on the front end of the injector and pull it out of the hood (fig. 17.13, a, b).
14. Disconnect the hose from the injector. If necessary, disconnect the electrical connector from the injector.
15. When installing the injector on early models, securely connect the hose to the injector and install the injector on the hood. If necessary, connect the electrical connector. On later models, install the injector in place and connect the hose and electrical connector. Check the operation of the injector. If necessary, adjust the direction of the fluid stream from the injector (using a needle), one stream should hit slightly above the center of the cleaned area of the windshield, and the second - slightly below.
Headlight washer nozzles
16. Using a wooden or plastic block, carefully remove the injector housing located under the headlight and take out the injector.
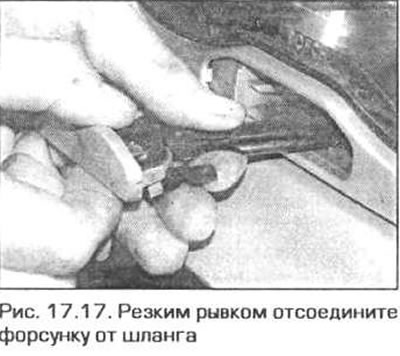
17. Disconnect the nozzle from the hose with a sharp jerk (fig. 17.17). Prepare for fluid leakage.
18. Disconnect the injector heater connector (if it exists).
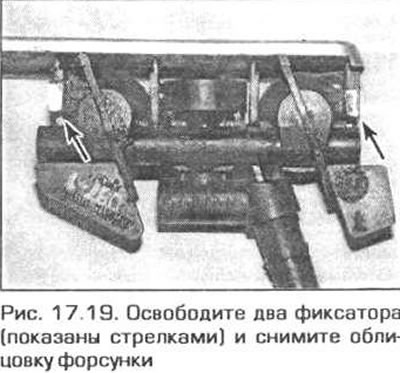
19. If necessary, remove the injector trim. To do this, release the two fasteners on both sides of the injector (fig. 17.19).
20. When installing, place the hose on the nozzle and insert the nozzle into place. Connect the wiring connector (if it exists). Adjust the injectors using the BMW tool 00 9 100.
Windscreen wiper/washer control unit
21. The windscreen wiper/washer system is controlled by a central control unit (ZKE V), which is sometimes called the main unit (GM V). This unit is located behind the glove box on the passenger side. To access the unit, remove the glove box (see chapter 11, paragraph 27).
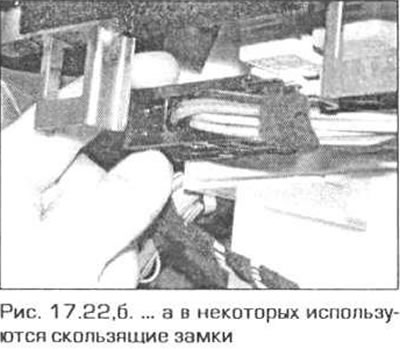
22. Disconnect the electrical connectors from the unit. Some connectors have locking levers, and some connectors use sliding locks (fig. 17.22, a, b).

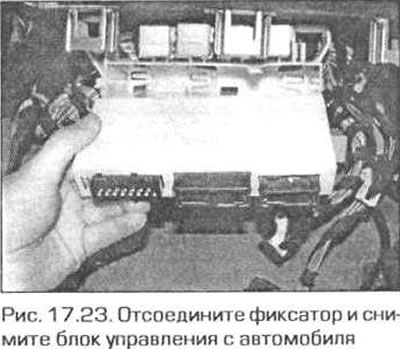
23. Disconnect the retainer and remove the control unit from the vehicle (fig. 17.23).
24. Installation is carried out in the reverse order of removal.
Rear window washer reservoir
25. Remove the right luggage compartment trim panel (see chapter 11, paragraph 27).
26. Drain the reservoir or prepare for a fluid leak.
27. Disconnect the electrical wiring connector from the pump.
28. Carefully disconnect the hoses from the pump.
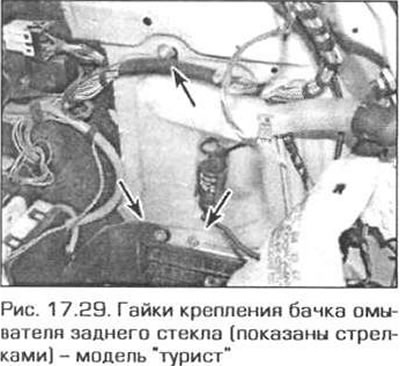
29. Loosen the upper mounting nut, then loosen the lower mounting nuts (fig. 17.29). Remove the tank.
30. Installation is carried out in the reverse order of removal.
Rear window washer pump
31. Remove the right luggage compartment trim panel (see chapter 11, paragraph 27).
32. Drain the reservoir or prepare for a fluid leak.
33. Disconnect the electrical wiring connector from the pump.
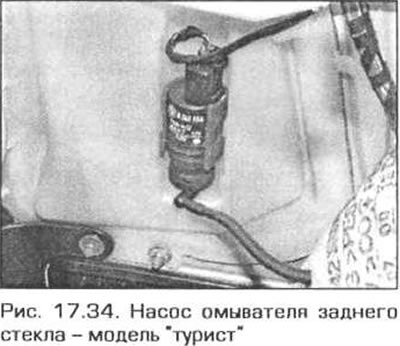
34. Carefully disconnect the pressure hose from the pump, pull the pump up and remove it from the tank (fig. 17.34).
35. Installation is carried out in the reverse order of removal.
Rear window washer nozzle
36. The rear window washer nozzle is attached to the end of the hose. Using a plastic or wooden tool, carefully remove the nozzle from the rubber gasket located above the glass (fig. 17.36),
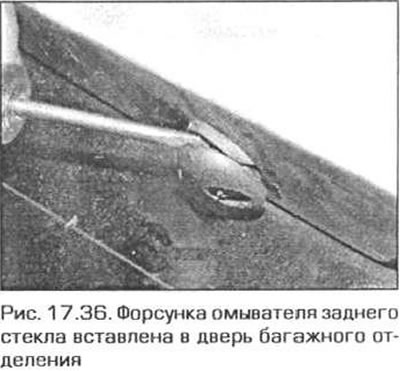
37. Installation is performed in the reverse order of removal. Adjust the stream of liquid so that it hits the glass 100 mm below the top edge and 320 mm from the edge of the glass.
This article is available at russian, bulgarian, belarusian, ukrainian, serbian, croatian, romanian, polish, slovak, hungarian
Article verified: Ilyinsky Matvey
Share information:
Previous articles
БМВ E46: Equipment and devices
Next articles
Similar articles on other types of BMW cars:
Windscreen, headlight (and fog light) washer and intensive cleaning… BMW 5 Series E34 (1988-1996)
Removal and installation the electric motor of the headlight beam… BMW 5 Series E39 (1995-2003)
Windscreen wiper motor — removal and installation BMW 7 Series E32 (1986-1994)
Removal and installation gear shift drive components BMW 7 Series E38 (1994-2001)
Removal and installation the left headlight (with adaptive cornering… BMW X3 E83 (2003-2010)
Removal and installation the engine BMW X5 E53 (1999-2006)
Link in different formats to this page
Visitor comments
No comments yet
- General information
- Manual
- Maintenance
- Power unit
- Engine repair
- Cooling system
- Power system (gasoline)
- Injection system (gasoline)
- Fuel system (diesel)
- Exhaust system
- Ignition system
- Charge and launch systems
- Transmission
- Car gearbox
- Clutch and drive shafts
- Chassis
- Brake system
- Suspension front and rear
- Steering
- Body
- Body care and repair
- Exterior
- Interior
- Electrical equipment
- Troubleshooting
- Lighting and signaling
- Equipment and devices
- Heater and air conditioner
- Electrical circuits
- General information
- Manual
- Repair on the road
- Weekly checks
- Maintenance
- Troubleshooting
- Power unit
- 4 cylinder engines
- 6 cylinder engines
- Engine overhaul
- Cooling and heating
- Fuel and exhaust system
- Starting and charging system
- Ignition system
- Transmission
- Clutch
- Mechanical gearbox
- Automatic gearbox
- Cardan and drive shafts
- Chassis
- Brake system
- Wheel suspension
- Steering
- Body
- Exterior
- Interior
- Electrical equipment
- Equipment and devices
- Electrical circuits
- General information
- Maintenance
- Power unit
- Engine repair
- Cooling system
- Ignition system
- Supply system
- Fuel injection system
- Exhaust system
- Transmission
- Clutch
- Car gearbox
- Front and rear axle
- Chassis
- Steering
- Brake system
- Body
- Exterior
- Interior
- Electrical equipment
- Heating system
- Equipment and devices
- Power devices
- Electrical circuits
- Power unit
- M10/M20 engine
- M40 engine
- Ignition system
- Lubrication system
- Cooling system
- Supply system
- Fuel injection
- Exhaust system
- Transmission
- Clutch
- Manual gearbox
- Front axle
- Rear axle
- Chassis
- Steering
- Brake system
- Body
- Exterior
- Interior
- Electrical equipment
- Heating system
- Equipment and devices
- Electrical circuits
- General information
- Specifications
- Operation and maintenance
- 4-cylinder engine
- Engine repair
- Cooling and lubrication system
- Supply system
- Ignition system
- 6-cylinder engine
- Engine repair
- Cooling and lubrication system
- Supply system
- Fuel injection system
- Ignition system
- Transmission
- Clutch
- 4-speed manual gearbox
- 5-speed manual gearbox
- Automatic gearbox
- Cardan and rear axle
- Chassis
- Steering
- Front suspension
- Rear suspension
- Brake system
- Electrical equipment
- Equipment and devices
- Electrical circuits