
Table of contents: Engine M43TU ↓ Engine N42 ↓
- Home
- BMW 3 Series
- E46
- Power unit
- 4 cylinder engines
- Crankshaft pulley and vibration damper — removal and installation
Crankshaft pulley and vibration damper — removal and installation (BMW 3 Series E46)
Engine M43TU
Note: If the pulley hub is removed, reassembly will require a new bolt and a torque wrench capable of producing 330 Nm of torque.
Removal
1. Remove the accessory drive belt(s) as specified in chapter 1. If necessary, remove the air conditioning compressor pulley.
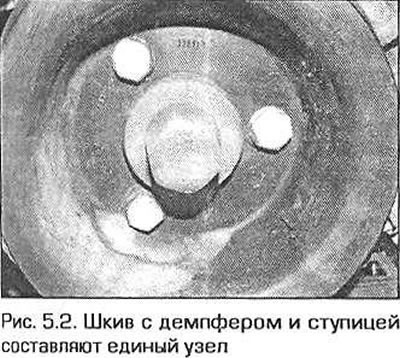
2. On some engines, the pulley and damper are a separate unit that is attached to the crankshaft hub, while on other engines, the pulley with damper and hub are a single unit, mounted on the shaft (Fig. 5.2).
3. On models with a pulley separate from the hub, unscrew the pulley mounting bolts and remove it from the hub. If necessary, hold the shaft from turning by the head of the hub mounting bolt.
4. On models where the pulley with the damper and the hub form a single unit, the hub mounting bolt will have to be unscrewed. The bolt must also be unscrewed on a model with a separate hub if the hub needs to be removed from the shaft for some reason.
Warning! The hub mounting bolt is tightened with great force. A special device is required to fix the shaft from turning. Do not try to use an unsuitable tool or improvised means for this. Most likely, in this case, you will get injured or damage the engine.
5. Make a fixture to prevent the shaft from rotating. A suitable fixture can be made from two pieces of steel strip connected together with a large bolt. Bolt the fixture to the hub using the pulley-to-hub bolts. A proprietary fixture for this purpose can be purchased from a BMW dealer (Fig. 5.5).

6. Loosen the hub mounting bolt. Keep in mind that the bolt is tightened with considerable force.
7. Unscrew the bolt and remove the washer. Do not use the bolt again - replace it with a new one.
8. Remove the hub from the shaft nose. If the hub cannot be removed by hand, use a puller.
9. If the woodruff key does not hold well in the shaft nose, remove it as well.
Installation
10. On the model with a single unit pulley-damper-hub (or on a split hub model, if the hub has been removed for some reason) before installing the hub on the shaft, it is advisable to take the opportunity to replace the front crankshaft oil seal in the lower chain cover (see paragraph 6).
11. On the model with a single unit pulley - damper - hub (or on a split hub model, if the hub has been removed for some reason) perform the operations starting from the next point. Otherwise, go to point 17.
12. Insert the key into the groove of the crankshaft nose. Align the groove of the hub with the key and put the hub on the shaft.
13. Secure the hub with a new bolt and washer.
14. Screw the anti-rotation device to the hub, as during disassembly, and tighten the bolt to the required force.
15. Next, on a model with a single pulley-damper-hub unit, perform the operations starting from step 18.
16. Remove the crankshaft holding device and install the pulley with the damper in its place, ensuring that the hub locating pin enters the corresponding hole in the pulley.
17. Screw in the pulley mounting bolts and tighten them to the required torque.
18. Install the accessory drive belt(s) as specified in chapter 1.
Engine N42
Note: If the pulley hub is removed, reassembly will require a new bolt and a torque wrench capable of producing 300 Nm of torque.
Removal
19. Remove the accessory drive belt(s) as specified in chapter 1.
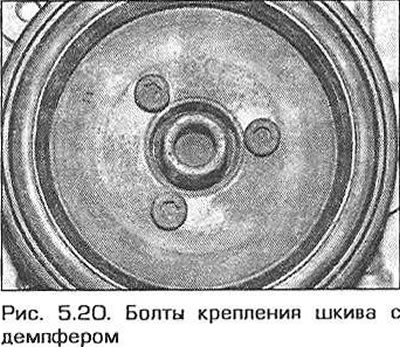
20. Unscrew the three bolts and remove the pulley with the damper from the hub. Hold the crankshaft from turning by the head of the hub bolt (Fig. 5.20).
21. To remove the pulley, you need to unscrew the central bolt.
Caution! After loosening the hub mounting bolt, the chain drive sprockets, oil pump and balance shafts will no longer be clamped on the shaft and will be able to rotate independently of it. Therefore, when loosening the hub bolt, lock the crankshaft and camshaft in the installation position as indicated in paragraph 3.
Warning! The hub mounting bolt is tightened with great force. To lock the crankshaft from turning, a special device is required, which can be purchased from a BMW dealer. Do not try to use an unsuitable tool or improvised means for locking. Most likely, in this case, you will get injured or damage the engine.
22. Make a device to prevent the shaft from rotating. A suitable device can be made from two pieces of steel strip connected with a large bolt. Screw the device to the hub with the pulley-to-hub bolts.
23. Loosen the hub mounting bolt. Keep in mind that the bolt is tightened with considerable force.
24. Remove the bolt and remove the hub from the crankshaft nose. When reassembling, replace the bolt with a new one. Since the hub has been removed, take this opportunity to replace the front crankshaft seal in the lower chain cover (see paragraph 18).
Installation
25. Installation is carried out in the reverse order of removal, observing the following notes.
- a) Adjust the balance shafts as specified in paragraph 16.
- b) Tighten all fasteners to the specified torque, if specified.
This article is available at russian, bulgarian, belarusian, ukrainian, serbian, croatian, romanian, polish, slovak, hungarian
Article verified: Ilyinsky Matvey
Share information:
Previous articles
БМВ E46: 4 cylinder engines
Next articles
Similar articles on other types of BMW cars:
Removal and installation the oil pan BMW 5 Series E12 (1972-1981)
Removal and installation the torsional vibration damper BMW 7 Series E38 (1994-2001)
Cylinder Head Cover — Removal and Installation BMW 7 Series E32 (1986-1994)
Pistons — removal and installation BMW X3 E83 (2003-2010)
Torsional vibration damper BMW X5 E53 (1999-2006)
Link in different formats to this page
Visitor comments
No comments yet
- General information
- Manual
- Maintenance
- Power unit
- Engine repair
- Cooling system
- Power system (gasoline)
- Injection system (gasoline)
- Fuel system (diesel)
- Exhaust system
- Ignition system
- Charge and launch systems
- Transmission
- Car gearbox
- Clutch and drive shafts
- Chassis
- Brake system
- Suspension front and rear
- Steering
- Body
- Body care and repair
- Exterior
- Interior
- Electrical equipment
- Troubleshooting
- Lighting and signaling
- Equipment and devices
- Heater and air conditioner
- Electrical circuits
- General information
- Manual
- Repair on the road
- Weekly checks
- Maintenance
- Troubleshooting
- Power unit
- 4 cylinder engines
- 6 cylinder engines
- Engine overhaul
- Cooling and heating
- Fuel and exhaust system
- Starting and charging system
- Ignition system
- Transmission
- Clutch
- Mechanical gearbox
- Automatic gearbox
- Cardan and drive shafts
- Chassis
- Brake system
- Wheel suspension
- Steering
- Body
- Exterior
- Interior
- Electrical equipment
- Equipment and devices
- Electrical circuits
- General information
- Maintenance
- Power unit
- Engine repair
- Cooling system
- Ignition system
- Supply system
- Fuel injection system
- Exhaust system
- Transmission
- Clutch
- Car gearbox
- Front and rear axle
- Chassis
- Steering
- Brake system
- Body
- Exterior
- Interior
- Electrical equipment
- Heating system
- Equipment and devices
- Power devices
- Electrical circuits
- Power unit
- M10/M20 engine
- M40 engine
- Ignition system
- Lubrication system
- Cooling system
- Supply system
- Fuel injection
- Exhaust system
- Transmission
- Clutch
- Manual gearbox
- Front axle
- Rear axle
- Chassis
- Steering
- Brake system
- Body
- Exterior
- Interior
- Electrical equipment
- Heating system
- Equipment and devices
- Electrical circuits
- General information
- Specifications
- Operation and maintenance
- 4-cylinder engine
- Engine repair
- Cooling and lubrication system
- Supply system
- Ignition system
- 6-cylinder engine
- Engine repair
- Cooling and lubrication system
- Supply system
- Fuel injection system
- Ignition system
- Transmission
- Clutch
- 4-speed manual gearbox
- 5-speed manual gearbox
- Automatic gearbox
- Cardan and rear axle
- Chassis
- Steering
- Front suspension
- Rear suspension
- Brake system
- Electrical equipment
- Equipment and devices
- Electrical circuits