
Table of contents: Removal ↓ Installation ↓
- Home
- BMW 5 Series
- E28
- Transmission
- Automatic gearbox
- Removal and installation of automatic transmission
Removal and installation of automatic transmission (BMW 5 Series E28)
If your vehicle's radio is equipped with an anti-theft system, make sure you enter the correct code before disconnecting the battery.
If the instrument panel displays the wrong language after connecting the battery, refer to Section Anti-theft audio system and instrument cluster language, which describes the procedure for installing the required language.
Removal
1. Disconnect the negative battery cable.
2. Disconnect the throttle cable and remove it from the bracket on the intake manifold (see chapter Power supply system).
3. On M10 engines, remove the distributor cap to prevent damage to it when removing the transmission and the engine is tilted rearward.
4. Jack up the vehicle and securely place it on axle stands.
5. Remove the exhaust system (see chapter Power supply system).
6. Disconnect the selector rod from the cable (see section Adjusting the selector lever drive).
7. Remove the driveshaft (see chapter Clutch).
8. Drain the transmission fluid (see chapter Routine car maintenance). Remove the fill tube and disconnect the coolant lines.
9. Plug open lines to prevent dirt from entering the transmission.
10. On 3HP 22 transmissions, remove the transmission cover at the bottom of the dome. On other transmission models, remove the stiffener and transmission impact limiter at the bottom of the dome.
11. Through the hole in the dome, release the bolts securing the rotary converter to the drive disk. There are four such bolts on 3NR 22 transmissions; on 4HP 22 - three. If necessary, turn the engine so that all bolts are visible.
12. On vehicles with the Motronic fuel injection system, remove the engine speed and crankshaft position sensors installed in the transmission dome (see chapter Ignition system).
13. On vehicles equipped with 4HP 22 EH transmissions, disconnect the control module electrical connector on the left side of the transmission, just above the transmission oil pan.
14. Support the transmission from underneath with a special transmission jack or jack on wheels, placing a block of wood between the jack head and the transmission oil pan to protect the pan. Remove the rear transmission mount and, if provided, the reinforcement beam, loosening the bolts securing them to the body. Lower the engine and transmission onto the front axle.
To avoid damage to the converter or transmission, do not allow the converter shaft to support the weight of the transmission.
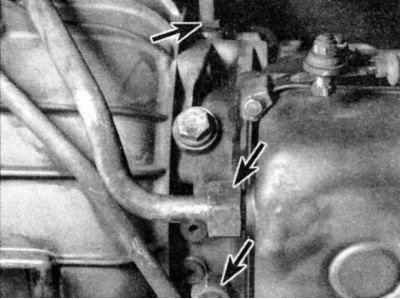
15. Remove the transmission dome mounting bolts from the engine.
16. To access the torque converter, remove the inspection grille on the side of the dome. Using a pry bar to hold the torque converter securely attached to the transmission, separate the transmission from the engine.
17. If installing a new or rebuilt transmission, remove the rotation converter from the old transmission and install it on the new transmission. To remove the converter from the old transmission, insert the two long bolts halfway into the mounting holes of the converter and pull evenly on both bolts. To install the converter, see Section Replacing oil seals, paragraph 6.
Installation
Installation is generally done in the reverse order of removal, but keep the following in mind:
1. Tighten the rotation converter bolts to the required torque.
2. Before connecting the cooler lines, blow them out with compressed air, then flush them with clean fluid to remove friction material particles that could clog a new or rebuilt transmission.
3. Use a new gasket on the transmission oil pan drain plug and a new O-ring on the filler tube connection to the pan.
4. When connecting the control unit connector on 4HP 22 EH transmissions, make sure that the marks are aligned.
5. Fill the transmission with new, clean fluid (see chapter Routine car maintenance).
6. Adjust the selector lever drive and throttle cable (see sections. Adjusting the selector lever drive and Adjusting the throttle cable).
This article is available at russian, bulgarian, belarusian, ukrainian, serbian, croatian, romanian, polish, slovak, hungarian
Article verified: Zhuravleva Isolda
Share information:
Previous articles
БМВ E28: Automatic gearbox
Next articles
Similar articles on other types of BMW cars:
Automatic transmission — removal and installation BMW 3 Series E46 (1998-2006, petrol)
Removal and installation of automatic transmission BMW 3 Series E46 (1998-2006)
Automatic transmission — removal and installation BMW 7 Series E32 (1986-1994)
Removal and installation of manual transmission BMW 7 Series E38 (1994-2001)
Pistons — removal and installation BMW X3 E83 (2003-2010)
Removal and installation of automatic transmission type A5S 440Z BMW X5 E53 (1999-2006)
Link in different formats to this page
Visitor comments
No comments yet
- General information
- Governing bodies
- Manual
- Maintenance
- Power unit
- Engine repair
- Lubrication system
- Cooling system
- Ignition system
- Supply system
- Injection system (gasoline)
- Injection system (diesel)
- Exhaust system
- Transmission
- Clutch
- Car gearbox
- Front axle
- Rear axle
- Chassis
- Steering
- Brake system
- Wheels and tires
- Body
- Interior
- Exterior
- Heating system
- Electrical equipment
- Equipment and devices
- Power devices
- Windscreen wipers
- Electrical circuits
- General information
- Manual
- Maintenance
- Power unit
- Engine repair
- Ignition system
- Engine lubrication system
- Cooling system
- Fuel system (gasoline)
- Fuel system (diesel)
- Exhaust system
- Transmission
- Clutch
- Car gearbox
- Chassis
- Front and rear suspension
- Steering
- Brake system
- Body
- Exterior
- Interior
- Electrical equipment
- Heating system
- Equipment and devices
- Power devices
- Electrical circuits
- General information
- Manual
- Maintenance
- Power unit
- Engine in a car
- Engine overhaul
- Cooling system
- Supply system
- Ignition system
- Control system
- Transmission
- Clutch
- Manual gearbox
- Automatic gearbox
- Transmission line
- Chassis
- Steering
- Front suspension
- Rear suspension
- Brake system
- Body
- Body elements
- Car care and painting
- Electrical equipment
- Heater and air conditioner
- Equipment and devices
- Starter and generator
- Electrical circuits
- General information
- Operation and maintenance
- Specifications
- Power unit
- Engine repair
- Cooling and lubrication system
- Supply system
- Ecotronic power supply system
- Fuel injection system
- Ignition system
- Transmission
- Clutch
- Gearbox BMW 242/4
- Gearbox Getrag 262/8
- Gearbox Getrag 265/6
- Automatic gearbox
- Cardan gear
- Rear axle
- Chassis
- Steering
- Front suspension
- Rear suspension
- Brake system
- Electrical equipment
- Equipment and devices
- Electrical circuits