
Note. Installation will require a new gasket, a new oil dipstick tube seal and sealant.
Withdrawal
1. Remove the crankcase protection from under the engine. Drain engine oil (see chapter 1).
2. Apply the parking brake, raise the front of the vehicle and place it on secure stands.
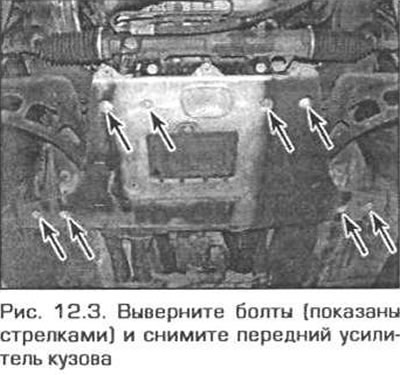
3. Remove the front body amplifier from under the engine (pic. 12.3). The bolts with which the amplifier was attached can be thrown away - they must be replaced with new ones during assembly.
4. Remove the alternator cooling duct from the front.
5. Remove the air cleaner (see chapter 4A).
6. To remove the pallet, it is necessary to lower the front subframe, which requires supporting the engine. Attach a hoist strap to the engine rigging eye and pull the engine up to take its weight off its supports.
7. On a model with an automatic transmission, disconnect the oil pipes from the transmission pan. Get ready for an oil leak.
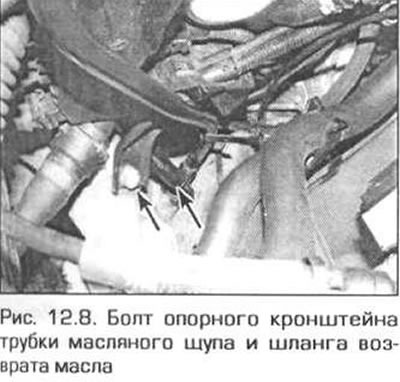
8. Remove the mounting bolt, disconnect the oil return hose from the separator and pull the oil dipstick tube out of the sump (pic. 12.8). Remove the o-ring from the tube. When installing, the ring must be replaced.
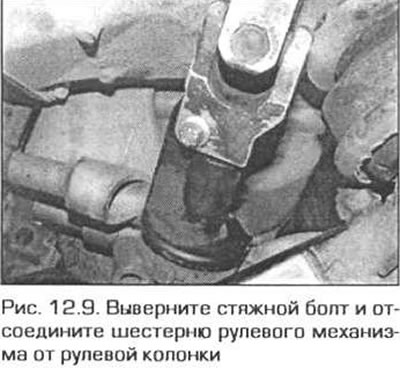
9. Set the front wheels to straight ahead and lock the steering column. Mark the relative position of the steering shaft connecting flange and steering gear. Unscrew the coupling bolt and pull the coupling from the gear (pic. 12.9). Obviously, while the gear is disconnected from the steering column, neither the steering wheel nor the front wheels should be turned.
10. Remove the accessory drive belt as directed in chapter 1.
11. From the rear side of the power steering pump, unscrew the bolts of the support bracket, then unscrew the bolts securing the pump support bracket to the generator support bracket, remove the pump and move it to the side without disconnecting the hoses from it. Tie up the pump to something. Do not strain the hoses.
12. Turn away nuts of fastening of the engine to the right and left support on a stretcher. Raise the engine 10-15 mm. Make sure that the rear side of the cylinder head does not crush the brake pipes that run along the engine bulkhead.
13. Unhook from the pallet all hoses and wires attached to it.
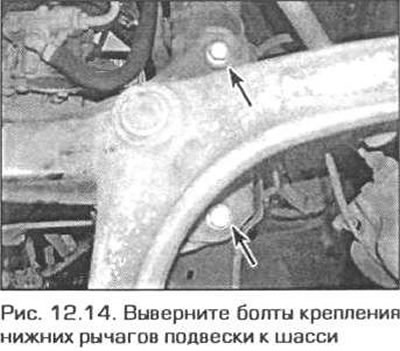
14. Turn out bolts and disconnect brackets of the left and right bottom suspension arms from the chassis (pic. 12.14).
15. Turn out the coupling screws of the stabilizer bar (if necessary, see chapter 10).
16. Support the subframe with a trolley jack, unscrew the bolts securing the subframe to the body and lower the subframe, being careful. so as not to break the power steering hoses (pic. 12.16). Remove the rubber block between the pan and subframe (if any).

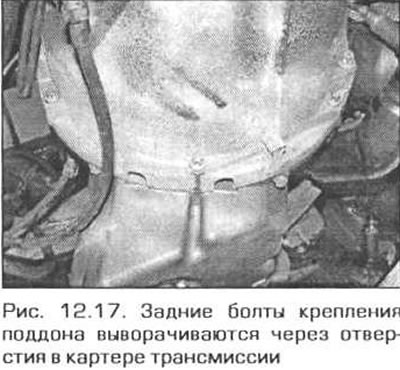
17. Gradually turn out all bots of fastening of the pallet. Be aware that the rear sump mounting bolts can be removed through the holes in the transmission case (pic. 12.17). Also keep in mind that the three lower transmission-to-engine bolts must also be removed as they are screwed into the pan.
18. Lower the pallet.
19. Remove pan gasket
Installation
20. Thoroughly clean the mating surfaces of the sump and crankcase.
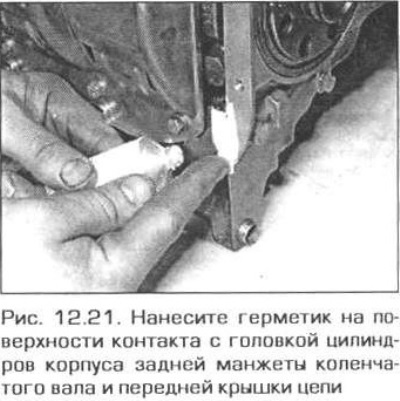
21. Apply a small amount of Drei Bond 1209 sealant to the cylinder head contact surfaces of the rear crankshaft seal housing and the front camshaft timing chain cover (pic. 12.21).
22. Place the gasket on the sump flange.
23. Replace the pallet, making sure that the gasket does not move. Screw in bolts of fastening of the pallet and tighten them while only by hand.
24. Gradually tighten the pan bolts to the required torque.
25. Torque tighten the bolts securing the transmission to the engine and to the pan.
26. The rest of the installation is carried out in the reverse order of removal, taking into account the following remarks.
- A) Be careful when lifting the subframe. so as not to pinch them with hoses, pipes and wires.
- b) Replace the mounting bolts of the subframe and front amplifier with new ones.
- V) Tighten the engine mount nuts securely.
- G) Install and tension the accessory drive belt as instructed in chapter 1.
- d) Before installing the oil dipstick tube, replace the O-ring on it.
- e) Fill the engine with oil as directed in chapter 1.
- and) On a model with automatic transmission, check the transmission fluid level as indicated in Chapter 7B.