
- Home
- BMW 7 Series
- E38
- Power unit
- Fuel system (diesel)
- Removal and installation a turbocharger
Removal and installation a turbocharger (BMW 7 Series E38)
If the installed boost air hoses are not degreased and are damp, this may result in supercharger failure.
Models with M57 engine
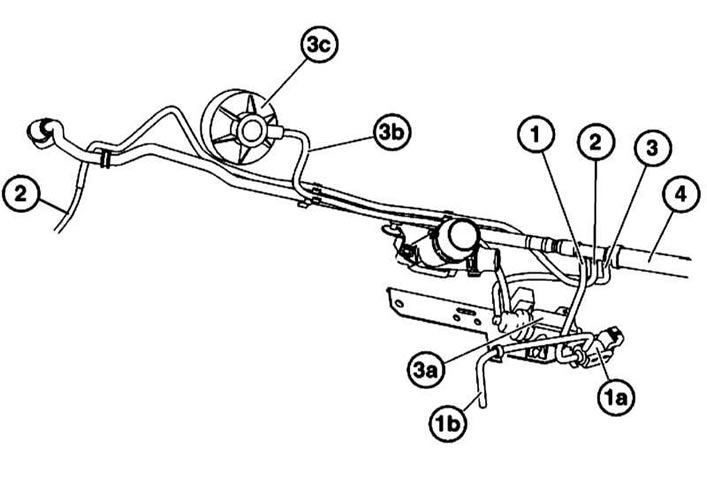
M57 Engine Vacuum Hoses Part 1
1 - Vacuum hose to engine mount vacuum valve
1a — Engine mount vacuum valve
1b - Vacuum hose to engine mount cushion
2 - Vacuum hose to turbocharger (see illustration)
3 - Vacuum hose to valve 3c pressure converter
3a - Pressure converter for valve 3c
3b - Vacuum hose to valve 3c
3c-Exhaust gas return valve (EGR)
4 - Vacuum pipeline
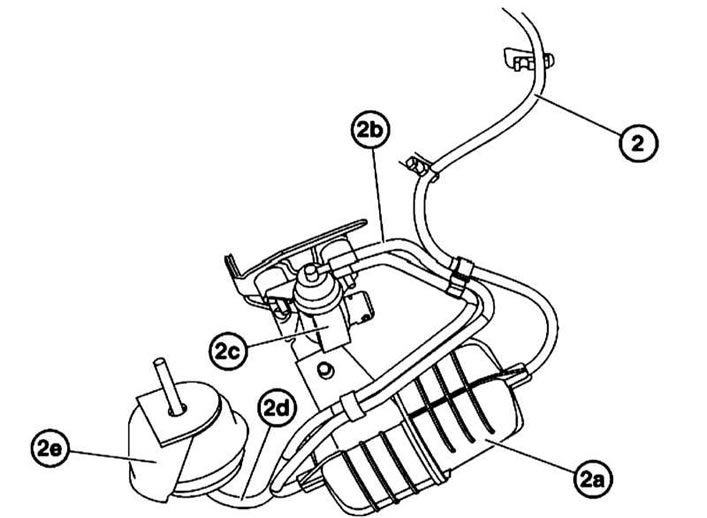
M57 Engine Vacuum Hoses Part 2
2 - Vacuum hose to the vacuum chamber
2a - Vacuum chamber
2b - Vacuum hose to pressure converter
2c - Pressure transducer
2d - Vacuum hose to the turbocharger membrane mechanism
2e - Turbocharger membrane mechanism
1. Remove the upper engine covers.
2. Loosen the bolts and remove the molded hose in the direction of the arrow (see illustration).
When installing, lubricate the mating surfaces with a thin layer of Vaseline and install new O-rings
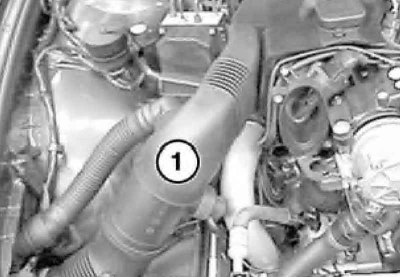
3. Remove the corrugated casing assembly (1).
4. Remove the air cleaner filter element (see section Replacing the air cleaner filter element Chapters Vehicle settings and routine maintenance).
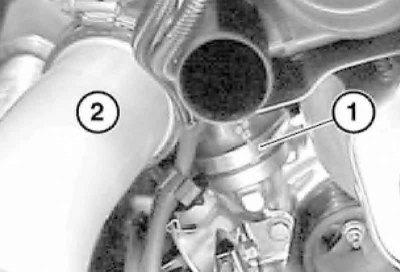
5. Loosen the clamp (1) and remove the boost air line (2) together with the boost air hose. Seal the turbocharger holes (for example, with a rag).
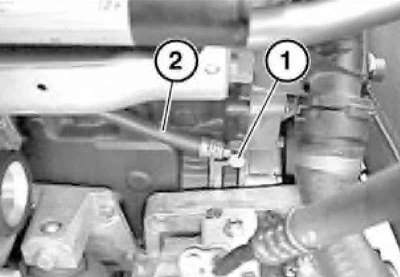
6. Unscrew the hollow bolt (1) and remove the oil line (2).
Seal the oil line nipple and the hole in the crankcase. Replace the sealing rings when installing.
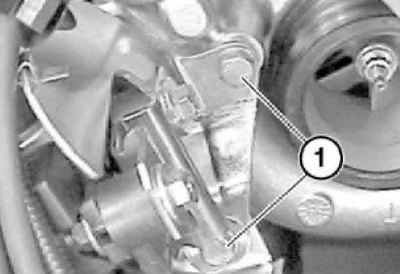
7. Remove the bolts (1), remove both brackets and set them aside.
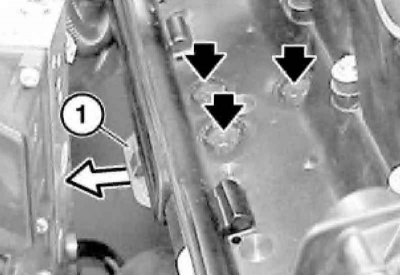
8. Remove the locking cover (1) of the heat shield and take out the plugs (arrows).
During installation, damaged plugs must be replaced.
9. Unscrew the bolts located under the plugs.
When installing, lubricate the bolt threads with a thin layer of copper-containing paste (CRC).
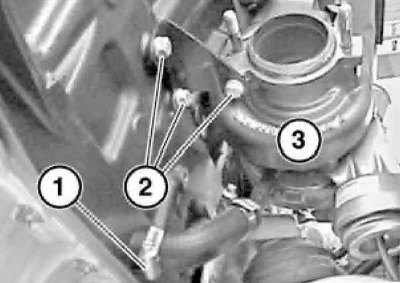
10. Loosen the clamp (1) and disconnect the hose. Unscrew the bolts (2) and remove the turbocharger (3) downwards.
11. Installation is carried out in reverse order. Please note the following points:
- If necessary, relocate the drain line and oil line to the new turbocharger;
- Replace all gaskets;
- Clean the mating surface of the exhaust manifold;
- The clamp (1) on the locking cover (2) must be inserted into the heat shield.
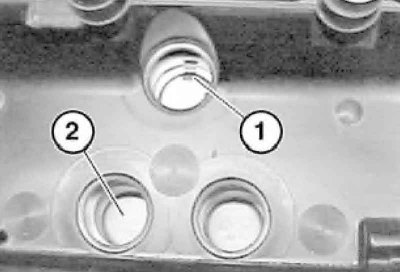
Clamp on the locking cover
Models with M67 engine (left turbocharger)
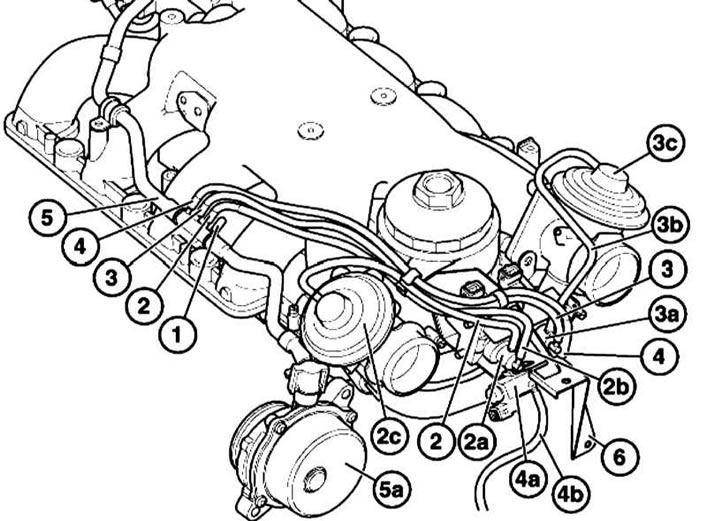
M67 Engine Vacuum Hoses
1 - Plug
2 - Vacuum hose to the right pressure converter
2a - Right pressure transducer
2b - Vacuum hose to valve 2c
2c — Right exhaust gas return valve (EGR)
3 - Vacuum hose to the left pressure transducer
3a - Left pressure transducer
3b - Vacuum hose to left valve 3c
3c — Left exhaust gas return valve (EGR)
4 — Vacuum hose to engine mount vacuum valve
4a — Vacuum valve for left and right engine mount cushions
4b — Vacuum hose for left and right engine mount cushions
5 - Vacuum pipeline
5a - Vacuum pump
6 — Pressure transducer/vacuum valve bracket
1. Remove the fuel injection pump (see section Removal and installation of fuel injection pump).
2. Remove the engine cooling system fan housing and impeller (see chapter Engine cooling, heating, ventilation and air conditioning systems).
3. Drain the coolant from the radiator of the cooling system (see chapter Vehicle settings and routine maintenance).
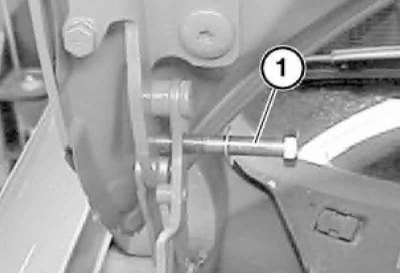
4. Raise the hood, detach the struts from it and fix the hood in a vertical position by inserting M8 bolts into the hinges.
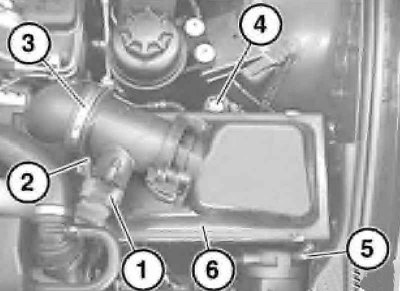
5. Disconnect the connector (1) and release the wire from the holder (2). Unscrew the bolt (4), loosen the clamp (5) and remove the resonator housing (6) assembled with the air flow meter.
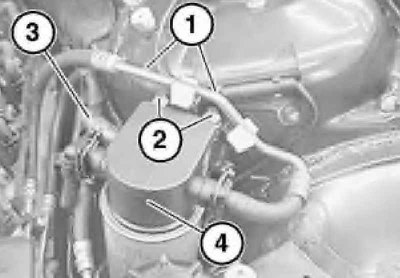
6. Release the wire (1) from the holder, loosen the nuts (2), disconnect the connector (3) and set the fuel filter assembly (4) aside.
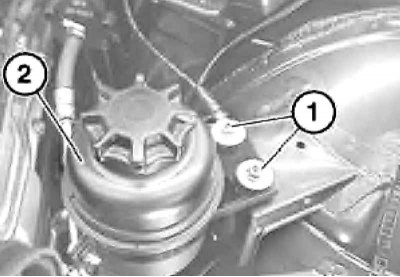
7. Loosen the nuts (1) and set the power steering fluid reservoir (2) aside.
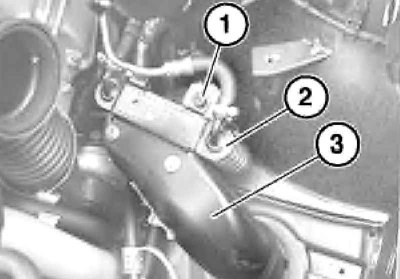
8. Remove the bolt (1) and set the fuel cooler (2) together with the air duct (3) aside.
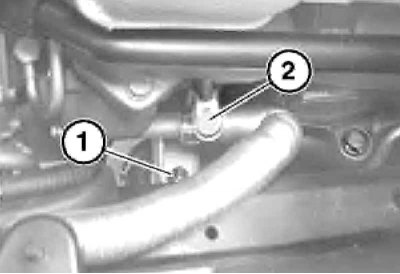
9. Loosen the nut (1) of the left engine mount cushion. Unscrew the bolt (2).
10. Using a special lifting device, raise the engine by the lifting eyes by 25 mm.
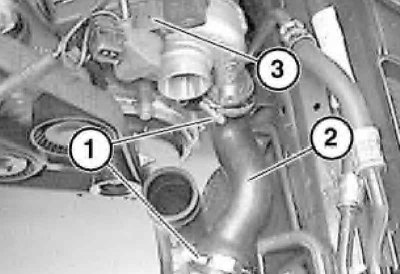
11. Loosen the clamps (1), remove the pressure hose (2) and disconnect the connector (3).
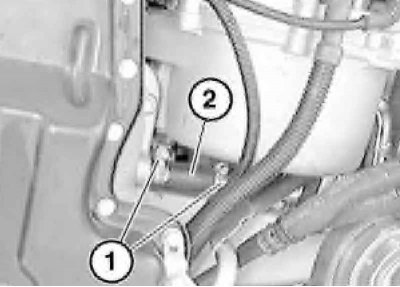
12. Loosen the clamps (1) and place the hose (2) on the turbocharger return pipe.
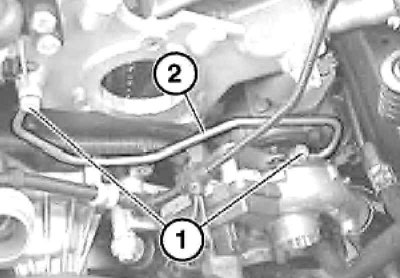
13. Unscrew the hollow bolts (1) and remove the pressure pipe (2).
Replace the hollow bolt sealing rings when installing.
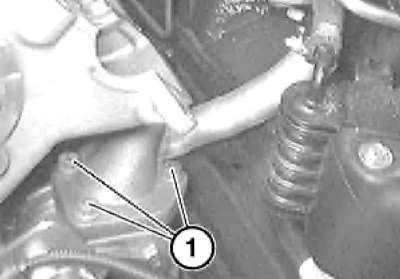
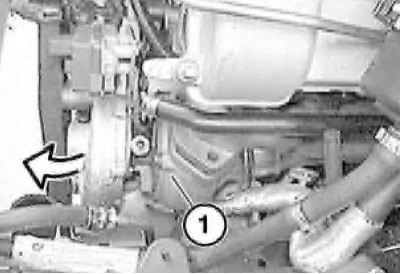
14. Remove the bolts and remove the turbocharger assembly forward.
When installing, clean the mating surfaces without damaging them and replace the gasket.
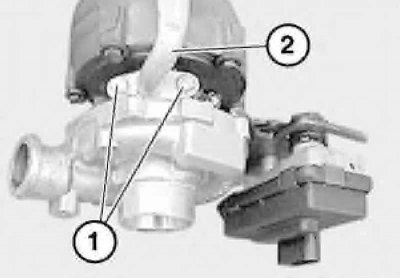
15. Remove the bolts (1) and move the return pipe (2) to the new turbocharger.
When installing, clean the mating surfaces on the turbocharger and return pipe and replace the gasket.
16. Installation is carried out in reverse order.
Models with M67 engine (right turbocharger)
The right turbocharger is removed together with the pressure oil line, deformation and damage of which is not allowed.
1. Disconnect the negative cable from the battery.
2. Remove the front and rear underbody trim.
3. Remove the right air cleaner housing assembly.
4. Remove the right upstream catalytic converter.
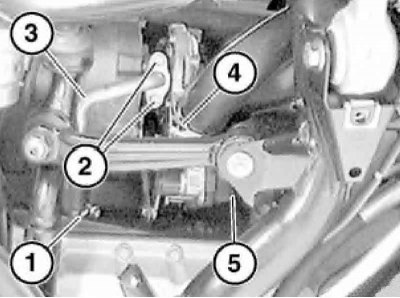
5. Loosen the clamp (1), unscrew the bolts (2) and remove the oil drain line (3). Loosen the clamp (4), slide it back and disconnect the connector (5) from the turbocharger.
When installing, clean the mating surfaces and replace the gasket.
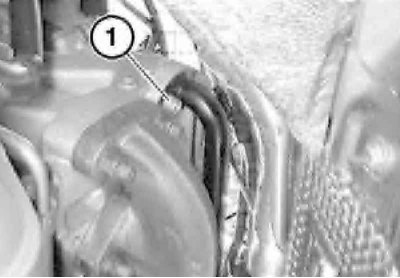
6. Remove the bolt.
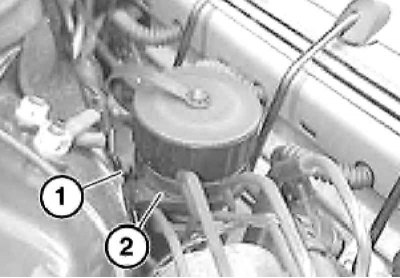
7. Open the retainer (1), disconnect the plug (2) of the diagnostic connector and set it aside.
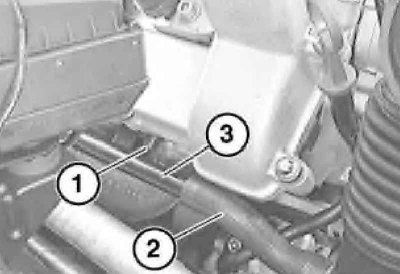
8. Unscrew the bolt (1), disconnect the hose (2) and remove the air duct (3).
Replace the sealing ring if necessary.
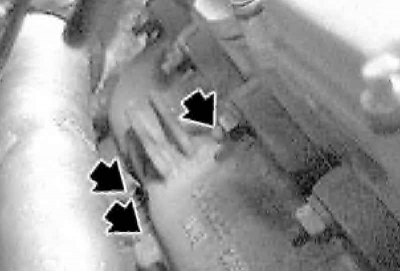
9. Remove the three bolts securing the turbocharger to the exhaust manifold.
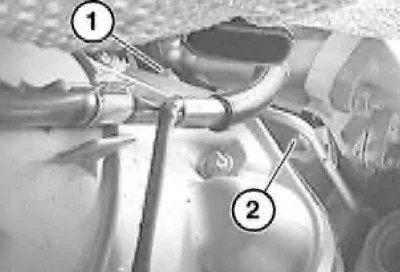
10. Release the wire from the holders on the AT. Unscrew the hollow bolt (1) and bolt (2).
Replace the hollow bolt sealing rings when installing.
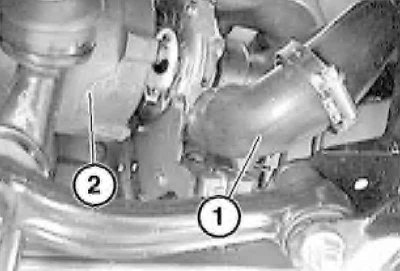
11. Disconnect the boost air hose (1) and move it to the side.
When installing, the hose must be degreased and dry. Carefully remove the turbocharger (2) by moving it downwards towards the right suspension strut, between the front axle beam and the transverse steering rod.
12. Relocate the oil pressure line to the new turbocharger. To do this, follow these steps:
- Determine the dimension (A) between the pressure oil line (1) and the turbocharger flange;
- Remove the hollow bolt (2) and replace its sealing rings;
- Install the oil pressure line to the new turbocharger using the hollow bolt;
- Tighten the hollow bolt to adjust the dimension (A).
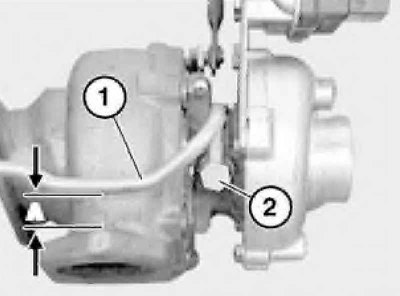
Oil pipeline relocation
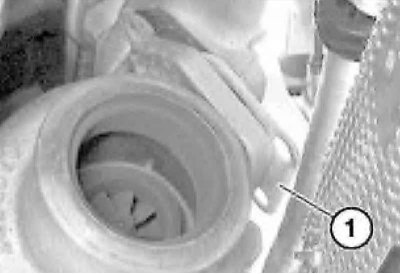
13. Installation is carried out in the reverse order. Replace the sealing gasket.
This article is available at russian, bulgarian, belarusian, ukrainian, serbian, croatian, romanian, polish, slovak, hungarian
Article verified: Polikarpov Saveliy
Share information:
Previous articles
БМВ E38: Fuel system (diesel)
Next articles
Similar articles on other types of BMW cars:
Removal and installation the contact ignition distributor BMW 3 Series E21 (1975-1983)
Removal and installation the exhaust gas turbocharger BMW 5 Series E34 (1988-1996)
Removal and installation the oil pan BMW 5 Series E12 (1972-1981)
Pistons — removal and installation BMW X3 E83 (2003-2010)
Removal and installation the engine BMW X5 E53 (1999-2006)
Removal and installation the contact ignition distributor BMW 3 Series E21 (1975-1983)
Removal and installation the exhaust gas turbocharger BMW 5 Series E34 (1988-1996)
Removal and installation the oil pan BMW 5 Series E12 (1972-1981)
Pistons — removal and installation BMW X3 E83 (2003-2010)
Removal and installation the engine BMW X5 E53 (1999-2006)
Link in different formats to this page
Visitor comments
No comments yet
- General information
- Introduction to guide
- Manual
- Maintenance
- Power unit
- Engine M60/1, M60/2 (petrol)
- M62 engine (petrol)
- M57 engine (diesel)
- M67 engine (diesel)
- Cooling system
- Fuel system (petrol)
- Fuel system (diesel)
- Exhaust system
- Ignition and control systems
- Charge and launch systems
- Transmission
- Clutch
- Mechanical gearbox
- Automatic gearbox
- Cardan and drive shafts
- Chassis
- Brake system
- Front suspension
- Rear suspension
- Steering
- Body
- Exterior
- Interior
- Electrical equipment
- Equipment and devices
- Lighting
- Heating and air conditioning
- Electrical circuits
- General information
- Care and maintenance
- Power unit
- Minor engine repair
- Engine overhaul
- Lubrication system
- Cooling system
- Ignition system
- Supply system
- Injection system (petrol)
- Injection system (diesel)
- Exhaust system
- Transmission
- Clutch
- Manual gearbox
- Automatic gearbox
- Cardan gear
- Rear axle and shafts
- Chassis
- Front suspension
- Rear suspension
- Steering
- Wheels and tires
- Brake system
- Body
- Body elements
- Electrical equipment
- Equipment and devices
- Electrical circuits