
Table of contents: Removal ↓ Installation ↓
- Home
- BMW 5 Series
- E28
- Power unit
- Engine in a car
- Removal and installation the intake manifold
Removal and installation the intake manifold (BMW 5 Series E28)
Removal
Allow the engine to cool completely, then relieve the fuel system pressure for fuel-injected engines (see chapter Power supply system).
Disconnect the negative battery cable.
If your vehicle's radio is equipped with an anti-theft system, make sure you enter the correct code before disconnecting the battery.
If the instrument cluster displays the wrong language after connecting the battery, refer to Section Anti-theft audio system and instrument cluster language, which describes the procedure for installing the required language.
1. Drain the engine coolant (see chapter Routine car maintenance) to a level below the intake manifold. If the cooler is still in good condition, it can be used again.
2. On fuel-injected engines, loosen the hose clamp and disconnect the large air intake hose from the throttle body. It may be necessary to remove the entire air cleaner/intake hose assembly to provide more room to work (see chapter Power supply system).
3. On carburetor type engines, completely remove the air cleaner assembly (see chapter Power supply system).
4. Disconnect the coolant hoses from the throttle body/intake manifold where provided.
5. Disconnect the throttle cable and, if equipped, the cruise control cable (see chapter Power supply system).
6. Remove the EGR valve and line where provided (see chapter Engine management and emission control systems).
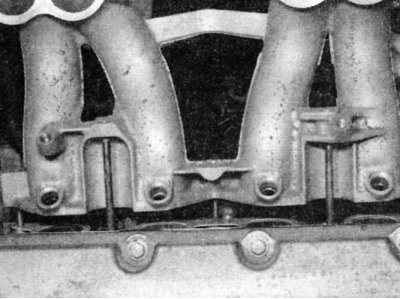
7. At this stage on M40 engines the upper part of the intake manifold should be removed by loosening the bolts and nuts. Remove the gaskets.
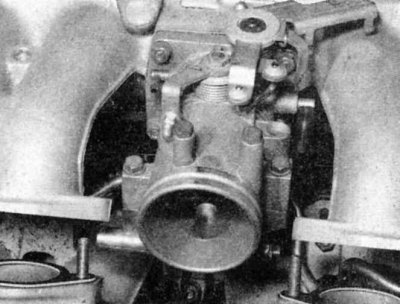
8. On fuel-injected engines, disconnect the vacuum hose from the fuel pressure regulator and disconnect the electrical connectors from the fuel injectors (see chapter Power supply system).

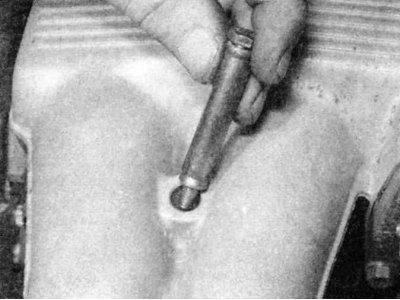
9. Disconnect the fuel supply lines from the fuel rail or carburetor, as provided (see chapter Power supply system).
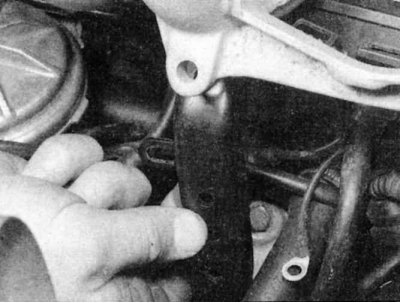
10. On M40 engines, unbolt and remove the support bracket from the bottom of the intake manifold.
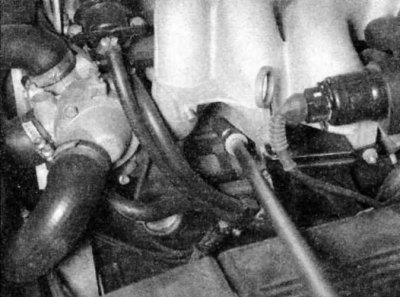
11. Disconnect all remaining hoses and wires between the intake manifold/throttle body assembly and the engine or chassis.
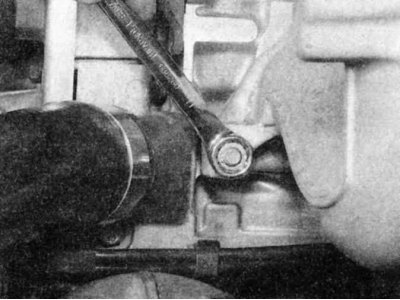
12. Loosen the bolts and/or nuts securing the pipeline to the cylinder head using a socket, ratchet and long wrench (m²0 engines).
13. Start at the ends and work your way toward the middle, loosening each nut one at a time until you can loosen them by hand. When removing the fastener, support the pipe so that it does not fall.
The manifold can be removed without removing the throttle body, injectors, vacuum/thermo valves, fuel pressure regulator, or carburetor. If you are installing a new manifold, transfer all of these components (see chapter Power supply system) onto the new pipeline before installing it on the cylinder head.
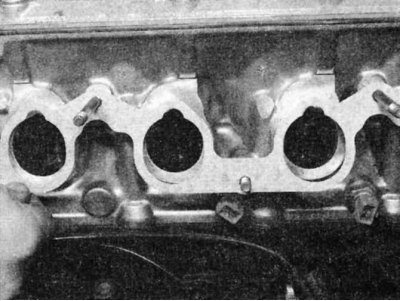
14. Move the pipe up and down to break the gasket sealant, then remove it from the head and then remove the gasket.
Installation
1. Remove the old gasket, then carefully scrape all traces of the old gasket material from the mating surfaces of the manifold and head. Be very careful not to damage or scratch the soft aluminum surfaces. Special solvents are available for removing gaskets. Make sure the surfaces are completely clean and degreased.
2. Check the pipeline for signs of corrosion (where the cooler passes), cracks, deformations and other damage. Cracks and deformations usually appear near the surface of the gasket, around the holes for the clearance adjustment screws. If such defects are found, send the pipeline for repair (or replace if necessary).
3. Always use a new gasket when installing the pipe. Where one side of the gasket has a graphite surface, it should face the cylinder head.
4. Install the nuts and bolts and tighten them gradually, starting from the center and moving towards the ends, achieving the required force.
5. Perform the rest of the installation procedure in the reverse order of removal. On M40 engines, replace the gaskets between the upper and lower parts of the pipeline.
This article is available at russian, bulgarian, belarusian, ukrainian, serbian, croatian, romanian, polish, slovak, hungarian
Article verified: Zhuravleva Isolda
Share information:
Previous articles
БМВ E28: Engine in a car
Next articles
Similar articles on other types of BMW cars:
Removal and installation the intake manifold BMW 3 Series E46 (1998-2006)
Removal and installation the air intake BMW 3 Series E36 (1990-2000)
Intake manifold — removal and installation BMW 7 Series E32 (1986-1994)
Removal and installation the intake manifold BMW 7 Series E38 (1994-2001)
Pistons — removal and installation BMW X3 E83 (2003-2010)
Intake manifold — design description BMW X5 E53 (1999-2006)
Link in different formats to this page
Visitor comments
No comments yet
- General information
- Governing bodies
- Manual
- Maintenance
- Power unit
- Engine repair
- Lubrication system
- Cooling system
- Ignition system
- Supply system
- Injection system (gasoline)
- Injection system (diesel)
- Exhaust system
- Transmission
- Clutch
- Car gearbox
- Front axle
- Rear axle
- Chassis
- Steering
- Brake system
- Wheels and tires
- Body
- Interior
- Exterior
- Heating system
- Electrical equipment
- Equipment and devices
- Power devices
- Windscreen wipers
- Electrical circuits
- General information
- Manual
- Maintenance
- Power unit
- Engine repair
- Ignition system
- Engine lubrication system
- Cooling system
- Fuel system (gasoline)
- Fuel system (diesel)
- Exhaust system
- Transmission
- Clutch
- Car gearbox
- Chassis
- Front and rear suspension
- Steering
- Brake system
- Body
- Exterior
- Interior
- Electrical equipment
- Heating system
- Equipment and devices
- Power devices
- Electrical circuits
- General information
- Manual
- Maintenance
- Power unit
- Engine in a car
- Engine overhaul
- Cooling system
- Supply system
- Ignition system
- Control system
- Transmission
- Clutch
- Manual gearbox
- Automatic gearbox
- Transmission line
- Chassis
- Steering
- Front suspension
- Rear suspension
- Brake system
- Body
- Body elements
- Car care and painting
- Electrical equipment
- Heater and air conditioner
- Equipment and devices
- Starter and generator
- Electrical circuits
- General information
- Operation and maintenance
- Specifications
- Power unit
- Engine repair
- Cooling and lubrication system
- Supply system
- Ecotronic power supply system
- Fuel injection system
- Ignition system
- Transmission
- Clutch
- Gearbox BMW 242/4
- Gearbox Getrag 262/8
- Gearbox Getrag 265/6
- Automatic gearbox
- Cardan gear
- Rear axle
- Chassis
- Steering
- Front suspension
- Rear suspension
- Brake system
- Electrical equipment
- Equipment and devices
- Electrical circuits