
- Home
- BMW 5 Series
- E28
- Power unit
- Engine in a car
- Removal, inspection and installation of the oil pump
Removal, inspection and installation of the oil pump (BMW 5 Series E28)
Removal
Remove the oil pan (see section Removal and installation the oil pan).
Engines M10, M20 and M30
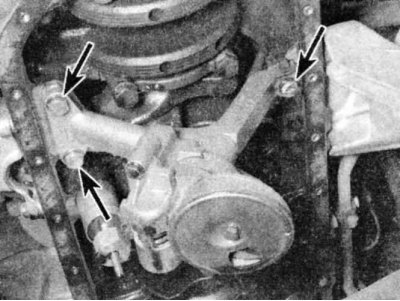
1. On M10 and M30 engines, loosen the three bolts securing the pump mechanism to the front of the pump.
Some models have only one central nut that secures the mechanism to the oil pump.
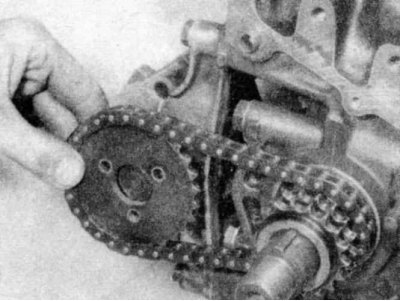
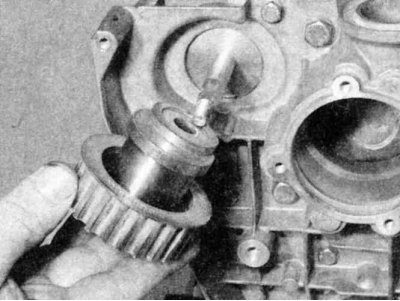
2. Unbolt the oil pump from the cylinder block and remove it. On M20 engines, the oil pump is bolted across the cylinder block on both sides towards the front of the engine
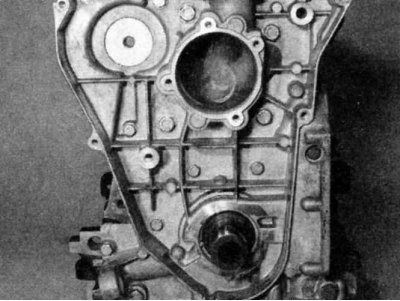
3. On M10 and M30 engines, the oil pump is bolted to the front and center of the cylinder block
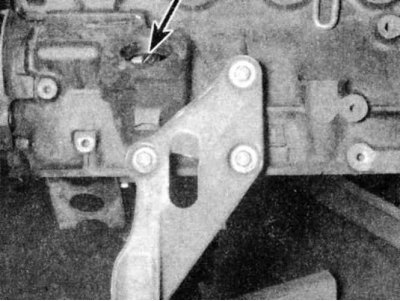
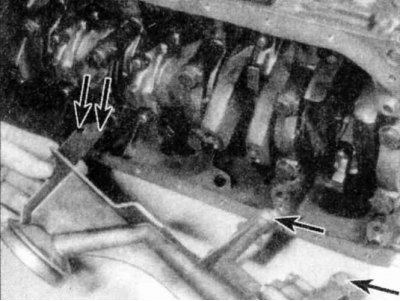
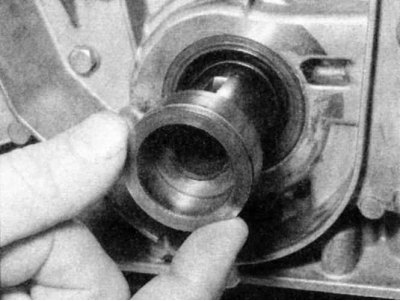
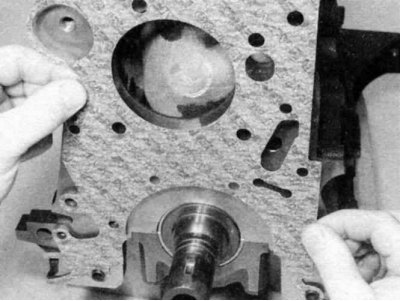
4. On M20 engines, the intermediate shaft drives the oil pump drive shaft, which in turn drives the pump. To remove the drive shaft, remove the retaining plate from the block and remove the plug. Check the condition of the sealing ring and replace it if necessary. Remove the drive shaft and inspect both gears for signs of wear and damage, replace them if necessary. The intermediate shaft gear in the cylinder block is indicated by an arrow.
5. If the intermediate shaft gear is worn, or the bearing of this shaft is worn or damaged, the shaft must be removed. Remove the engine (see Part Engine Component Overhaul Procedures), then remove the timing belt, crankshaft and intermediate shaft sprockets (see section Removal, inspection and installation of the timing belt and its tensioner sprockets), as well as the front engine cover (see section Replacing the front oil seals). The intermediate shaft can be removed from the front of the engine.
M40 engines
1. Remove the timing belt as described in Section Removal, inspection and installation of the timing belt and its tensioner sprockets.
2. Remove the cylinder head as described in Section Removal and installation the cylinder head.
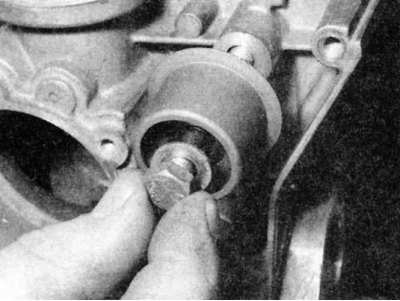
3. Loosen the nut and remove the timing belt tensioner from the front end cover.
4. If necessary, remove the clearance adjustment screws from the cylinder block.
5. Loosen the crankshaft hub bolt while holding the crankshaft still. This bolt is very tight, so it is important not to let the crankshaft turn. The best way is to bolt a metal bar to the sprocket, or remove the starter and hold the flywheel with a wide-bladed screwdriver. When using improvised methods to hold the crankshaft still, remember that there is a risk of damaging surrounding components.
6. Remove the sprocket and spacer, noting that the spacer flange faces inward.
7. Loosen the bolts and remove the stabilizer...
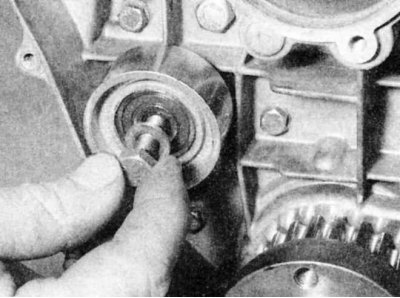
...and guide rollers from the front end cover.
8. Using a small screwdriver or similar tool, remove the key from the groove in the crankshaft journal.
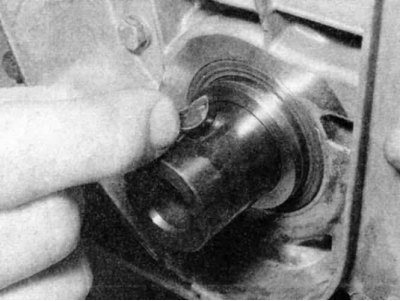
9. Remove the spacer ring from the crankshaft.
10. Loosen the mounting bolts and remove the front end cover and oil pump from the cylinder block.
11. Note the location of the front cover bolts as they are different sizes. With the cover removed, remove the rubber sealing ring from the groove in the crankshaft journal.

12. Note the correct position of the oil seal, then remove it from the casing.
Checking the status
Given that a faulty oil pump can cause serious engine damage, we recommend replacing it every time the engine is overhauled unless it is in excellent condition.
Engines M10, M20 and M30
1. Remove the cover and inspect the housing, gears or rotors and cover for cracks and signs of wear (especially in areas where the gear or rotor comes into contact with other components).
2. Check the filter to make sure it is not clogged or damaged.
3. Lubricate the gears with clean engine oil, then install the pump cover onto the housing and tighten the bolts evenly and securely.
4. Before installing the pump - new, overhauled or old - test its operation on the engine. Fill a clean container with fresh motor oil of the recommended viscosity to about 2.5 - 3 cm.
5. Immerse the inlet of the oil pump in the oil and turn the pump drive shaft counterclockwise by hand. When the shaft is turned, oil should flow out of the outlet of the pump.
M40 engines
1. With the front end cover in place on a workbench, loosen the bolts and remove the cover plate to expose the oil pump rotors.
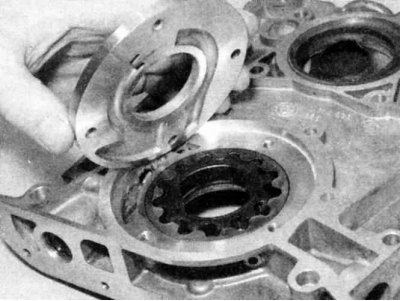
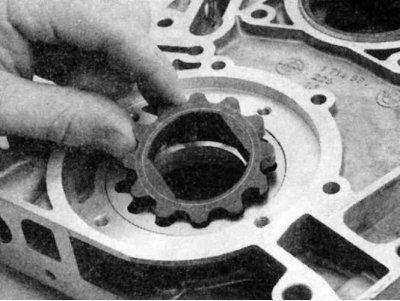
2. Note the position of the rotors, then remove the inner rotor from the housing...
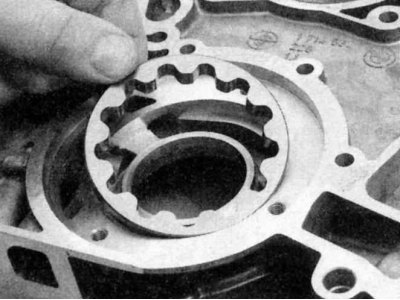
...and the outer rotor of the oil pump.
3. Clean the rotors and housing thoroughly, then install the rotors in the previously noted position. The inner rotor should be installed with the guide facing the housing.
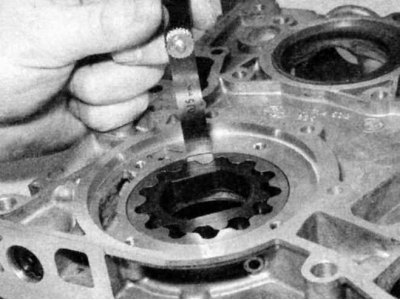
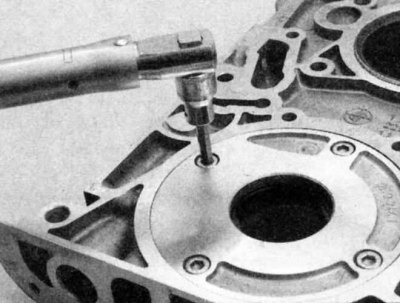
4. Using a feeler gauge blade, measure the clearance between the oil pump housing and the outer rotor,..
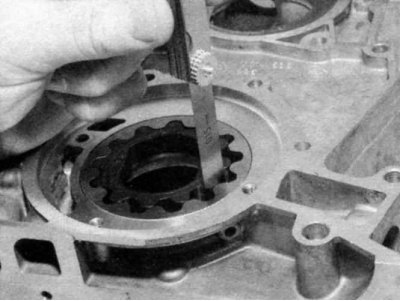
...then check the clearance between the outer and inner rotors.
5. If the gap size does not match that specified in Table of sizes and adjustment data at the end of the manual, the entire oil pump and front end cover must be replaced. If the clearance is within the tolerance, remove the rotors, then pour a small amount of engine oil into the housing. Install the rotors and rotate them to distribute the oil over their surfaces.
6. Install the cover plate and tighten the bolts to the required torque.
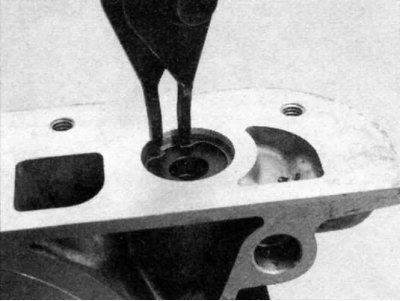
7. To check the safety valve, remove the retaining ring...
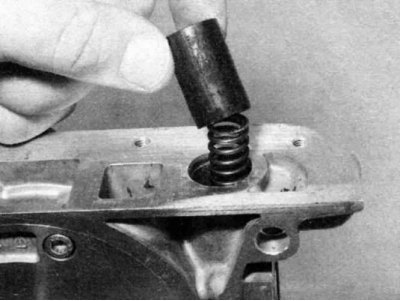
...and remove the bushing,..

...spring...
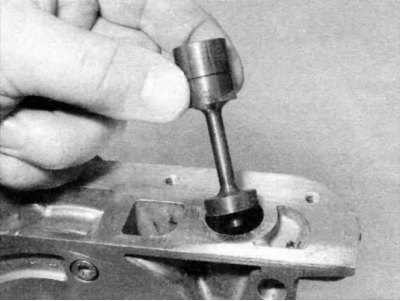
...and the piston...
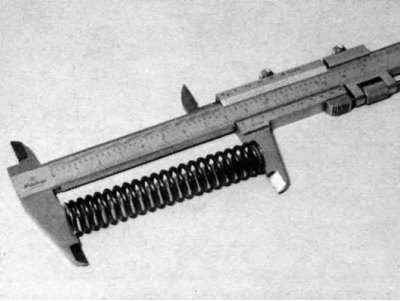
8. Check if the spring length matches the value specified in Table of sizes and adjustment data at the end of the Guide.
9. Assemble the safety valve in the reverse order of removal.
Installation
Engines M10, M20 and M30
1. Make sure the mounting surfaces are clean and insert the pump into the special recess on the cylinder block. Fit the bolts and tighten them to the required torque.
2. Install in reverse order
M40 engines
1. Clean the mating surfaces, then install the front end cover and oil pump together with a new gasket onto the cylinder block.
2. Tighten the bolts to the required torque. Note that two different bolt sizes are used here, each with a different tightening torque.
3. Install the spacer ring onto the front of the crankshaft.
4. Apply engine oil to the lips of the new seal, then press the seal into the housing at the previously marked location. To ensure a smooth installation of the seal in place, use a large socket and the crankshaft pulley bolt to install it.
5. Install the key into the groove in the nose of the crankshaft.
6. Install the stabilizer roller onto the front end cover and tighten the bolt.
7. Install the sprocket, spacer, and crankshaft pulley bolt. Tighten the bolt to the specified torque while holding the crankshaft still using one of the methods described above.
8. Install the timing belt tensioner pulley, but do not tighten the bolt yet.
9. Install the cylinder head as described in Section Removal and installation the cylinder head.
10. Install the timing belt as described in Section Removal, inspection and installation of the timing belt and its tensioner sprockets.
11. Install the oil pan (see section Removal and installation the oil pan).
This article is available at russian, bulgarian, belarusian, ukrainian, serbian, croatian, romanian, polish, slovak, hungarian
Article verified: Zhuravleva Isolda
Share information:
Previous articles
БМВ E28: Engine in a car
Next articles
Similar articles on other types of BMW cars:
Oil pump — removal, inspection and installation BMW 3 Series E46 (1998-2006, petrol)
Mechanical fuel pump — checking, adjustment, removal and installation BMW 3 Series E21 (1975-1983)
Oil pump — removal, inspection and installation BMW 7 Series E32 (1986-1994)
Removal and installation the oil pump BMW 7 Series E38 (1994-2001)
Pistons — removal and installation BMW X3 E83 (2003-2010)
Removal and installation the engine BMW X5 E53 (1999-2006)
Link in different formats to this page
Visitor comments
No comments yet
- General information
- Governing bodies
- Manual
- Maintenance
- Power unit
- Engine repair
- Lubrication system
- Cooling system
- Ignition system
- Supply system
- Injection system (gasoline)
- Injection system (diesel)
- Exhaust system
- Transmission
- Clutch
- Car gearbox
- Front axle
- Rear axle
- Chassis
- Steering
- Brake system
- Wheels and tires
- Body
- Interior
- Exterior
- Heating system
- Electrical equipment
- Equipment and devices
- Power devices
- Windscreen wipers
- Electrical circuits
- General information
- Manual
- Maintenance
- Power unit
- Engine repair
- Ignition system
- Engine lubrication system
- Cooling system
- Fuel system (gasoline)
- Fuel system (diesel)
- Exhaust system
- Transmission
- Clutch
- Car gearbox
- Chassis
- Front and rear suspension
- Steering
- Brake system
- Body
- Exterior
- Interior
- Electrical equipment
- Heating system
- Equipment and devices
- Power devices
- Electrical circuits
- General information
- Manual
- Maintenance
- Power unit
- Engine in a car
- Engine overhaul
- Cooling system
- Supply system
- Ignition system
- Control system
- Transmission
- Clutch
- Manual gearbox
- Automatic gearbox
- Transmission line
- Chassis
- Steering
- Front suspension
- Rear suspension
- Brake system
- Body
- Body elements
- Car care and painting
- Electrical equipment
- Heater and air conditioner
- Equipment and devices
- Starter and generator
- Electrical circuits
- General information
- Operation and maintenance
- Specifications
- Power unit
- Engine repair
- Cooling and lubrication system
- Supply system
- Ecotronic power supply system
- Fuel injection system
- Ignition system
- Transmission
- Clutch
- Gearbox BMW 242/4
- Gearbox Getrag 262/8
- Gearbox Getrag 265/6
- Automatic gearbox
- Cardan gear
- Rear axle
- Chassis
- Steering
- Front suspension
- Rear suspension
- Brake system
- Electrical equipment
- Equipment and devices
- Electrical circuits