
Table of contents: Removal ↓ Installation ↓
- Home
- BMW 5 Series
- E28
- Power unit
- Engine overhaul
- Removal and installation the engine
Removal and installation the engine (BMW 5 Series E28)
If your vehicle's radio is equipped with an anti-theft system, make sure you know the correct activation code before disconnecting the battery.
If an unreadable message appears on the radio instrument panel display after connecting the battery, refer to Section Anti-theft audio system and instrument cluster language for information on the display operation setup procedure.
Removal
1. Relieve the pressure in the fuel system (see chapter Power supply system), then disconnect the negative cable from the battery.
2. Cover the fenders and front panel and remove the hood (see chapter Body). There are special mats to protect the wings, but an old bed cover or blanket will also work.
3. Remove the air cleaner housing and air intake ducts (see chapter Power supply system).
4. Drain the cooling system (see chapter Routine car maintenance).

5. To ensure proper reconnection, label the vacuum lines, emission control hoses, cable connectors, ground straps, and fuel lines, then disconnect them. It is helpful to use pieces of tape with numbers or letters on them.
If there is some possibility of error, make a sketch of the engine compartment and clearly label the lines, hoses and wires.
6. Label and disconnect all cooling system hoses from the engine (see chapter Cooling system).
7. Remove the cooling fan, shroud and radiator (see chapter Cooling system).
On the M40 engine, only the cooling fan and casing need to be removed; however, protect the radiator from damage with a board or cardboard.
8. Remove the drive belts (see chapter Routine car maintenance).
9. Disconnect the fuel lines from the fuel supply pipe (see chapter Power supply system).
Fuel is extremely flammable, so take extra precautions when working on any part of the fuel system. Do not smoke, use open flames or unsheltered lights near the work area, and do not work in a garage with natural gas equipment (such as a water heater or a clothes dryer), which contains a wick.
10. When performing any work on the fuel system, wear safety glasses and keep a fire extinguisher handy.
11. Disconnect the accelerator cable from the engine (see chapter Power supply system) and the release rod/speed control cable, if used (see chapter Automatic transmission (AT)).
12. If installed, remove the power steering pump (see chapter Steering). Leave the tubes/hoses connected and make sure the pump is held in the correct position in the engine compartment (tie it to the side with rope or wire).
13. On models with air conditioning, remove the compressor (see chapter Cooling system) and move to the side or tie off outside the work area. Do not disconnect the hoses.
14. Drain the engine oil (see chapter Routine car maintenance) and remove the oil filter. Remove the splash guard under the engine.
15. Remove the starter (see chapter On-board electrical equipment system).
16. Remove the generator (see chapter On-board electrical equipment system). This is not necessary on all models, but is advisable in any case to avoid damage.
17. Disconnect the exhaust system from the engine (see chapter Power supply system).
18. If the vehicle is equipped with an automatic transmission, unscrew the bolts and nuts securing the rotation converter to the drive disk (see chapter Automatic transmission (AT)). On the M40 engine, unscrew the bolts securing the automatic transmission fluid cooling pipes from the sump.
19. Place a jack under the transmission. To prevent damage to the transmission, place a block of wood between them. There are special transmission jacks with safety chains - use one if possible.
20. Attach a lifting strap or a length of chain to the engine lifting eyes. If the lifting eyes are removed, the chain can be directly attached to the intake manifold studs, but place a flat washer between the chain and the nut and tighten the nut until the chain is fully compressed to avoid possible bending of the studs.
21. Roll the winch up and attach the sling to it. Take up the slack in the sling or chain, but do not lift the engine.
Do not crawl under the engine when it is supported only by a winch or other lifting device.
22. On M10, M20 and M30 engines, remove the rear transmission mount crossmember and lower the rear of the transmission slightly.
23. Using a hex socket head, remove the transmission-to-cylinder block mounting bolts.
To remove the bolts that secure the clutch housing to the cylinder block, you will need a trunnion wrench with a very large extension that is positioned toward the rear of the transmission.
24. Remove the nuts securing the engine mounts to the frame brackets. On the M40 engine, unscrew the damper bolts from the mounts.
25. Check again to see if there are any other connections from the engine to the transmission or the vehicle. If there are, disconnect them.
26. Raise the engine slightly. Carefully push it forward to disconnect it from the transmission. If you are working on an engine with an automatic transmission, the torque converter may move forward with the engine. If it is still in the transmission, do not touch it, but you may find it easier to let it move forward so that you can grab it with your hands and remove it from the crankshaft.
Before installing the torque converter in the transmission, when returning the engine to its place, make sure that the front oil seal of the transmission pump is replaced with a new one, since the old one is usually damaged when removing the engine together with the converter. Either method is acceptable, however, be prepared for some fluid to leak out when the torque converter leaves the transmission. If you are working with an engine with a manual transmission, then move the engine forward so that the input shaft is completely disconnected from the clutch. Slowly lift the engine out of the engine compartment. Carefully check that everything is disconnected.
27. Remove the flywheel/drive disc (and the rear engine cover, if applicable)...
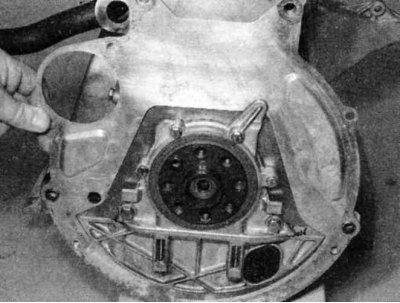
...and install the engine on a special stand. Do not turn the M40 engine over (see section Engine Removal Methods and Precautions).
Installation
1. Check the engine and transmission mounts. If they are worn or damaged, replace them.
2. Install the flywheel or drive disc (see section Repair work carried out without removing the engine from the vehicle). On an engine with a manual transmission, install the clutch and pressure plate (see chapter Manual transmission (MT)). This is a good time to replace the clutch.
3. If the rotation converter came out with the engine when it was removed, carefully install the converter into the transmission before lowering the engine into the vehicle.
4. Carefully lower the engine into the engine compartment; make sure the engine mounts are aligned.
5. On a vehicle with an automatic transmission, install the rotation converter on the crankshaft following the instructions in Chapter Automatic transmission (AT).
6. On a manual transmission vehicle, lightly coat the input shaft with high temperature grease and insert it into the clutch and crankshaft auxiliary bearing until the clutch housing is flush with the cylinder block. Do not allow the weight of the engine to rest on the input shaft.
It may be necessary to rock the engine slightly or rotate the crankshaft to align the splines of the clutch disc input shaft.
7. Install the transmission-to-engine mounting bolts and tighten them.
Do not use bolts to tighten the transmission to the engine.
8. Install the remaining components in reverse order.
9. Fill with coolant, oil, power steering fluid and, if necessary, transmission fluid.
10. Start the engine and check for leaks and proper operation of all units, then install the hood and test the car while driving.
11. If necessary, charge the air conditioning system and check for leaks.
This article is available at russian, bulgarian, belarusian, ukrainian, serbian, croatian, romanian, polish, slovak, hungarian
Article verified: Zhuravleva Isolda
Share information:
Previous articles
БМВ E28: Engine overhaul
Next articles
Similar articles on other types of BMW cars:
Removal and installation the engine BMW 3 Series E21 (1975-1983)
Removal and installation the engine BMW 3 Series E30 (1982-1994)
Engine — removal and installation BMW 7 Series E32 (1986-1994)
Removal and installation the engine BMW 7 Series E38 (1994-2001)
Removal and installation the engine assembly BMW X3 E83 (2003-2010)
Removal and installation the engine BMW X5 E53 (1999-2006)
Link in different formats to this page
Visitor comments
No comments yet
- General information
- Governing bodies
- Manual
- Maintenance
- Power unit
- Engine repair
- Lubrication system
- Cooling system
- Ignition system
- Supply system
- Injection system (gasoline)
- Injection system (diesel)
- Exhaust system
- Transmission
- Clutch
- Car gearbox
- Front axle
- Rear axle
- Chassis
- Steering
- Brake system
- Wheels and tires
- Body
- Interior
- Exterior
- Heating system
- Electrical equipment
- Equipment and devices
- Power devices
- Windscreen wipers
- Electrical circuits
- General information
- Manual
- Maintenance
- Power unit
- Engine repair
- Ignition system
- Engine lubrication system
- Cooling system
- Fuel system (gasoline)
- Fuel system (diesel)
- Exhaust system
- Transmission
- Clutch
- Car gearbox
- Chassis
- Front and rear suspension
- Steering
- Brake system
- Body
- Exterior
- Interior
- Electrical equipment
- Heating system
- Equipment and devices
- Power devices
- Electrical circuits
- General information
- Manual
- Maintenance
- Power unit
- Engine in a car
- Engine overhaul
- Cooling system
- Supply system
- Ignition system
- Control system
- Transmission
- Clutch
- Manual gearbox
- Automatic gearbox
- Transmission line
- Chassis
- Steering
- Front suspension
- Rear suspension
- Brake system
- Body
- Body elements
- Car care and painting
- Electrical equipment
- Heater and air conditioner
- Equipment and devices
- Starter and generator
- Electrical circuits
- General information
- Operation and maintenance
- Specifications
- Power unit
- Engine repair
- Cooling and lubrication system
- Supply system
- Ecotronic power supply system
- Fuel injection system
- Ignition system
- Transmission
- Clutch
- Gearbox BMW 242/4
- Gearbox Getrag 262/8
- Gearbox Getrag 265/6
- Automatic gearbox
- Cardan gear
- Rear axle
- Chassis
- Steering
- Front suspension
- Rear suspension
- Brake system
- Electrical equipment
- Equipment and devices
- Electrical circuits