
2. Before installing the crankshaft, check the seal contact surface very carefully for scratches and nicks that could damage the flange of the new seal and cause oil leaks. If the crankshaft is damaged, the only alternative is another or a new crankshaft unless a repair shop can suggest a repair method.
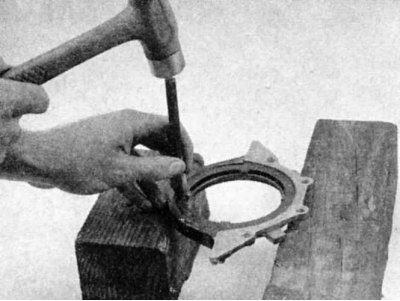
3. The old seal can be removed from the housing using a hammer and punch, acting from the rear side. Do not forget to pay attention to how deep the seal is installed in the housing before removing it; the new seal must be installed to the same depth. Be very careful not to scratch or otherwise damage the bore in the housing, otherwise oil leakage may occur.

4. Make sure the holder is clean, then apply a thin coat of engine oil to the outside edge of the new seal. The seal should be pressed flat into the housing bore, so using a hammer is not advisable. If a press is not available, clamp the housing and seal between two smooth blocks of wood and press the seal into place between the jaws of a large vice. The blocks of wood should be thick enough to distribute the force evenly around the seal. Work slowly, making sure the seal fits flat into the housing bore.
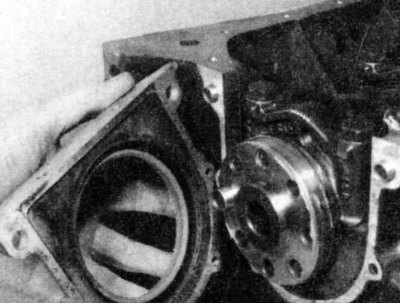
5. Before sliding the seal/retainer onto the crankshaft and tightening the bolts, the flanges of the seal should be lubricated with a multi-purpose grease or clean engine oil. Install a new gasket - no sealant is required - and make sure the guide pins are in place before installing the retainer.
6. Gradually tighten the bracket nuts/screws until they are tight, tighten them to the torque specified in Table of sizes and adjustment data at the end of the Guide.