Cars Mazda Cars Mitsubishi Cars Toyota Cars Chevrolet Cars AvtoVAZ Cars Kia Cars Nissan
English Русский
Български
Беларускі
Український
Српски
Hrvatski
Română
Polski
Slovenský
Magyar
| Articles | Contacts | Sitemap |   
BMWman.ru


3 series   5 series   7 series   BMW X3   BMW X5   BMW X6

E39 (1995-2003) E34 (1988-1996) E28 (1981-1988) E12 (1972-1981)
  • Home
  • BMW 5 Series
  • E28
  • Power unit
  • Engine overhaul
  • Checking the condition of pistons / connecting rods

Checking the condition of pistons / connecting rods (BMW 5 Series E28)

            0

Before performing the inspection, the piston/connecting rod assemblies must be cleaned and the old rings removed from the pistons.

Always use new rings when reassembling the engine.


Always use new rings when reassembling the engine.


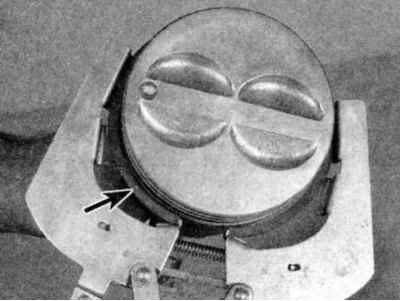
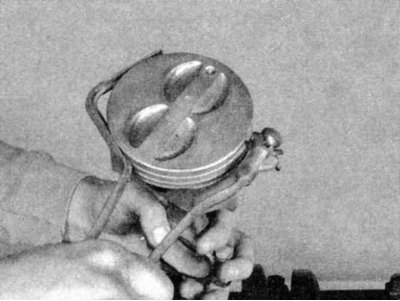
1. Carefully remove the rings using a special tool, pay attention to the mark (arrow) on the top of the ring. Be careful not to leave nicks or dents on the pistons.

2. Remove all traces of carbon deposits from the piston bottom. After the bulk of the carbon deposits have been removed with a scraper, a hand wire brush or a piece of fine sandpaper may be used. Under no circumstances should a wire brush in an electric drill be used to remove carbon deposits from the pistons. The piston is made of soft material and may be damaged by it.

2. Remove all traces of carbon deposits from the piston bottom. After the bulk of the carbon…


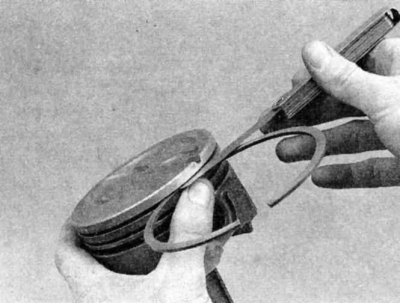
3. Use a ring groove cleaner to remove carbon deposits from the ring grooves. Be very careful to remove only the carbon deposits - do not remove metal or nick or scratch the sidewalls of the grooves.


If a groove cleaning device is not available, this job can be done with a piece of an old piston ring, but be careful with your hands - the rings can be sharp.


4. After removing the carbon deposits, wash the pistons/connecting rods with solvent and dry with compressed air (if available). Make sure the oil return holes in the side surfaces of the ring grooves are clean.

5. If the cylinder walls and pistons are not damaged or excessively worn, and if the cylinder block has not been ground, new pistons are not required. Normal piston wear is shown by uniform wear of the thrust surfaces (at an angle of 90° to the pin hole) and by slight play in the groove of the upper ring. However, when rebuilding an engine, new rings should always be installed.

6. Carefully inspect each piston for cracks around the skirt, on the piston pin bosses and in the ring grooves.

7. Inspect the skirt thrust surfaces for grooves and wear, the bottom for holes, and the bottom edges for burnt areas. If the skirt has grooves or abrasion marks, the engine may have been overheated and/or there is an abnormal compression ratio causing elevated operating temperatures.

8. It is necessary to carefully check the cooling system and the lubrication system. A hole in the piston crown indicates that there was an abnormal compression ratio (early ignition). Burn marks on the edge of the underbody are usually a sign of explosive combustion (detonation). If any of these problems exist, the cause must be corrected or the fault will reoccur. The fault may be a leak in the intake manifold, incorrect fuel/air mixture or incorrect ignition timing. On later models with sophisticated exhaust management systems including catalytic converters, the problem may originate from the EGR system (exhaust gas recirculation), if it is applied.


9. Piston corrosion, which looks like small pits, indicates that the cooler has penetrated into the combustion chamber and/or crankcase; in the same way, the cause must be eliminated, otherwise the problem will reoccur.

9. Piston corrosion, which looks like small pits, indicates that the cooler has penetrated into the…


10. Measure the piston ring side clearance by installing a new piston ring in the groove and inserting a feeler gauge between it and the side surface of the groove.

11. Check the clearance in three or four places around each groove. Make sure you check the correct ring - the rings are different. If the clearance is greater than the allowable value, the piston must be replaced.

11. Check the clearance in three or four places around each groove. Make sure you check the correct…


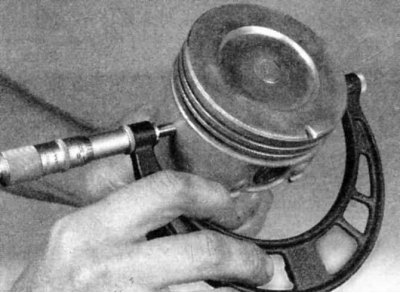
12. Check the piston clearance in the cylinder by subtracting the piston diameter from the cylinder diameter. Make sure the pistons and cylinders fit together. Measure the piston diameter at the skirt level along the pin and at a 90° angle to it.


13. Any difference in these measurements indicates ovality. Subtract the piston diameter from the cylinder diameter to get the clearance value. If the clearance is greater than the allowable value, the block should be ground and new pistons and rings installed.

14. Check the play between the piston and connecting rod by rotating them in opposite directions. Any noticeable play indicates excessive wear that must be corrected. The piston/connecting rod assembly should be sent to a workshop for inspection. After repair, check the connecting rods for bending and twisting, as most machine shops have the equipment to do this.

Unless new pistons and/or connecting rods are being installed, do not separate the pistons from the connecting rods.


15. Check the connecting rods for cracks and other damage. Temporarily remove the connecting rod bearing caps, remove the old liners, wipe the bearing surfaces in the rod and cap, and inspect them for nicks, dents, and scratches. After checking the connecting rods, install new liners, replace the caps, and hand tighten the nuts.

Examine the original source using the link on the website: BMWMan.ru

This article is available at russian, bulgarian, belarusian, ukrainian, serbian, croatian, romanian, polish, slovak, hungarian
Article verified: Zhuravleva Isolda

Share information:
Previous articles
БМВ E28: Engine overhaul
Next articles

Cylinder honing
Checking the condition of the cylinder block
Cleaning the cylinder block
Removal and checking the condition of the intermediate shaft
Removal the crankshaft
Checking the condition of the crankshaft
Checking the condition of main and connecting rod bearings
Sequence of engine assembly during major repairs
Installing piston rings
Installing the intermediate shaft


Similar articles on other types of BMW cars:
Pistons and connecting rods — condition check BMW 3 Series E46 (1998-2006, petrol)
Checking the technical condition of connecting rod and piston group… BMW 3 Series E21 (1975-1983)
Pistons and connecting rods — installation and checking of connecting… BMW 7 Series E32 (1986-1994)
Checking the condition of the exhaust system BMW 7 Series E38 (1994-2001)
Identifying engine faults by the condition of spark plugs BMW X3 E83 (2003-2010)
Pistons and connecting rods — design description BMW X5 E53 (1999-2006)
Link in different formats to this page


Visitor comments

No comments yet


How much 41 + 50 =


BMW E39 (1995-2003) 
  • General information
  • Governing bodies
  • Manual
  • Maintenance
  • Power unit
  • Engine repair
  • Lubrication system
  • Cooling system
  • Ignition system
  • Supply system
  • Injection system (gasoline)
  • Injection system (diesel)
  • Exhaust system
  • Transmission
  • Clutch
  • Car gearbox
  • Front axle
  • Rear axle
  • Chassis
  • Steering
  • Brake system
  • Wheels and tires
  • Body
  • Interior
  • Exterior
  • Heating system
  • Electrical equipment
  • Equipment and devices
  • Power devices
  • Windscreen wipers
  • Electrical circuits
BMW E34 (1988-1996) 
  • General information
  • Manual
  • Maintenance
  • Power unit
  • Engine repair
  • Ignition system
  • Engine lubrication system
  • Cooling system
  • Fuel system (gasoline)
  • Fuel system (diesel)
  • Exhaust system
  • Transmission
  • Clutch
  • Car gearbox
  • Chassis
  • Front and rear suspension
  • Steering
  • Brake system
  • Body
  • Exterior
  • Interior
  • Electrical equipment
  • Heating system
  • Equipment and devices
  • Power devices
  • Electrical circuits
BMW E28 (1981-1988) 
  • General information
  • Manual
  • Maintenance
  • Power unit
  • Engine in a car
  • Engine overhaul
  • Cooling system
  • Supply system
  • Ignition system
  • Control system
  • Transmission
  • Clutch
  • Manual gearbox
  • Automatic gearbox
  • Transmission line
  • Chassis
  • Steering
  • Front suspension
  • Rear suspension
  • Brake system
  • Body
  • Body elements
  • Car care and painting
  • Electrical equipment
  • Heater and air conditioner
  • Equipment and devices
  • Starter and generator
  • Electrical circuits
BMW E12 (1972-1981) 
  • General information
  • Operation and maintenance
  • Specifications
  • Power unit
  • Engine repair
  • Cooling and lubrication system
  • Supply system
  • Ecotronic power supply system
  • Fuel injection system
  • Ignition system
  • Transmission
  • Clutch
  • Gearbox BMW 242/4
  • Gearbox Getrag 262/8
  • Gearbox Getrag 265/6
  • Automatic gearbox
  • Cardan gear
  • Rear axle
  • Chassis
  • Steering
  • Front suspension
  • Rear suspension
  • Brake system
  • Electrical equipment
  • Equipment and devices
  • Electrical circuits
BMWman.ru © 2017-2026 · Mobile version · News and articles · Sitemap: EN BG BY UA RS HR RO PL SK HU · Feedback · Site search
3er E21 · 3er E30 · 3er E36 · 3er E46 [petrol] · 3er E46 · 5er E12 · 5er E28 · 5er E34 · 5er E39 · 7er E32 · 7er E38 · X3 E83 · X5 E53 ·
This site uses cookies 🍪, without them some features simply would not work.