
Caution! The working edge of the seal is very sensitive and must not be bent under any circumstances. Do not touch the working edge with your hands.
The gland can only be replaced together with the cover. The seal is an integral part of the gland and should not be replaced separately.
Check the correct position of the support sleeve, which is included in the delivery set. If the gland has been stored without the support sleeve for more than six months, it is prohibited to install it. The support sleeve remains in the gland and, when installed as described below, is used as a sliding sleeve.
The previously released device "11.2.390" must not be used. When installing the seal as a sliding sleeve, use only the supplied support sleeve.
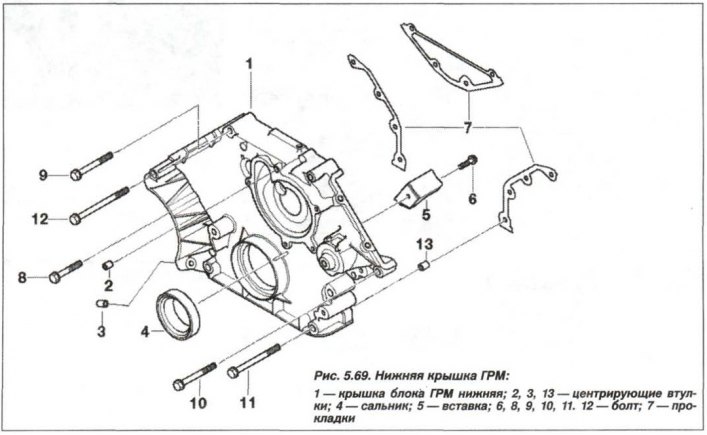
Check the centering bushings (12, see Fig. 5.69) for damage and correct installation. The surfaces to be sealed must be clean and free of grease.
Apply a layer of sealant such as Drei Bond 1209 to the corner joints (arrows) of the parting plane with the oil pan. Lightly lubricate the crankshaft seating surface and the working edges of the oil seal with engine oil; do not touch the edges with your hands.
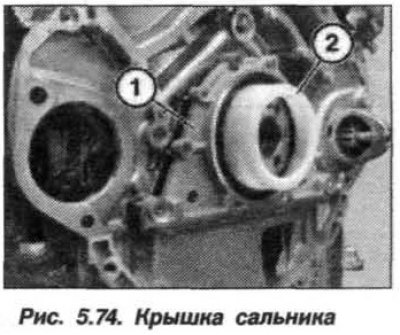
Install the lid (1, Fig. 5.74) with the support sleeve (2) of the oil seal on the crankshaft, avoiding any distortions, and carefully push it on.
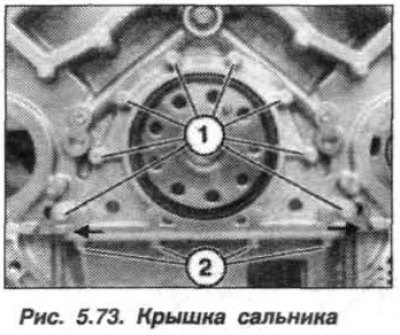
Replace the sealing washers under the bolts (1 and 2, see Fig. 5.73). Insert and tighten first the bolts (1) and then the bolts (2) for fastening the oil seal cover. Tighten first the bolts (1) and then the bolts (2) for fastening the oil seal cover to a torque of 12 N·m (1.2 kgf·m).
(The original text is available on the website: «www.bmwman.ru»)