
- Home
- BMW 7 Series
- E38
- Power unit
- Fuel system (petrol)
- Removal and installation the throttle body, replacing its gasket
Removal and installation the throttle body, replacing its gasket (BMW 7 Series E38)
ASC T Throttle Body M52 Models
1. Disconnect the connectors.
When installing, connect the PCV hose to the suction hose.
2. Disconnect the throttle cable.
When installing the cable, the gap should be 0.5÷1 mm.
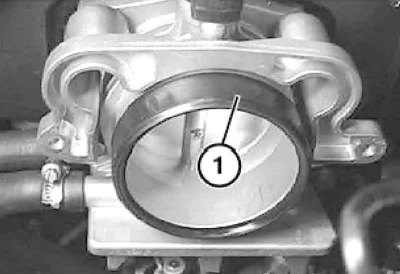
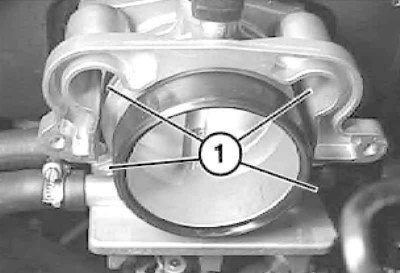
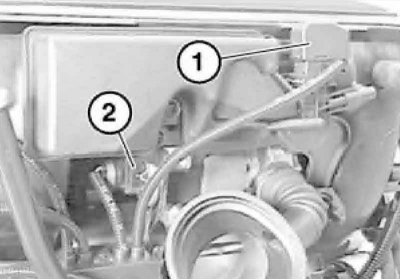
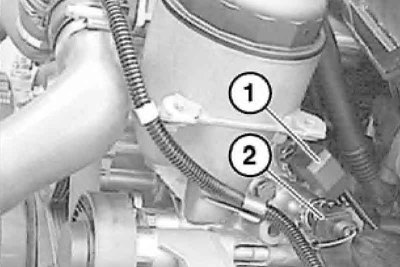
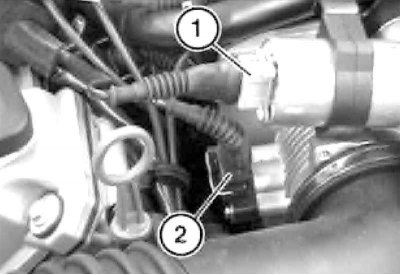
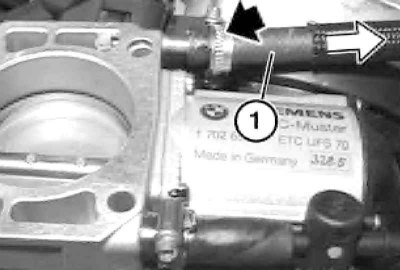
3. Check the condition of the sealing ring (1) and replace it if necessary.

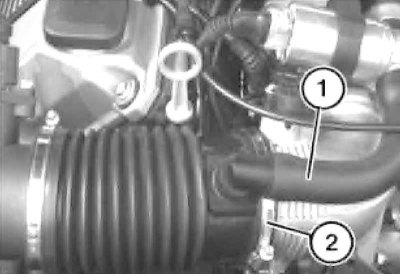
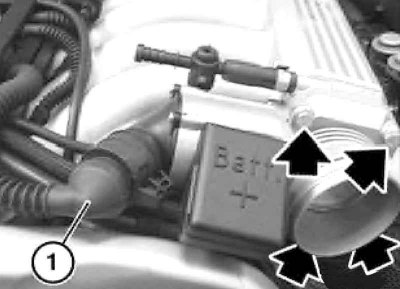
4. Loosen the clamp (1), unscrew the bolts (2).
5. Loosen the throttle body bracket mounting bolts and remove the bracket.
6. Installation is carried out in reverse order.
M52 Model Throttle Body Gasket
1. Remove the air flow meter (see section Removal and installation the air cleaner housing).
2. Remove the ASC T-system throttle body.
3. Disconnect the throttle cable. Disconnect and block the throttle heating hoses.
At the same time, a small amount of coolant leaks out.
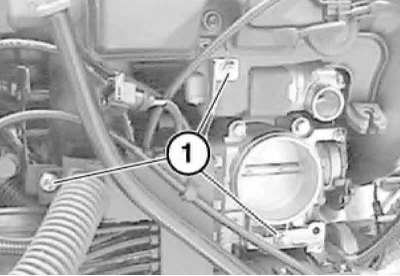
4. Remove the bolts and the throttle body with the seal. Replace the gasket.
5. Installation is performed in the reverse order. Check the coolant level and correct it if necessary.
Throttle body models M52TU
1. Disconnect the negative cable from the battery.
2. Remove the air cleaner housing.
3. Remove the air flow meter (see section Removal and installation the air cleaner housing).
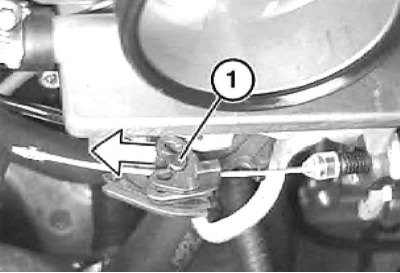
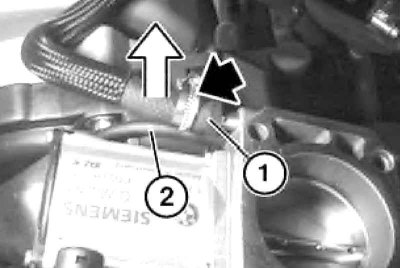
4. Pull the cable out of the holder (1) with an upward movement and unhook it from the throttle actuator mechanism.
When installing, adjust the throttle cable.
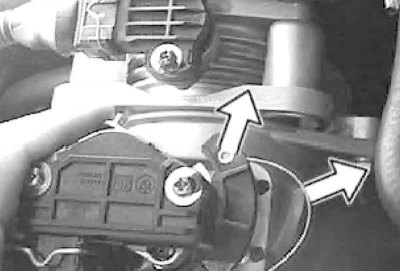
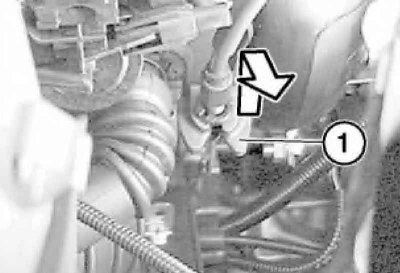
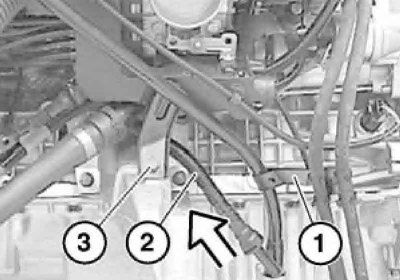
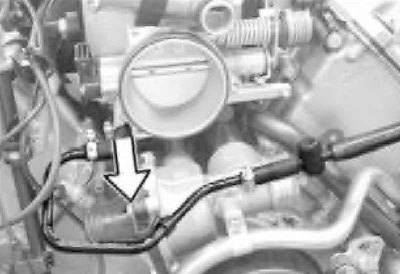
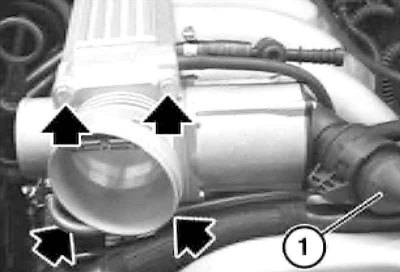
5. Loosen the clamps (1). Disconnect the pipe from the throttle body and IAC valve.
6. Disconnect the connectors of the resonance valve (1) and IAC valve (2), as well as the D/V pressure (1) and temperature (2) of the engine oil.
7. Remove the wiring box mounting bolts.
8. Release the fuel lines and the oil level sensor wire from the holder (1) on the engine oil dipstick guide tube. Disconnect the oil drain line (2) from the guide tube, unscrew the bolt (3) and remove the engine oil dipstick guide tube.
When installing, replace the guide tube sealing ring.

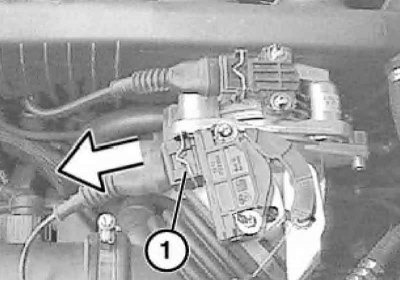
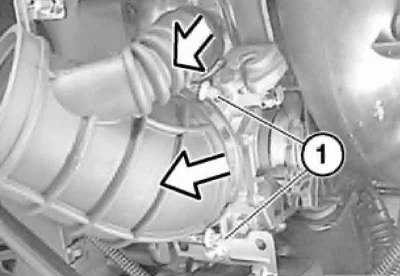
9. Move the wiring box (1) to the side and disconnect the connector (2) from the throttle body. Unscrew the bolts (3) and remove the throttle body.
10. Installation is carried out in reverse order. Please note the following points:
- Replace the throttle body sealing ring;
- Before connecting, secure the connector to the throttle body. To do this, hold the connector plug body and turn the locking ring on it clockwise (looking from the free end of the fork), so that the locking pin clicks into place. There is a hole between the protrusions on the fork body, through which the red locking pin should be visible when properly locked;
- When connecting the connector, the white arrow mark on the plug body must match the arrow on the throttle body. Connect the connector, turn the locking ring clockwise (looking from the side where the wiring is connected to the plug);
- If the throttle valve was removed for replacement due to a fault, the initial correction values should be re-programmed into the ECM using diagnostic equipment.
ASC T throttle body for M60 and M62 models
1. Turn off the ignition.
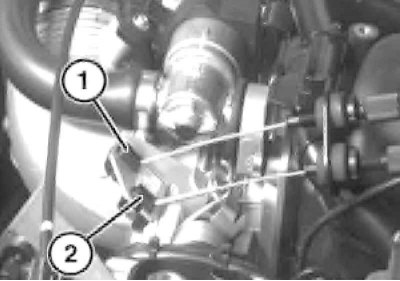
2. Disconnect the hose (1). Loosen the clamp (2) and remove the protective cover.
3. Disconnect the connector.
4. Hang up the throttle cable.
When installing, adjust the throttle cable so that it does not sag.
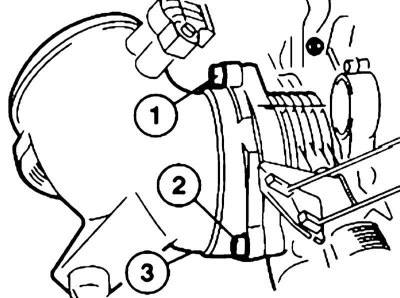
5. Remove the bolts (1-3) and remove the throttle body.
6. Installation is carried out in reverse order.
Replace the throttle body gasket when installing.
Throttle body models M60 and M62
1. Turn off the ignition.
2. Remove the top cover of the engine compartment.
Models with IAC valve
1. Disconnect the connector on the IAC valve and the throttle potentiometer.
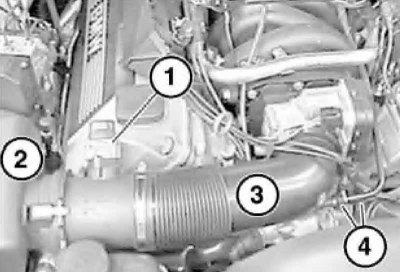
2. Press the brackets (1), loosen the clamp (2) (if it is installed) and disconnect the hose. Disconnect the connector (3). On M62 engine models, disconnect the IAT sensor wiring connector.
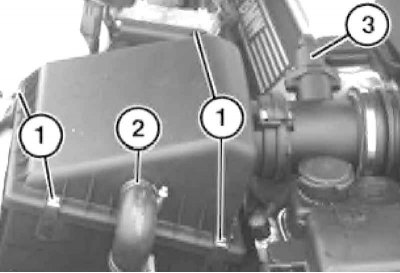
3. Loosen the clamps (1 and 2) and remove the air intake hoses together with the upper section of the air cleaner housing.
4. Remove the throttle control cables (1 and 2) (gas and cruise control pedals).
When installing, the gas pedal cable should not have free play, and the free play of the cruise control cable should be 1÷2 mm.
5. Disconnect the vacuum hose from the throttle body.
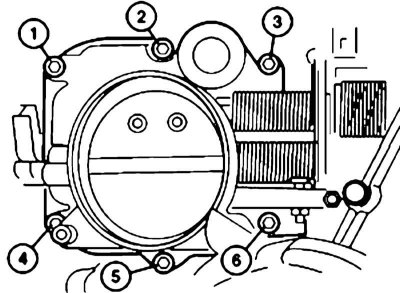
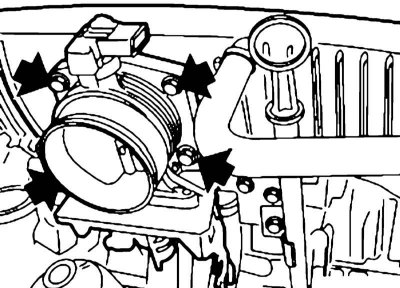
6. Remove the bolts (1-6) and remove the throttle body.
7. Installation is carried out in the reverse order. Replace the throttle body gasket.
Models without IAC valve
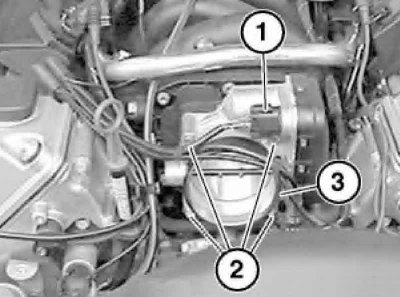
1. Disconnect the connector (1), disconnect the vacuum lines (4) and remove the suction pipe (3) with the upper section (2) of the air cleaner housing.
2. Disconnect the connector (1), remove the sealing ring (3), which may still be in place. Unscrew the screws (2) and remove the throttle body.
3. Installation is carried out in the reverse order. If necessary, replace the throttle body gasket.
Throttle body models M73
1. Disconnect the negative cable from the battery. Turn off the ignition.
2. Remove the top engine cover.
Throttle body of cylinders No.7-12
1. Disconnect the hose from the throttle body. Disconnect the connector (1), unscrew the bolts and remove the bracket securing the positive battery terminal in the engine compartment.
Replace the gasket when installing.
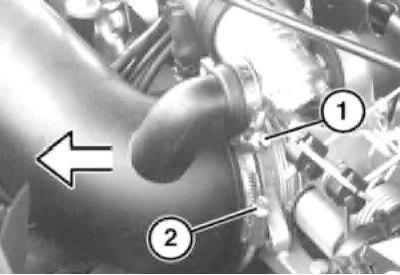
2. Loosen the clamp (1) and remove the hose. Disconnect the hose (2). If so equipped, remove the additional air supply valve.
When installing, replace the fuel hose to the EVAP valve and the mounting clamp.
Throttle body for cylinders No.1-6
1. Disconnect the hose from the throttle body. Disconnect the connector (1) and unscrew the mounting bolts.
Replace the gasket when installing.
2. Loosen the clamp (1) and disconnect the hose. If so equipped, remove the additional air valve.
When installing, replace the fuel hose to the EVAP valve and the mounting clamp.
This article is available at russian, bulgarian, belarusian, ukrainian, serbian, croatian, romanian, polish, slovak, hungarian
Article verified: Polikarpov Saveliy
Share information:
Previous articles
БМВ E38: Fuel system (petrol)
Next articles
Similar articles on other types of BMW cars:
Removal and installation the cylinder head / replacing the sealing… BMW 3 Series E46 (1998-2006)
Throttle body — removal and installation BMW 3 Series E46 (1998-2006, petrol)
Removal and installation the cylinder head / replacing the cylinder… BMW 5 Series E39 (1995-2003)
Removal and installation the oil pan BMW 5 Series E12 (1972-1981)
Pistons — removal and installation BMW X3 E83 (2003-2010)
Replacing the air duct between the IRV and the throttle body BMW X5 E53 (1999-2006)
Link in different formats to this page
Visitor comments
No comments yet
- General information
- Introduction to guide
- Manual
- Maintenance
- Power unit
- Engine M60/1, M60/2 (petrol)
- M62 engine (petrol)
- M57 engine (diesel)
- M67 engine (diesel)
- Cooling system
- Fuel system (petrol)
- Fuel system (diesel)
- Exhaust system
- Ignition and control systems
- Charge and launch systems
- Transmission
- Clutch
- Mechanical gearbox
- Automatic gearbox
- Cardan and drive shafts
- Chassis
- Brake system
- Front suspension
- Rear suspension
- Steering
- Body
- Exterior
- Interior
- Electrical equipment
- Equipment and devices
- Lighting
- Heating and air conditioning
- Electrical circuits
- General information
- Care and maintenance
- Power unit
- Minor engine repair
- Engine overhaul
- Lubrication system
- Cooling system
- Ignition system
- Supply system
- Injection system (petrol)
- Injection system (diesel)
- Exhaust system
- Transmission
- Clutch
- Manual gearbox
- Automatic gearbox
- Cardan gear
- Rear axle and shafts
- Chassis
- Front suspension
- Rear suspension
- Steering
- Wheels and tires
- Brake system
- Body
- Body elements
- Electrical equipment
- Equipment and devices
- Electrical circuits