
Attention! The stems of the intake and exhaust valves have the same diameters, but different diameters of the plates, do not mix them up.
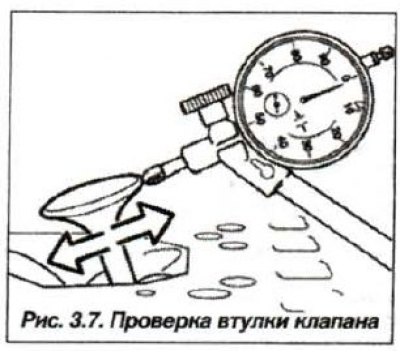
The valve guide bush wear level should be checked in the following order. Prepare the "00.4.210" device and a pointer indicator on the stand.
Remove the cylinder head and take out the valve. Remove carbon deposits from the inner surface of the guide bushing.
Insert the new valve so that the end of the valve stem aligns with the end of the valve guide sleeve.
Install a pointer indicator (see fig. 3.7) and measure the gap between the guide bushing and the valve stem according to the maximum deviation of the valve head, which should not exceed 0.5 mm.
If an increased clearance is detected, process the guide bushing with a reamer with a mushroom (1, Fig. 3.70) depending on the diameter of the valve stem from the tool kit "00.4.210".
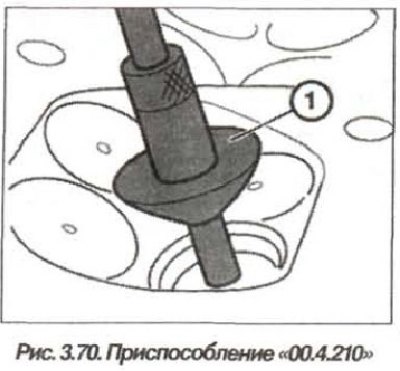
Press the guide cap (1) against the valve seat and process the valve guide bushing with a reamer in a dry state, starting from the combustion chamber side. Turn the reamer once with a downward feed. After processing with a reamer, it is necessary to grind the valve seat and install the valve with a stem of the repair size (Fig. 3.71).
