
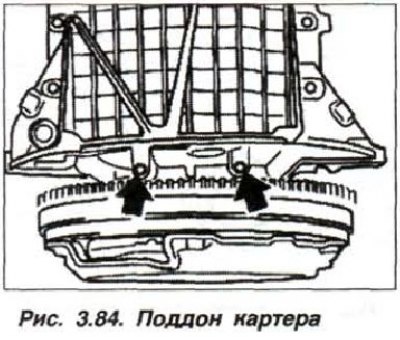
Loosen the oil pan mounting bolts by 0.5 turns. Unscrew the bolts (6 pcs.) securing the crankshaft rear oil seal cover. Carefully detach the oil pan sealing gasket from the rear oil seal cover and remove the cover.
After removing the rear oil seal cover, check the oil pan sealing gasket for damage. If necessary, remove the oil pan and replace its sealing gasket.
Attention! The rear oil seal cover is supplied complete with the oil seal. Since 04.1990, the oil seal supplied is used and stored only on a special support sleeve. If the oil seal has been stored without a support sleeve for more than six months, do not install such an oil seal. The new oil seal does not have a spiral twisted expander.
The working edge of the seal is very sensitive and should never be bent or touched by hand.
If it is necessary to remove the seal and press in a new one, use the "11.1.260" tool in combination with the "00.5.500" tool.
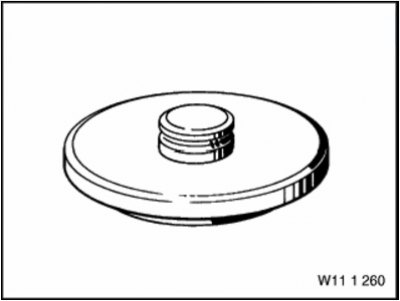
Device 11.1.260
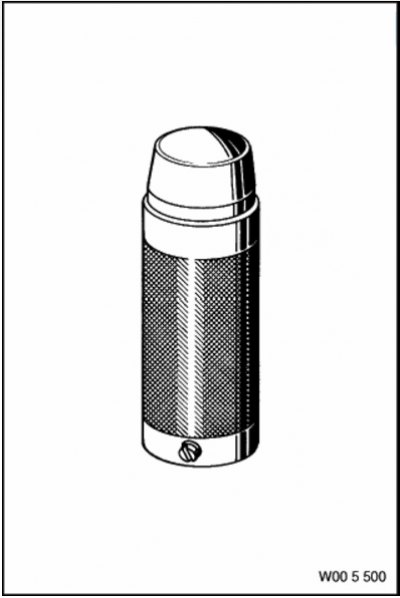
Device 00.5.500
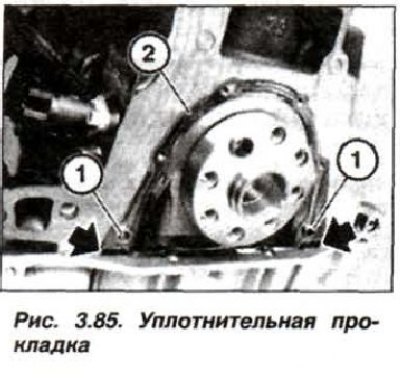
Check the correct position of the centering bushings (1, Fig. 3.85) and replace the sealing gasket (2)
Apply a thin layer of sealant of the type evenly to the corner joints (arrows) of the plane of the joint with the oil pan "Drei Bond-1209".
When installing the cover with the oil seal on the crankshaft, use the support sleeve supplied with the oil seal as a mounting device. Before installing, lubricate the seating surface of the crankshaft with engine oil. Install the cover with the oil seal on the crankshaft, avoiding distortions.
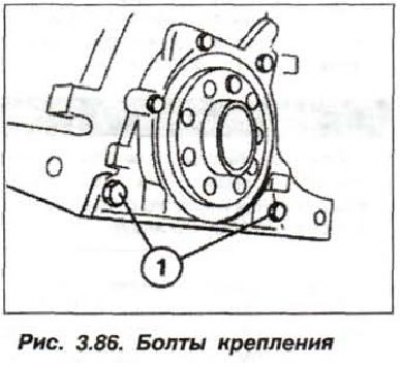
Replace M8 bolts (1, Fig. 3.86) and cover their threads with sealant.
Replace the sealing washers under the mounting bolts (M6).
Insert and tighten all oil seal cover mounting bolts to a preliminary torque of 8.0–10 N·m (0.8–1.0 kgf·m), then bolts (M6, 4 pcs.) to a torque of 11–14 N·m (1.1–1.4 kgf·m), and bolts (M8, 2 pcs.) to a torque of 24–30 N·m (2.4–3.0) kgf·m.