



Caution! The cable drive and all moving elements of the parking brake system must move easily.
Before adjusting, the parking brake must be worked in. On an empty road, at a speed of 40 km / h, pull the parking brake lever towards you until you feel a slight resistance. Move the lever one more click. In this position (with the parking brake slightly applied) drive about 400-500 m. This will remove any corrosion that has occurred on the drum and dust from wear on the friction linings. If necessary, the process can be repeated once more, allowing the brakes to cool down.
Adjustment of the parking brake is carried out after:
- replacement of parking brake pads;
- replacement of rear wheel brake disc;
- disassembly of the adjustment device;
- replacing the parking brake cables;
- with a large stroke of the parking brake control lever, more than 10 clicks (teeth);
- if the braking force appears when the lever is tightened by one click.
The parking brake adjustment must be carried out in the following order. Prepare the "34.1.030" device or a screwdriver with a flexible rod for hexagonal replaceable heads for the adjusting nut and lock nut. The rear brake mechanisms of the working system are adjusted.
Raise and support the rear of the vehicle and remove the parking brake lever dust cover. Release the handbrake lever (set to the bottom position).
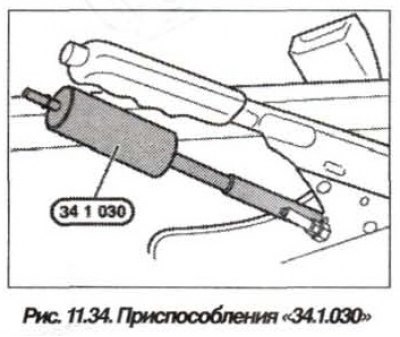
Using the devices "34.1.030" (fig. 11.34), loosen the parking brake cable locknuts and adjusting nuts as much as possible. The cables should be completely loose.
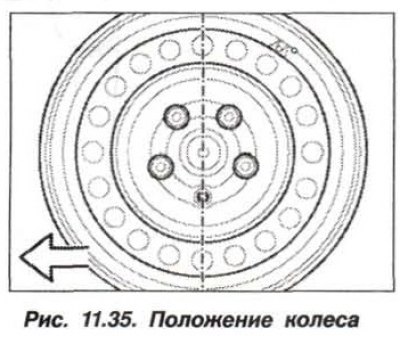
Completely unscrew one mounting bolt from each rear wheel and position the wheel with the hole from under the unscrewed bolt strictly vertically downwards (fig. 11.35). The adjusting nut should be visible through the hole.
Turn with a screwdriver (fig. 11.36) adjusting nut, press the brake shoe against the drum until the wheel stops rotating under the force of your hand - it will lock.
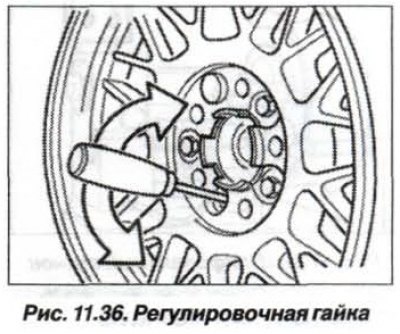
Turn the adjusting ratchet nut back twelve clicks of the lock (teeth). When turning the adjusting ratchet nut, it is necessary to take into account the direction of its rotation. Tightening the wheel pads (their adhesion to the drum) occurs when the left brake mechanism ratchet nut rotates in the top-down direction. Tightening of the right wheel pads occurs when the brake mechanism ratchet nut rotates in the bottom-up direction.
Press the brake pedal firmly once and release it. Check that the cable adjusting couplings are fully unscrewed. Tighten and release the parking brake lever five times with a force of 400 N (40 kgf), while pressing the lever release button. Check the freedom of rotation of the wheels. If there is jamming, unscrew the ratchet nut.
Adjust the brake cables. Raise the handbrake lever two clicks (teeth) and tighten the cable adjusting sleeves until braking action occurs. Release the brake lever all the way down and check the uniformity and freedom of wheel rotation by hand. Repeat the adjustment if necessary.
Release the parking brake lever all the way down. Turn on the ignition, the parking brake indicator should not light.
Tighten the brake lever one click. The rear wheels should not be braking, the indicator may be on.
Tighten the brake lever two clicks. You should feel the braking force and the indicator should light up. If it does not light up, adjust the indicator contacts on the parking brake lever by bending them.
Turn off the ignition. Tighten the locknuts, holding the adjusting nuts from turning. Install the protective cover of the parking brake drive lever.
Lower the vehicle onto its wheels. Install the two wheel mounting bolts and tighten them to a torque of 140 N·m (14.0 kgf·m). Install the wheel caps, if provided.
The main criterion for the correctness of the adjustment is the uniform tightening of both brake drums in the brake discs of the rear wheels.