
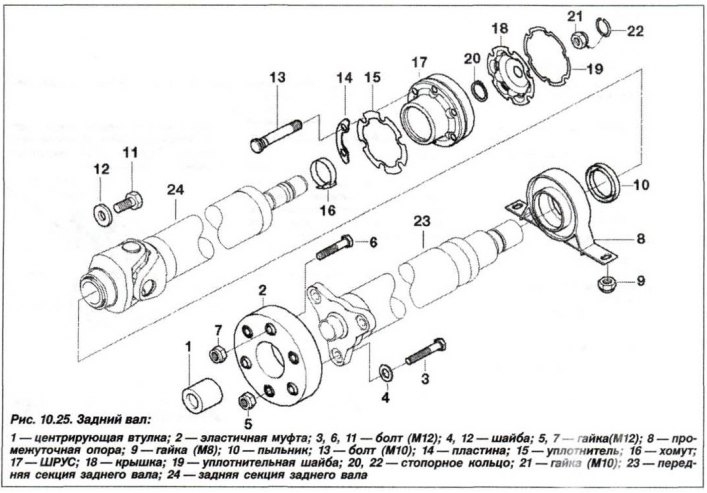
Attention! The cardan shaft is balanced as an assembly.
The connecting bolt of the front and rear parts of the rear wheel drive cardan shaft must be installed using sealant.
Apply marks to the relative positions of the shaft and the crosspiece (arrows, Fig. 10.40). Loosen the tie bolt (1) and separate the cardan shaft components.

Remove the spacer washer (12, see Fig. 10.25) and anther (10).
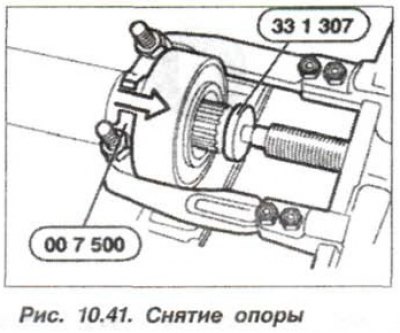
Using the devices "33.1.307" and "00.7.500" (fig. 10.41), pull the intermediate support off the front part of the propeller shaft and check the technical condition of the intermediate support, replace it if necessary.
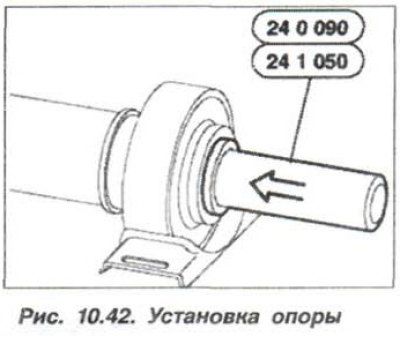
Install the intermediate support of the cardan shaft until it stops (fig. 10.42), using the mandrel "24.0.090" (with a support inner hole diameter of 30 mm) or mandrel "24.1.050" (with a support inner hole diameter of 35 mm).
When assembling the cardan shaft, make sure that the marks match (see fig. 10.40) on its front and back parts.
Use new spacer washer (12) and connecting bolt (11, see Fig. 10.25), making sure that there are no traces of grease on its threads.
Apply a sealant of the type to the threaded part of the tie bolt (11) "Loctite 648" and tighten it to a torque of 97 N·m (9.7 kgf·m).
Install the intermediate support on the vehicle body and tighten the new self-locking nuts to a torque of 21 N·m (2.1 kgf·m).
This publication was borrowed from an online resource BMWman.ru