
The hood must be removed with an assistant, in the following order. Open it, cover the body wings with a thick cloth such as tarpaulin, disconnect the SS from the heated nozzles, the washer fluid supply hose and the SS of the windshield washer.
Fix the installation location of the hinge compensation plates by outlining their position with a marker.
Fix the car hood in the open position using an additional support such as a wooden beam, unscrew the bolt securing the body ground busbar in the area of the right hood hinge and move the busbar to the side. Fix the place of fastening of the bolts with washers on the hinge, outlining the position of their heads with a marker.
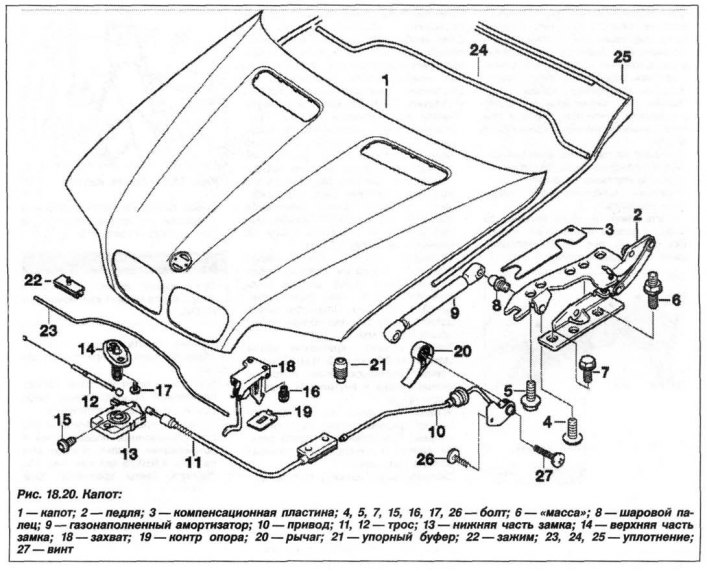
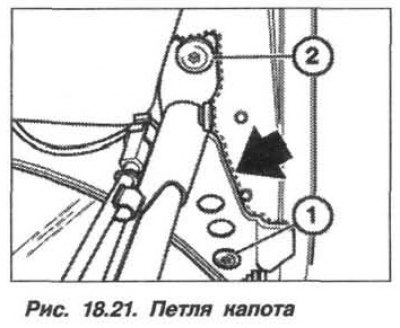
Unscrew the lower bolt (1, Fig. 18.21) fastening the hood hinge to the body and loosen its upper bolt (2). Remove the hood stop by disconnecting the upper axle pin and pressing the lower ball pin. Perform similar operations on the opposite side of the hood and remove it.
Attention! When replacing the spring-gas strut, dispose of it at a service station.
The installation of the hood should be carried out in the reverse order, while it is necessary.
Install the hood on the hinges according to the previously applied markings, but do not tighten the screws.
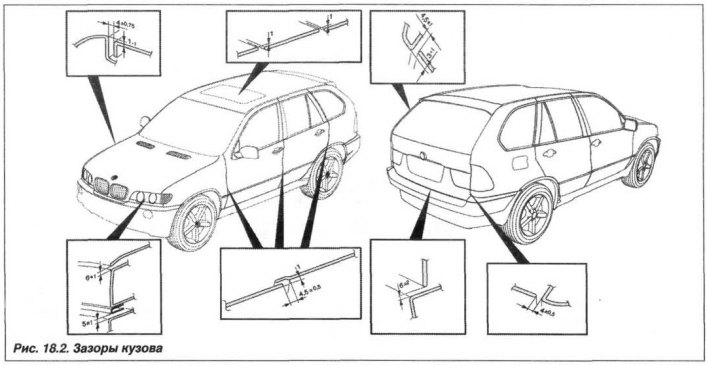
Check the gap size of the mating surfaces of the hood/front fenders, which should be 4.0±0.75 mm (see fig. 18.2). Tighten the hinge mounting bolts to a torque of 2.0 kgf·m (20 N·m). If the hood has been replaced, adjust its position.
Adjust the position of the car hood in the following order.
Attention! Check that the cable drive of both hood locks has no play or sagging of the cable. The cable sheath must be firmly secured in the lock guides. If the hood moves involuntarily, damage to the paintwork up to a metallic shine is visible.
When adjusting the position of the hood, avoid damaging adjacent body elements.
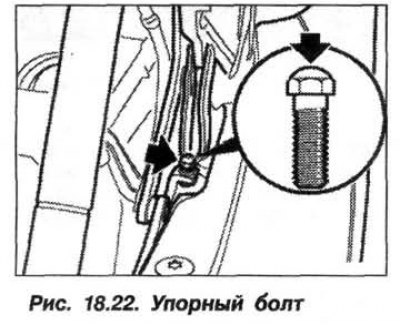
Check the stop bolts (arrow, Fig. 18.22) left and right hood hinges. The plastic bolt tips must be in place and undamaged. Replace the hood hinge bolt if necessary.
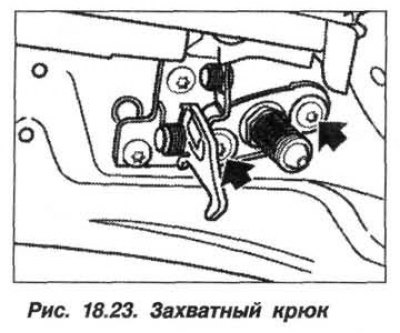
Loosen the screws (arrows, Fig. 18.23) the catch hook of the upper part of the hood lock on the left and right. The parts should move.
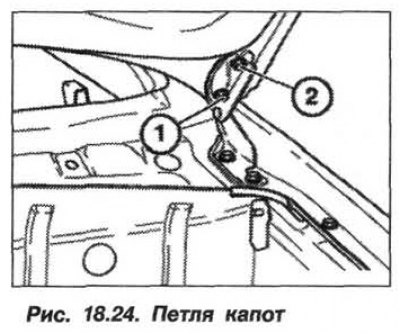
Loosen the screws (1 and 2, Fig. 18.24) left and right hood hinges so that the hood can move. Slowly close the hood. The locks and catch hooks should engage with the body.
Note: If during the adjustment process it turns out that the adjustment range is insufficient, you can loosen the bolts securing the hood hinge to the body and move it.
Adjust the position of the hood so that the gap (see fig. 18.2) relative to the wings in front was the same (4.0 + 0.75 mm). The hood and front wings in the area of the headlights should be flush and at the same height. During operation, symmetrical recession of the hood relative to the wings by no more than 1.0 mm is allowed.
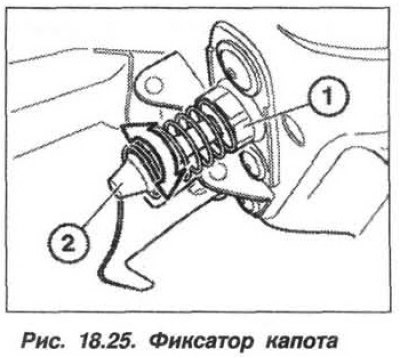
Adjust the height of the hood (6.0 – 7.0 mm) relative to the front shield with the lock nut loosened (1, Fig. 18.25), by rotating the lock (2, arrow).
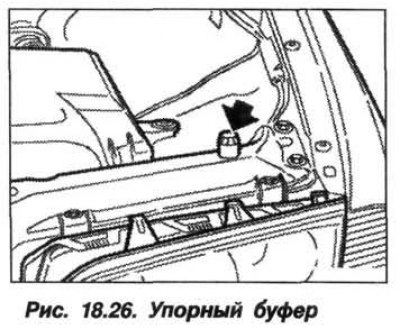
Adjust the height of the hood relative to the front fenders by rotating the stop buffers in the front shield on the right and left (arrow, Fig. 18.26).
Attention! After completing the adjustments, check the operation of the grab hook.