
The rear axle gearbox must be removed in the following order. Prepare the "33.4.420" device and disconnect the rear wheel drive shafts from the output flange of the rear axle gearbox differential.
Disconnect the cardan shaft from the rear axle gearbox and install the "33.4.420" device (Fig. 14.7), while maintaining a gap (arrow) between the device and the dust seal (1). Damage to the seal will cause increased noise.

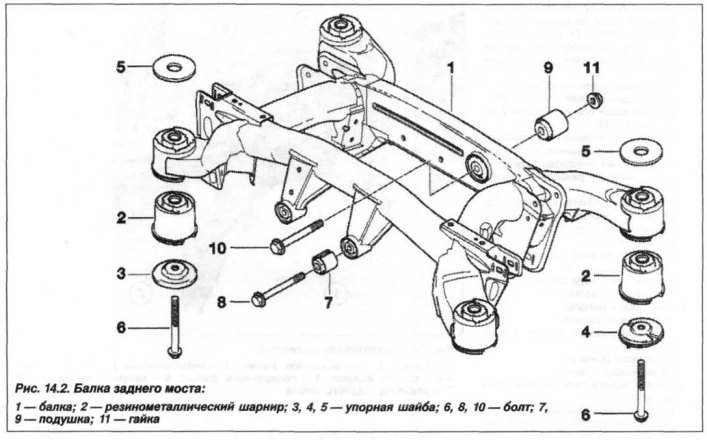
Unscrew the three rear bolts securing the heat-insulating screen, move it down, thus opening access to the front bolts (8, see Fig. 14.2) rear axle gearbox mounts and unscrew the bolts. Unscrew the nut (11) and remove the bolt (10). Disconnect the ventilation pipe from the rear axle gearbox housing and remove the gearbox by moving it downwards.
The installation of the rear axle gearbox should be carried out in the reverse order, while it is necessary to install the rear axle gearbox in place using a jack.
Insert the front bolts, screw on new self-locking nuts, but do not tighten them. Similarly, insert the rear bolt and remove the jack.
Tighten the two front bolts to 100 N·m (10.0 kgf·m) and the rear bolt to 165 N·m (16.5 kgf·m).
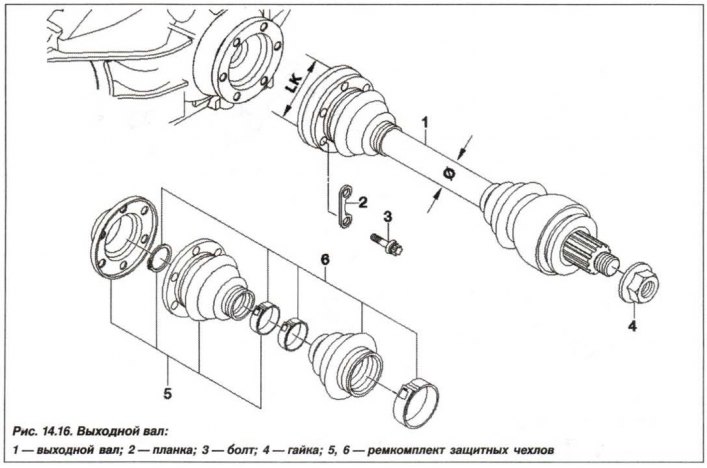
Install the locking plates (2, see Fig. 14.16) and tighten the bolts (3) for fastening the CV joint (M12) to a torque of 110 N·m (11.0 kgf·m), Torx bolts (M10) – 83 N·m (8.3 kgf·m).
After completing the work, check the oil level.