
Removal of the camshafts in the right cylinder head must be carried out using tools "11.2.300", "11.2.441", "11.2.443", "11.2.444", "11.2.445" and "11.5.180".
Prepare camshafts for removal:
- turn the exhaust camshaft by the hexagon so that the cams of the valves of the 2nd cylinder are vertically upwards (upper arrow of the circle, Fig. 4.92).
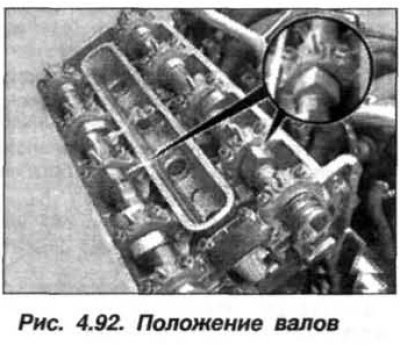
- turn the intake camshaft by the hexagon so that the cams of the valves of the 1st cylinder are vertically upwards (lower circle arrow).
The installation of camshafts should be carried out in the following order.
Install the exhaust and intake camshafts on cylinder bank 1–4. The camshafts are marked "A,1–4" for the exhaust valves and "E,1–4" for the intake valves.
When installing, turn the exhaust camshaft by the hexagon so that the cams of the valves of the 2nd cylinder are vertically upward, and the cams of the intake camshaft of the 1st cylinder are also vertically upward.
Install the bearing caps in their places. The bearing caps of the exhaust camshaft are marked from A1 to A5, read from the intake side. The bearing caps of the intake camshaft are marked from E1 to E5, read from the intake side.
Install tools "11.2.445" (A) and "11.2.441" (E) (Fig. 4.93) on the camshafts on cylinder side 1–4.
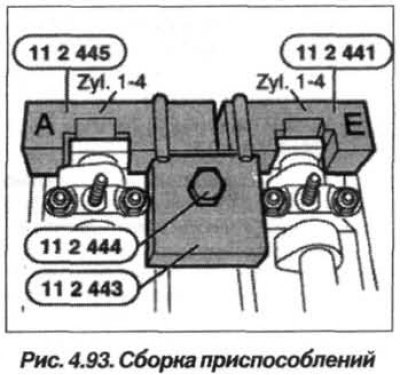
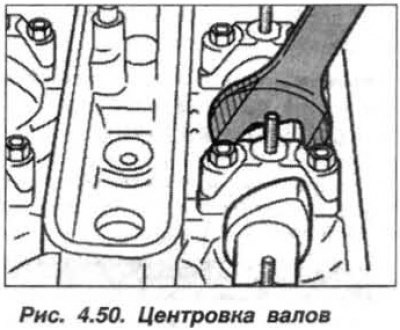
Using a wrench (see fig. 4.50), adjust the position of the camshafts so that the devices "11.2.445" and "11.2.441" fit tightly to the cylinder head, without any gap.
Install the device "11.2.443" (Fig. 4.93) on the devices "11.2.445" and "11.2.441" and secure it with the bolt "11.2.444" screwed into the spark plug hole.
Attention! Before starting the engine, remove the device "11.5.180".
Assemble the engine. Setting the valve timing requires highly qualified technical personnel and special equipment, so it should only be carried out at CTOA-BMW.