
Cars Mazda Cars Mitsubishi Cars Toyota Cars Chevrolet Cars AvtoVAZ Cars Kia Cars Nissan
English Русский
Български
Беларускі
Український
Српски
Hrvatski
Română
Polski
Slovenský
Magyar
| Articles | Contacts | Sitemap |   
BMWman.ru


3 series   5 series   7 series   BMW X3   BMW X5   BMW X6

E38 (1994-2001) E32 (1986-1994)
  • Home
  • BMW 7 Series
  • E32
  • Power unit
  • Engine overhaul
  • Pistons and connecting rods — check

Pistons and connecting rods — check (BMW 7 Series E32)

            0

Before checking, the pistons and connecting rods must be cleaned and the old rings removed from the pistons.

Caution: Install new piston rings whenever the engine is disassembled.


Using ring installers, carefully remove the old rings from the pistons. Be careful not to scratch or damage the pistons in the process.
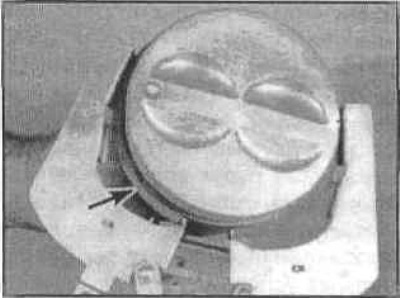
Using ring installers, carefully remove the old rings from the pistons. Be careful not to scratch…


Clean all traces of carbon from the top of the piston, using a pen, wire brush and sandpaper. Never use a wire brush attached to a drill, as it can damage the piston, which is made of soft material.

Using a piece of old piston ring, clean away any carbon deposits in the ring grooves. Clean away only the carbon deposits and do not remove metal or scratch the sides of the grooves.
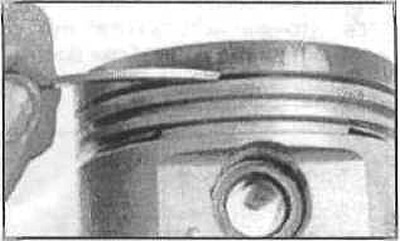
Using a piece of old piston ring, clean away any carbon deposits in the ring grooves. Clean away…


After you have cleaned off the carbon deposits, clean the pistons and connecting rods with solvent and dry them. Make sure the oil return holes on the sides of the ring grooves are clean.


If the pistons and cylinder walls are not too worn or damaged, and if the cylinder block has not been rebored, old pistons can be used. Normal piston wear will show up as vertical wear stripes on the piston bearing surfaces and a slight slack in the top ring groove.

Check for nicks and scratches on the skirt bearing surfaces, in the piston pin bore, and burnt areas on the edge of the head.

If the skirt is scratched or worn, the engine may be suffering from overheating and/or abnormal combustion, resulting in excessively high operating temperatures. Such pistons should be replaced. The lubrication and cooling systems should be carefully checked. A hole in the piston head indicates abnormal combustion (premature ignition). Burnt areas on the edge of the head usually indicate detonation. If any of these problems occur, their causes must be corrected, otherwise the damage will reoccur. Causes can include intake air leaks, improper fuel/air mixture, incorrect ignition timing, and improper EGR operation.

Piston corrosion in the form of small pits indicates that coolant is leaking into the combustion chamber and/or crankcase. This fault should also be corrected.

Measure the piston ring side clearance by placing a new ring in each groove and inserting a feeler gauge next to it. Measure the clearance at three or four points around the perimeter of each groove. Make sure you are using the correct ring - they are different. If the side clearance is greater than the allowable value, the piston must be replaced.
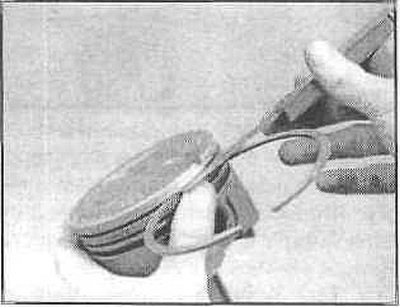


Measure the piston ring side clearance by placing a new ring in each groove and inserting a feeler…


Check the clearance between the piston and the cylinder wall by measuring the diameters of the cylinder bore and the piston diameter. Measure the piston diameter across the skirt coaxially and at an angle of 90° to the piston pin. The clearance is determined as the difference between the diameters of the cylinder bore and the piston. If the clearance is greater than the permissible value, the cylinder block should be bored and new pistons and rings should be used.
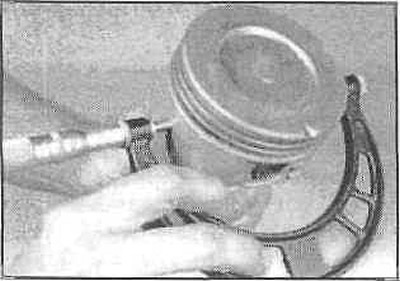
Check the clearance between the piston and the cylinder wall by measuring the diameters of the…


Check the clearance between the piston and connecting rod by moving them in the opposite direction. Any noticeable play means there is excessive wear that must be corrected. The pistons, together with the connecting rod, should be machined and new rings of the repair size installed.

Check the connecting rods for cracks and other damage. Periodically remove the connecting rod caps, pull out the old bearing shells, wipe the bearing surfaces in the connecting rods and caps clean and check for scratches, burrs, etc. After checking the connecting rods, replace the old bearing shells, install the caps and tighten the nuts with your fingers.

This article is available at russian, bulgarian, belarusian, ukrainian, serbian, croatian, romanian, polish, slovak, hungarian
Article verified: Sevastyanov Nikolay

Share information:
Previous articles
БМВ E32: Engine overhaul
Next articles

Cylinder honing
Cylinder Block — Check
Cylinder Block — Cleaning
Crankshaft — Removal
Pistons and connecting rods — removal
Crankshaft — Check
Main and connecting rod bearings — inspection
Inspection and repair of the flywheel
General instructions for engine assembly
Crankshaft — Installation and Checking of Main Bearing Oil Clearance


Similar articles on other types of BMW cars:
Pistons and connecting rods — condition check BMW 3 Series E46 (1998-2006, petrol)
Replacing connecting rods BMW 3 Series E21 (1975-1983)
Removal pistons/connecting rods BMW 5 Series E28 (1981-1988)
Disassembly and assembly of the connecting rod and piston group BMW 5 Series E12 (1972-1981)
Connecting electrical appliances BMW X3 E83 (2003-2010)
Pistons and connecting rods — design description BMW X5 E53 (1999-2006)
Link in different formats to this page


Visitor comments

No comments yet


How much 18 + 19 =


BMW E38 (1994-2001) 
  • General information
  • Introduction to guide
  • Manual
  • Maintenance
  • Power unit
  • Engine M60/1, M60/2 (petrol)
  • M62 engine (petrol)
  • M57 engine (diesel)
  • M67 engine (diesel)
  • Cooling system
  • Fuel system (petrol)
  • Fuel system (diesel)
  • Exhaust system
  • Ignition and control systems
  • Charge and launch systems
  • Transmission
  • Clutch
  • Mechanical gearbox
  • Automatic gearbox
  • Cardan and drive shafts
  • Chassis
  • Brake system
  • Front suspension
  • Rear suspension
  • Steering
  • Body
  • Exterior
  • Interior
  • Electrical equipment
  • Equipment and devices
  • Lighting
  • Heating and air conditioning
  • Electrical circuits
BMW E32 (1986-1994) 
  • General information
  • Care and maintenance
  • Power unit
  • Minor engine repair
  • Engine overhaul
  • Lubrication system
  • Cooling system
  • Ignition system
  • Supply system
  • Injection system (petrol)
  • Injection system (diesel)
  • Exhaust system
  • Transmission
  • Clutch
  • Manual gearbox
  • Automatic gearbox
  • Cardan gear
  • Rear axle and shafts
  • Chassis
  • Front suspension
  • Rear suspension
  • Steering
  • Wheels and tires
  • Brake system
  • Body
  • Body elements
  • Electrical equipment
  • Equipment and devices
  • Electrical circuits
BMWman.ru © 2017-2026 · Mobile version · News and articles · Sitemap: EN BG BY UA RS HR RO PL SK HU · Feedback · Site search
3er E21 · 3er E30 · 3er E36 · 3er E46 [petrol] · 3er E46 · 5er E12 · 5er E28 · 5er E34 · 5er E39 · 7er E32 · 7er E38 · X3 E83 · X5 E53 ·
This site uses cookies 🍪, without them some features simply would not work.